1-15 (E)
DFP-R3000
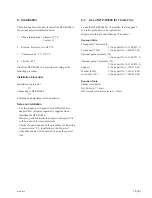
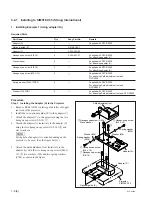
5-2-3. Installing to CENTURY JJ (Strong International)
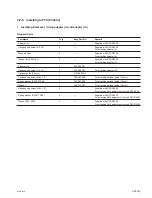
Required Parts
Part Name
Q’ty
Sony Part No.
Remark
Adapter (A)
1
—
Supplied with DFP-R3000
Hexagon cap screw (3/8-16)
2
—
Supplied with DFP-R3000
For attaching adapter (A)
Wave washer
2
—
Supplied with DFP-R3000
For attaching adapter (A)
Hexagon cap screw (M4
x
12)
4
—
Supplied with DFP-R3000
For attaching Path adjustment tool and DFP-3000
Spring washer (SW4 TYPE2)
4
—
Supplied with DFP-R3000
For attaching Path adjustment tool and DFP-R3000
Washer (W4, MID)
4
—
Supplied with DFP-R3000
For attaching Path adjustment tool and DFP-R3000
Procedure
Step 1. Installing the Adapter (A) to the Projector
1.
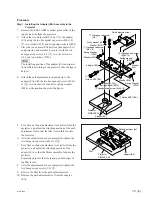
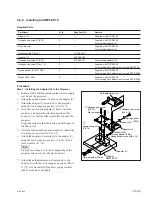
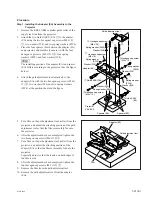
Remove REEL ARM or platter guide roller of supply
reel side of the projector.
2.
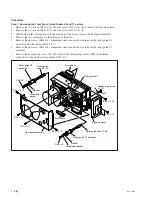
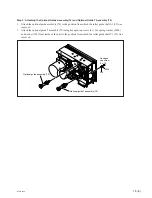
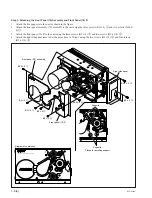
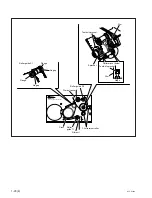
Attach the adapter (A) tentatively to the projector
using the two hexagon cap screws (3/8-16)
1
and
wave washers.
n
Fixing hole of adapter (A) varies depending on the
projector to be used. (See the figure below.)
3.
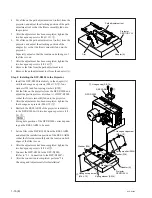
Attach the path adjustment tool tentatively to the
adapter (A) with the two hexagon cap screws (M4
x
12)
2
, two washers (W4) and two spring washers
(SW4) as shown in the figure.
Spring washer (SW4)
Spring washer
(SW4)
Washer (W4)
Washer (W4)
Adapter (A)
Projector
CENTURY JJ
Path adjustment tool
Hexagon cap screw (3/8-16)
Wave washer
1
1
2
Hexagon cap screw
(M4
x
12)
2
Hexagon cap screw
(M4
x
12)

