background image

66

GB

DAV-S400 4-240-074-

12

(1)

5m

5m

5m

3.4m

3.4m

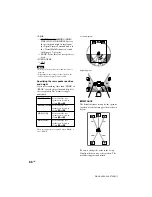
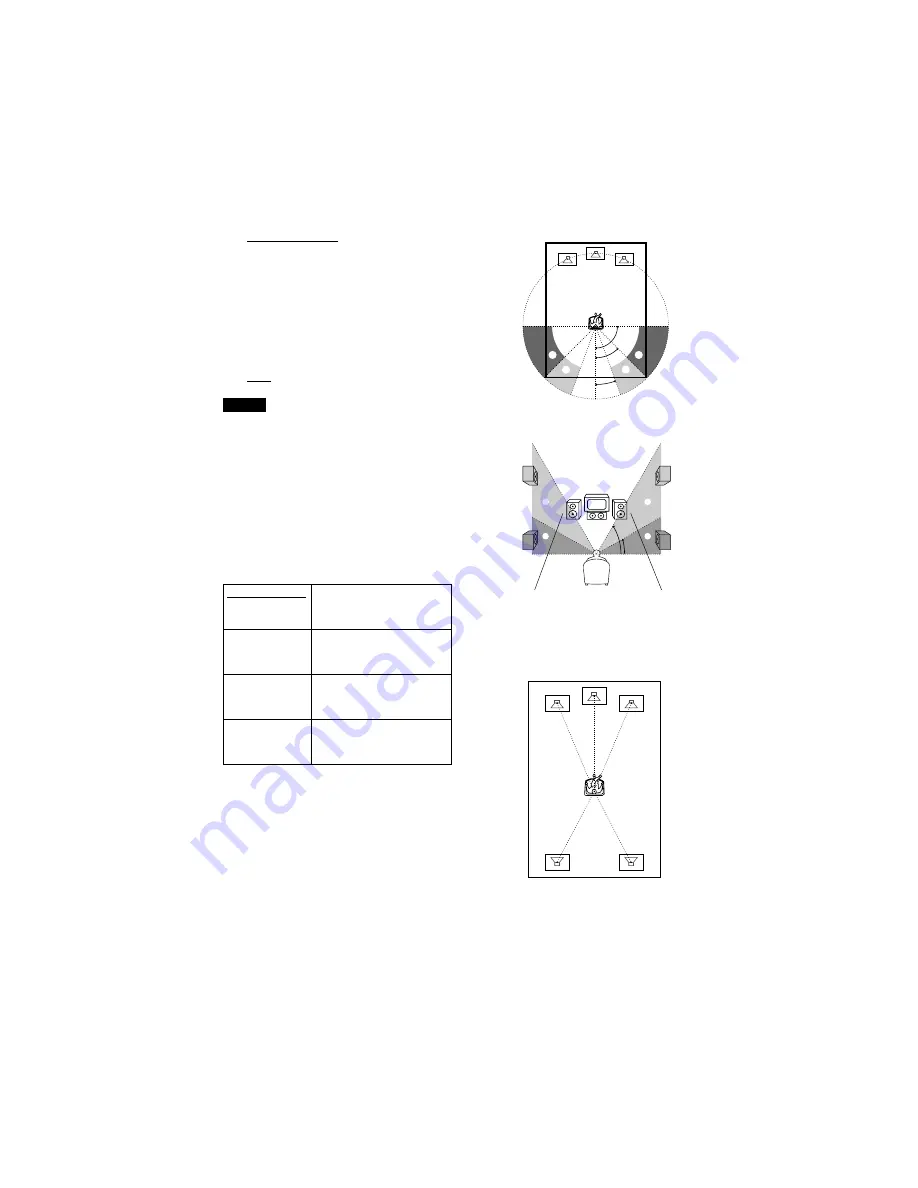
Position diagram

Height diagram

x

DISTANCE

The default distance setting for the speakers
in relation to the listening position is shown
below.

Be sure to change the value in the Setup
Display when you move the speakers. The
default settings are underlined.

60

30

C

C

D

D

• REAR

— BEHIND (LOW), BEHIND (HIGH),

SIDE (LOW), SIDE (HIGH): Specify
the position and height to implement
the Digital Cinema Surround modes in
the “Virtual Multi Dimension” sound
field (page 47) properly.

— NONE: Select this if no rear speaker is

used.

• SUBWOOFER

— YES

Notes

• When you select an item, the sound cuts off for a

moment.

• Depending on the settings of other speakers, the

subwoofer may output excessive sound.

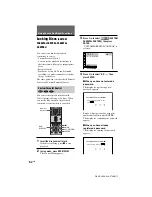
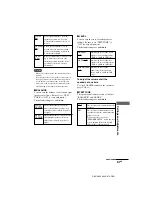
Specifying the rear speaker position

and height

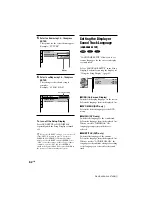
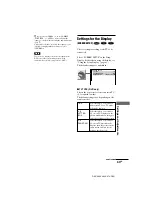
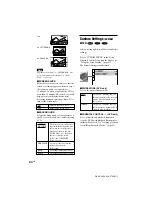
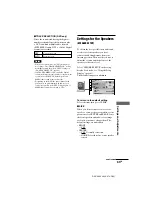
If you select anything other than “NONE” in
“REAR,” specify the position and height of
the rear speakers. The default setting is
underlined.

BEHIND (LOW)

BEHIND (HIGH)

SIDE (LOW)

SIDE (HIGH)

These parameters are not available when “REAR” is
set to “NONE.”

90 

20 

45 

A

A

B

B

Select this if the rear
speakers are located in
section 

B

 and 

D

.

Select this if the rear
speakers are located in
section 

B

 and 

C

.

Select this if the rear
speakers are located in
section 

A

 and 

D

.

Select this if the rear
speakers are located in
section 

A

 and 

C

.

Содержание DAV-S400

Страница 1: ...DAV S400 4 240 074 12 1 4 240 074 12 1 2002 Sony Corporation DAV S400 Compact AV System Operating Instructions ...

Страница 2: ...self has been turned off Unplug the unit from the wall outlet if you do not intend to use it for an extended period of time To disconnect the cord pull it out by the plug never by the cord Installing Do not install the appliance in a confined space such as a bookcase or built in cabinet Allow adequate air circulation to prevent internal heat buildup Do not place the unit on surfaces rugs blankets ...

Страница 3: ...instruments with this product will increase eye hazard Should any solid object or liquid fall into the cabinet unplug the system and have it checked by qualified personnel before operating it any further On power sources The unit is not disconnected from the AC power source mains as long as it is connected to the wall outlet even if the unit itself has been turned off AC power cord must be changed...

Страница 4: ...Setup 23 Presetting Radio Stations 28 Playing Discs 30 Playing Discs 30 Resuming Playback from the Point Where You Stopped the Disc Resume Play 31 Using the DVD s Menu 32 Playing VIDEO CDs with PBC Functions PBC Playback 33 Creating Your Own Programme Programme Play 34 Playing in random order Shuffle Play 36 Playing repeatedly Repeat Play 37 Searching for a Scene 38 Searching for a Particular Poin...

Страница 5: ...e 57 Listening to other audio units 58 Listening to the Radio 58 Using the Radio Data System RDS 59 Naming Preset Stations 60 Settings and Adjustments 61 Using the Setup Display 61 Setting the Display or Sound Track Language LANGUAGE SETUP 62 Settings for the Display SCREEN SETUP 63 Custom Settings CUSTOM SETUP 64 Settings for the Speakers SPEAKER SETUP 65 Additional Information 69 Troubleshooting...

Страница 6: ... is assigned a chapter number enabling you to locate the chapter you want Depending on the disc no chapters may be recorded Track Sections of a picture or a music piece on a VIDEO CD Super Audio CD or CD Each track is assigned a track number enabling you to locate the track you want Index Super Audio CD CD Video Index VIDEO CD A number that divides a track into sections to easily locate the point ...

Страница 7: ...ng the DVD is prohibited by area restrictions Examples of discs that the system cannot play The system cannot play the following discs CD ROMs PHOTO CDs included All CD Rs other than music and VCD formatted CD Rs Data part of CD Extras DVD ROMs DVD Audio discs A DVD with a different region code page 7 73 A disc that has a non standard shape e g card heart A disc with paper or stickers on it A disc...

Страница 8: ...air ducts or leave it in a car parked in direct sunlight as the temperature may rise considerably inside the car After playing store the disc in its case On cleaning Before playing clean the disc with a cleaning cloth Wipe the disc from the centre out Do not use solvents such as benzine thinner commercially available cleaners or anti static spray intended for vinyl LPs This system incorporates Dol...

Страница 9: ...ed in parentheses Front Panel 1 POWER switch indicator 30 2 Disc tray 30 3 A OPEN CLOSE 30 4 Front panel display 10 5 PREV NEXT PRESET 28 31 6 H play 30 7 X pause 31 8 x stop 30 9 PHONES jack 30 q VOLUME control 30 qa SOUND FIELD 46 qs DISPLAY 46 59 qd BAND 28 qf FUNCTION 58 qg remote sensor 16 continued ...

Страница 10: ... CD only Playing time ALL DIGITAL NTSCPBC ANGLE TITLE TRACK CHAPTER INDEX H TUNED M MONO ST S dB kHz PROGRAM MHz SHUFFLE REPEAT 1 FM AM DISC 1 S AUTO Current index number The index indicator does not appear during Super Audio CD playback Current sound ALL PRO LOGIC DIGITAL NTSCPBC ANGLE TITLE TRACK CHAPTER INDEX H TUNED M MONO ST S dB kHz PROGRAM MHz SHUFFLE REPEAT 1 FM AM DISC 1 S AUTO Playing st...

Страница 11: ...ck 22 5 MONITOR OUT jack 21 6 SPEAKER jacks 17 7 FM 75Ω COAXIAL antenna jack 20 Rear Panel AM COAXIAL FM 75Ω L R L R OPTICAL DIGITAL IN VIDEO OUT AUDIO OUT AUDIO IN AUDIO IN SPEAKER FRONT R REAR R CENTER WOOFER FRONT L REAR L IMPEDANCE USE WOOFER 3Ω EXCEPT WOOFER 6Ω A N T E N N A AUDIO 1 AUDIO 2 MONITOR OUT ...

Страница 12: ... NEXT TV CH PRESET 28 31 qd H PLAY SELECT 30 qf DVD TOP MENU 32 qg DVD DISPLAY 37 qh C X x c ENTER 24 qj DVD SETUP 54 qk 1 standby 30 ql DIMMER 27 w TV VIDEO 57 wa REPEAT 37 ws MUTING 31 wd TIME 41 wf FUNCTION 58 wg BAND 28 wh Number buttons 32 wj SOUND FIELD 46 wk DISPLAY 46 59 wl ENTER 57 e COMMAND MODE DVD TV switch 57 ea m M SLOW TUNING 28 38 es x STOP 30 ed X PAUSE 31 ef DVD MENU 33 eg O RETU...

Страница 13: ... the index VIDEO CD to be played Selects the track Super Audio CD CD to be played Selects the index Super Audio CD CD to be played Checks the elapsed time and the remaining playback time Inputs the time code for picture and music searching Displays the DVD or the Super Audio CD CD text OFF 1 ENGLISH 2 FRENCH 3 SPANISH OFF 1 8 3 4 1 2 2 7 T 1 3 2 5 5 DVD SUBTITLE Select Cancel ENTER RETURN Total nu...

Страница 14: ...g the Setup Display you can make various adjustments to items such as picture and sound You can also set a language for the subtitles and the Setup Display among other things RESET Returns the settings in SETUP to the default setting z Each time you press DVD DISPLAY the Control Menu display changes as follows Control Menu display m ADVANCED display Appears if you select any setting other than OFF...

Страница 15: ... the on screen display refer to page 62 For selecting the aspect ratio of the TV to be connected refer to page 63 Unpacking Check that you have the following items Speakers 5 Subwoofer 1 AM loop antenna 1 FM wire antenna 1 Speaker cords 5m 4 15m 2 Video cord 1 Remote commander remote RM SS400 1 R6 size AA batteries 2 Foot pads 24 Speakers Connection and Installation card 1 Getting Started ...

Страница 16: ...plied speaker system using the supplied speaker cords by matching the colours of the terminals to those of the cords Do not connect any speakers other than those supplied with this system To obtain the best possible surround sound specify the speaker parameters distance level etc on page 23 Required cords Speaker cords The connector and the colour tube of the speaker cords are the same colour as t...

Страница 17: ...A N T E N N A AUDIO 1 AUDIO 2 MONITOR OUT SPEAKER Front speaker R Rear speaker L Rear speaker R Subwoofer Centre speaker Front speaker L Colour label Terminals for connecting the speakers Connect the To the Front speakers SPEAKER FRONT L white and R red terminals Rear speakers SPEAKER REAR L blue and R grey terminals Centre speaker SPEAKER CENTER green terminal Subwoofer SPEAKER WOOFER purple term...

Страница 18: ...ails on outputting a test tone see page 26 If no sound is heard from a speaker while outputting a test tone or a test tone is output from a speaker other than the one currently displayed on the front panel display the speaker may be short circuited If this happens check the speaker connection again Notes Be sure to match the speaker cord to the appropriate terminal on the components 3 to 3 and to ...

Страница 19: ...Ω Step 2 Antenna Hookups Connect the supplied AM FM antennas to listen to the radio Terminals for connecting the antennas Connect the To the AM loop antenna AM terminals FM wire antenna FM 75Ω COAXIAL terminal Notes To prevent noise pickup keep the AM loop antenna away from the system and other components Be sure to fully extend the FM wire antenna After connecting the FM wire antenna keep it as h...

Страница 20: ...reception Use a 75 ohm coaxial cable not supplied to connect the system to an outdoor FM antenna as shown below Note If you connect the system to an outdoor antenna ground it to protect against lightning To prevent a gas explosion do not connect the ground wire to a gas pipe Ground wire not supplied To ground ...

Страница 21: ...ng video components Connect a To the TV monitor MONITOR OUT jack VCR AUDIO 1 jacks MD deck AUDIO 2 jacks Notes When you select AUDIO 1 using the FUNCTION button the signal is output from the front L R speakers but not from the AUDIO 1 AUDIO OUT L R jacks When you use the AUDIO 1 line outputs please set the system to 2CH STEREO mode If the system is not in 2CH STEREO mode the line outputs may not f...

Страница 22: ...instead of the AUDIO IN L R jacks of the system The system can accept both the digital and analog signals Digital signals have priority over analog signals If the digital signal ceases the analog signal will be processed after 2 seconds If you connect an MD deck without the OPTICAL jack Connect the MD deck to the AUDIO IN L R jacks of the system Connecting the AC Power Cord mains lead Before conne...

Страница 23: ... magnetically shielded to prevent magnetic leakage However some leakage may occur as a high strength magnet is employed If the subwoofer is used with CRT based TV or projector install the subwoofer at least 0 3 meters from the TV set etc If it is installed too close color irregularity may occur on the screen If color irregularity occurs Turn off the TV set once then turn it on after 15 to 30 minut...

Страница 24: ...nect centre or rear speakers or move the rear speakers set the parameters for CENTER and REAR Since the front speaker and subwoofer settings are fixed you cannot change them The default settings are underlined CENTER centre speaker YES Normally select this NO Select this if no centre speaker is used REAR rear speakers YES Normally select this Specify the position and height to implement the Digita...

Страница 25: ... distance can be set in 0 2 meters steps from a distance equal to the front speaker distance to a distance 4 6 meters closer to your listening position Note If each of the front or rear speakers are not placed an equal distance from your listening position set the distance of the closest speaker Specifying the rear speaker position and height If you select anything other than NONE in REAR specify ...

Страница 26: ...el of the centre and rear speakers and subwoofer 4 Adjust the volume level so that the volume of the test tone from each speaker sounds the same using C c The adjusted value will appear on the front panel display 5 Repeat Steps 3 and 4 to adjust other parameters in 9 LEVEL If you do not operate the remote for a few seconds the value disappears from the display and is stored in the system 6 Use X x...

Страница 27: ...ust the volume of all the speakers at one time Use the VOLUME control on the system or press VOL Other AMP MENU settings You can control the brightness of the front panel display clear the preset stations and the station names and set the speaker parameters back to the default setting Press AMP MENU repeatedly to display 9 CUSTOMIZE Use X x to select the following items and C c to adjust the setti...

Страница 28: ...TUNED and ST for stereo programme appear on the front panel display 3 Press MEMORY A preset number appears on the front panel display 4 Press PRESET or to select the preset number you want MEMORY PRESET BAND TUNING ENTER 1 2 3 4 5 6 7 10 10 0 8 9 ALL PRO LOGIC DIGITAL NTSCPBC ANGLE TITLE TRACK CHAPTER INDEX H TUNED M MONO ST S dB kHz PROGRAM MHz SHUFFLE REPEAT 1 FM AM DISC 1 S AUTO ALL PRO LOGIC D...

Страница 29: ... or repeatedly in 2 to tune in the station manually To change the preset number Start over from 1 ALL PRO LOGIC DIGITAL NTSCPBC ANGLE TITLE TRACK CHAPTER INDEX TUNED H MONO M ST S dB kHz PROGRAM MHz SHUFFLE REPEAT 1 FM AM DISC 1 S AUTO ALL PRO LOGIC DIGITAL NTSCPBC ANGLE TITLE TRACK CHAPTER INDEX H TUNED M MONO ST S dB kHz PROGRAM MHz SHUFFLE REPEAT 1 FM AM DISC 1 S AUTO v ...

Страница 30: ... TV screen You can play the disc interactively by following the instructions on the menu DVD page 32 VIDEO CD page 33 To turn on the system Press POWER on the system The system enters standby mode and the power indicator lights up in red Press 1 on the remote The system turns on and the power indicator turns off In standby mode you can also turn on the system by pressing A on the system or by pres...

Страница 31: ...ot appear Resume Play is not available 2 Press H The system starts playback from the point where you stopped the disc in Step 1 z To play from the beginning of the disc press x twice then press H H x 10 10 0 Additional operations To Operation Stop Press x Pause Press X Resume play after Press X or H pause Go to the next chapter Press track or scene in continuous play mode Go back to the Press prec...

Страница 32: ...ay simply be called a menu or title Using the title menu A DVD is divided into long sections of a picture or a music feature called titles When you play a DVD which contains several titles you can select the title you want using the title menu 1 Press DVD TOP MENU The title menu appears on the TV screen The contents of the menu vary from disc to disc 2 Press C X x c or the number buttons to select...

Страница 33: ...pressing X x or the number buttons 3 Press ENTER O RETURN H x X x ENTER Number buttons 1 2 3 4 5 6 7 10 10 0 8 9 Using the DVD menu Some DVDs allow you to select the disc contents using a menu When you play these DVDs you can select items such as the language for the subtitles and the language for the sound using the DVD menu 1 Press DVD MENU The DVD menu appears on the TV screen The contents of t...

Страница 34: ...CD Press ENTER in Step 3 may appear as Press SELECT in the instructions supplied with the disc In this case press H PROGRAM 1 TITLE ALL CLEAR 2 TITLE 3 TITLE 4 TITLE 5 TITLE 6 TITLE 7 TITLE T 01 02 03 04 05 Creating Your Own Programme Programme Play You can play the contents of a disc in the order you want by arranging the order of the titles chapters or tracks on the disc to create your own progr...

Страница 35: ...enu In stop mode press PLAY MODE to turn off the programme menu Selected track Total time of the programmed tracks PROGRAM 1 TITLE ALL CLEAR 2 TITLE 3 TITLE 4 TITLE 5 TITLE 6 TITLE 7 TITLE T C ALL 01 02 03 04 05 06 01 02 03 04 05 2 Press c The cursor moves to the title or track in this case 01 Chapters recorded on a disc Chapter Title 3 Select the title chapter or track you want to programme xWhen...

Страница 36: ...n the Control Menu display during Programme Play Note The number of titles chapters or tracks displayed are the same number of titles chapters or tracks recorded on a disc Playing in random order Shuffle Play You can have the system shuffle titles chapters or tracks and play them in random order Subsequent shuffling may produce a different playing order 1 In stop mode press PLAY MODE repeatedly un...

Страница 37: ... system starts Repeat Play z You can quickly display the REPEAT status Press REPEAT on the remote Note Repeat play is cancelled when you turn the power off you change the function you open and close the disc tray 1 8 3 4 1 2 2 7 T 1 3 2 5 5 CHAPTER DISC OFF TITLE OFF DVD Playing repeatedly Repeat Play You can play all the titles tracks or a single title chapter track on a disc In Shuffle or Progra...

Страница 38: ...OW 1 The SLOW 2 SLOW 2 playback speed is slower than SLOW 1 SLOW 1 Searching for a Particular Point on a Disc Scan Slow motion Play You can locate a particular point on a disc quickly by monitoring the picture or playing back slowly Note Depending on the DVD VIDEO CD you may not be able to do some of the operations described Locating a point quickly by playing a disc in fast forward or fast revers...

Страница 39: ...aying a DVD TITLE CHAPTER or TIME TEXT Select TIME TEXT for TIME SEARCH xWhen playing a VIDEO CD TRACK or INDEX DVD DISPLAY X x ENTER Number buttons xWhen playing a VIDEO CD with PBC Playback SCENE xWhen playing a Super Audio CD CD TRACK or INDEX Example when you select CHAPTER is selected refers to a number The number in parentheses indicates the total number of titles chapters tracks indexes or ...

Страница 40: ...ene using the time code TIME SEARCH DVD only 1 In Step 2 select TIME TEXT T playing time of the current title is selected 2 Press ENTER T changes to T 3 Input the time code using the number buttons then press ENTER For example to find the scene at 2 hours 10 minutes and 20 seconds after the beginning just enter 2 10 20 Note The title chapter or track number displayed is the same number recorded on...

Страница 41: ...TLE TRACK CHAPTER INDEX TUNED H MONO M ST S dB kHz PROGRAM MHz SHUFFLE REPEAT 1 Viewing Information About the Disc When playing a DVD Playing time and number of the current title Remaining time of the current title Playing time and number of the current chapter Remaining time of the current chapter Text Playing time and current track number Remaining time of the current track Playing time of the d...

Страница 42: ... time information The display and the kinds of time that you can change depend on the disc you are playing TIME DVD DISPLAY Time information Disc type 1 2 3 4 5 6 7 10 10 0 8 9 z The playing time and remaining time of the current chapter title track scene or disc will also appear on your TV screen See the following section Checking the Playing Time and Remaining Time for instructions on how to rea...

Страница 43: ... Menu is turned off Checking the DVD CD Super Audio CD text Press TIME repeatedly in Step 2 to display the text recorded on the DVD CD Super Audio CD The DVD CD Super Audio CD text appears only when the text is recorded on the disc You cannot change the text z If the DVD CD Super Audio CD text does not fit in a single line you can see the entire text scrolls across the front display z You can sele...

Страница 44: ...t the language code Refer to the language code list on page 77 to see which language the code represents When the same language is displayed two or more times the DVD is recorded in multiple audio formats xWhen playing aVIDEO CD or CD The default setting is underlined STEREO The standard stereo sound 1 L The sound of the left channel monaural 2 R The sound of the right channel monaural xWhen playi...

Страница 45: ...al and the Dolby Digital signal LFE LFE Low Frequency Effect Current audio format Current playing programme format Rear component 2 LFE Low Frequency Effect component 1 Front component 2 Centre component 1 The display examples are as follows PCM stereo Dolby Surround Dolby Digital 5 1ch When an LFE signal component is output LFE is enclosed in a solid line When an LFE signal component is not outpu...

Страница 46: ...Dolby Surround encoded programmes are labelled with the logo DTS Digital Surround discs are marked with DTS Note When you play sound tracks with 96 kHz sampling frequency the output signals will be converted to 48 kHz sampling frequency C S EX A CINEMA STUDIO EX A Reproduces the sound characteristics of the Sony Pictures Entertainment s classic editing studio using the 3D sound imaging of V MULTI ...

Страница 47: ...ock or pop music GAME Obtains maximum audio impact from video game software Be sure to set the game machine to stereo mode when using game software with stereo sound capabilities A F D AUTO FORMAT DECODING Automatically detects the type of audio signal being input Dolby Digital DTS Dolby Pro Logic or standard 2 channel stereo and performs the proper decoding if necessary This mode presents the sou...

Страница 48: ...s automatically changed to the HEADPHONE THEATER mode Adjusting the level parameters The level menu contains parameters that let you adjust the balance and speaker volumes of each speaker page 26 1 Start playing a programme source encoded with multichannel surround sound 2 Press AMP MENU repeatedly on the remote 9 LEVEL appears on the front panel display 3 Sit in your listening position and select...

Страница 49: ... X x to select ANGLE The angle number appears The number in parentheses indicates the total number of angles ANGLE ENTER DVD DISPLAY Number Buttons X c x 3 Press c or ENTER The angle number changes to 4 Select the angle number using the number buttons or X x then press ENTER The angle is changed to the selected angle To turn off the Control Menu Press DVD DISPLAY repeatedly until the Control Menu ...

Страница 50: ... appear SUBTITLE ENTER DVD DISPLAY X x 3 Press X x to select the language Depending on the DVD the choice of language varies When 4 digits are displayed they indicate the language code Refer to the language code list on page 77 to see which language the code represents 4 Press ENTER To cancel the SUBTITLE setting Select OFF in Step 3 To turn off the Control Menu Press DVD DISPLAY repeatedly until ...

Страница 51: ...r DVD the system indicates which layer is being read Layer 0 or Layer 1 For details on the layers see page 73 DVD Checking the Play Information ADVANCED You can check information such as the bit rate or the disc layer that is being played While playing a disc an approximate bit rate of the playback picture is always displayed as Mbps Mega bit per second and the audio as kbps kilo bit per second 1 ...

Страница 52: ...e disc you want to lock If the disc is playing press x to stop playback 2 In stop mode press DVD DISPLAY The Control Menu appears Using Various Additional Functions DVD DISPLAY O RETURN ENTER C X x x Number buttons 3 Press X x to select CUSTOM PARENTAL CONTROL then press ENTER CUSTOM PARENTAL CONTROL is selected 4 Press X x to select ON t then press ENTER xWhen you have not entered a password The ...

Страница 53: ...R The display for entering the password appears 2 Enter your 4 digit password using the number buttons then press ENTER 3 Enter a new 4 digit password using the number buttons then press ENTER 4 To confirm your password re enter it using the number buttons then press ENTER Playing the disc for which Custom Parental Control is set 1 Insert the disc for which Custom Parental Control is set The CUSTO...

Страница 54: ...ns then press ENTER The display for setting the playback limitation level and changing the password appears CUSTOM SETUP PAUSE MODE PARENTAL CONTROL TRACK SELECTION OFF AUTO CUSTOM SETUP PARENTAL CONTROL Enter a new 4 digit password then press ENTER CUSTOM SETUP PARENTAL CONTROL Enter password then press ENTER CUSTOM SETUP PARENTAL CONTROL LEVEL OFF STANDARD CHANGE PASSWORD USA 5 Press X x to sele...

Страница 55: ...pears 2 Enter your 4 digit password using the number buttons then press ENTER The system starts playback z If you forget your password remove the disc and repeat Step 1 to 5 of Limiting playback for children When you are asked to enter your password enter 199703 using the number buttons then press ENTER The display will ask you to enter a new 4 digit password After you enter a new 4 digit password...

Страница 56: ...land 2165 France 2174 Germany 2109 Hong Kong 2219 India 2248 Indonesia 2238 Italy 2254 Japan 2276 Standard Code number Korea 2304 Malaysia 2363 Mexico 2362 Netherlands 2376 New Zealand 2390 Norway 2379 Pakistan 2427 Philippines 2424 Portugal 2436 Russia 2489 Singapore 2501 Spain 2149 Sweden 2499 Switzerland 2086 Taiwan 2543 Thailand 2528 United Kingdom 2184 Area Code ...

Страница 57: ...of the TV and control of the DVD unit When you watch the DVD ensure that you have the COMMAND MODE DVD TV switch set to DVD The table below shows the buttons that are affected by the COMMAND MODE DVD TV switch Button DVD TV 1 9 Standard number Select channel 10 button function numbers 10 0 for DVD ENTER Standard enter Press after function for selecting a DVD channel number Standard CH preceding ti...

Страница 58: ... TITLE TRACK CHAPTER INDEX TUNED H MONO M ST S dB kHz PROGRAM MHz SHUFFLE REPEAT 1 FM AM DISC 1 S AUTO ALL PRO LOGIC DIGITAL NTSCPBC ANGLE TITLE TRACK CHAPTER INDEX H TUNED M MONO ST S dB kHz PROGRAM MHz SHUFFLE REPEAT 1 FM AM DISC 1 S AUTO DISPLAY TUNING STEREO MONO 1 m FUNCTION Listening to other audio units You can use MD decks or other units connected to the AUDIO 1 or AUDIO 2 jacks Refer to t...

Страница 59: ... Radio Data System Radio Data System RDS is a broadcasting service that allows radio stations to send additional information along with the regular programme signal This tuner offers convenient RDS features such as station name display RDS is available only for FM stations Note RDS may not work properly if the station you are tuned to is not transmitting the RDS signal properly or if the signal st...

Страница 60: ...rs for preset stations These names for example XYZ appear in the system s front panel display when a station is selected Note that no more than one name can be entered for each preset station 1 Press FUNCTION repeatedly until TUNER appears on the front panel display The last station you received is tuned in Each time you press FUNCTION the mode of the system changes in the following sequence DVD t...

Страница 61: ...ge 78 How to use the Setup Display 1 In stop mode press DVD DISPLAY The Control Menu appears If you press DVD SETUP you can go to Step 3 directly 2 Press X x to select SETUP then press ENTER The options for SETUP appear Settings and Adjustments X x ENTER 3 Press X x to select CUSTOM then press ENTER The Setup Display appears 4 Press X x to select the setup item from the displayed list LANGUAGE SET...

Страница 62: ...isplayed list When you select AUDIO FOLLOW the language for the subtitles changes according to the language you selected for the sound track Selected setting Options 5 Select an item using X x then press ENTER The options for the selected item appear Example TV TYPE 6 Select a setting using X x then press ENTER The setting is selected and setup is complete Example 4 3 PAN SCAN To turn off the Setu...

Страница 63: ...EN SETUP in the Setup Display For details on using the display see Using the Setup Display page 61 The default settings are underlined xTV TYPE DVD only Selects the aspect ratio of the connected TV 4 3 standard or wide The default settings vary depending on the country model 16 9 4 3 LETTER BOX 4 3 PAN SCAN Select this when you connect a wide screen TV or a TV with a wide mode function Select this...

Страница 64: ...ore than 15 minutes The screen saver will help prevent your display device from becoming damaged ghosting Press H to turn off the screen saver ON Turns on the screen saver OFF Turns off the screen saver xBACKGROUND Selects the background colour or picture on the TV screen in stop mode or while playing a CD JACKET PICTURE GRAPHICS BLUE BLACK The jacket picture still picture appears in the backgroun...

Страница 65: ...d FRONT YES CENTER YES Normally select this NONE Select this if no centre speaker is used SPEAKER SETUP SIZE DISTANCE BALANCE LEVEL OFF TEST TONE FRONT CENTER YES BEHIND LOW YES YES REAR SUBWOOFER continued No priority given Priority given xTRACK SELECTION DVD only Gives the sound track having the highest number of channels priority when you play a DVD on which multiple audio formats PCM MPEG audi...

Страница 66: ...peaker is used SUBWOOFER YES Notes When you select an item the sound cuts off for a moment Depending on the settings of other speakers the subwoofer may output excessive sound Specifying the rear speaker position and height If you select anything other than NONE in REAR specify the position and height of the rear speakers The default setting is underlined BEHIND LOW BEHIND HIGH SIDE LOW SIDE HIGH ...

Страница 67: ...nce between the front left and right speakers You can adjust from centre 6 steps left or right Adjust the balance between the rear left and right speakers You can adjust from centre 6 steps left or right xLEVEL You can vary the level of each speaker as follows Be sure to set TEST TONE to ON for easy adjustment The default settings are underlined CENTER 0dB REAR 0dB SUBWOOFER 0dB To adjust the volu...

Страница 68: ... TONE to ON You will hear the test tone from each speaker in sequence 3 From your listening position select BALANCE or LEVEL and adjust the value of BALANCE and LEVEL using X x The test tone is emitted from both left and right speakers simultaneously 4 Select TEST TONE and set TEST TONE to OFF to turn off the test tone Note When you adjust the speaker settings the sound cuts off for a moment ...

Страница 69: ...ure on the screen becomes black and white when you play a disc recorded in the NTSC colour system Sound There is no sound The connecting cord is not connected securely The connecting cord is damaged Press MUTING on the remote if MUTING ON is displayed on the front panel display The protective device on the system has been activated because of a short circuit Turn off the system eliminate the short...

Страница 70: ...d field containing the word cinema or virtual page 46 No sound or only a very low level sound is heard from the rear speakers Make sure the sound field function is on page 46 Select a sound field containing the word cinema or virtual page 46 Operation Radio stations cannot be tuned in Check that the antennas are connected securely Adjust the antennas and connect an external antenna if necessary Th...

Страница 71: ...age 62 The language for the sound track cannot be changed Multilingual tracks are not recorded on the DVD being played The DVD prohibits changing the language for the sound track The subtitle language cannot be changed Multilingual subtitles are not recorded on the DVD being played The DVD prohibits changing the subtitles The subtitle cannot be turned off The DVD prohibits turning off subtitles Th...

Страница 72: ...ound with an expanded frequency range and a subwoofer channel for deep bass is independently provided This format is also called 5 1 because the subwoofer channel is counted as 0 1 channel since it functions only when a deep bass effect is needed All six channels in this format are recorded separately to realize superior channel separation Furthermore since all the signals are processed digitally ...

Страница 73: ... compressed to about 1 40 of its original size The DVD also uses the variable rate coding technology that changes the data to be allocated according to the status of the picture The audio data is recorded in Dolby Digital as well as in PCM allowing you to enjoy more real audio presence Furthermore various advanced functions such as the multi angle multilingual and Parental Control functions are pr...

Страница 74: ...al size Consequently a 12 cm VIDEO CD can contain up to 74 minutes of moving pictures VIDEO CDs also contain compact audio data Sounds outside the range of human hearing are compressed while the sounds we can hear are not compressed VIDEO CDs can hold 6 times the audio information of conventional audio CDs There are 2 versions of VIDEO CDs Version 1 1 You can play only moving pictures and sounds V...

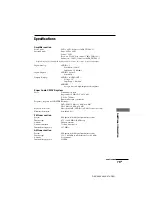
Страница 75: ...gh impedance headphones Super Audio CD DVD system Laser Semiconductor laser Super Audio CD DVD λ 650 nm CD λ 780 nm Emission duration continuous Frequency response at 2CH STEREO mode DVD PCM 2 Hz to 22 kHz 1 0 dB CD 2 Hz to 20 kHz 1 0 dB Signal to noise ratio More than 80 dB AUDIO 1 AUDIO connectors only Harmonic distortion Less than 0 03 FM tuner section System PLL quartz locked digital synthesiz...

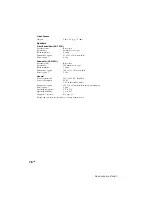
Страница 76: ...eaker system Bass reflex Speaker unit 200 mm dia cone type Rated impedance 3 ohms Dimensions approx 160 355 355 mm w h d Mass approx 5 5 kg General Power requirements 220 240 V AC 50 60 Hz Power consumption 98 W 2 W in the standby mode Dimensions approx 355 70 378 mm w h d incl projecting parts Mass approx 4 0 kg Operating temperature 5 C to 35 C Operating humidity 5 to 90 Supplied accessories See...

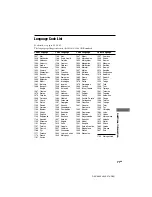
Страница 77: ...panese 1269 Yiddish 1283 Javanese 1287 Georgian 1297 Kazakh 1298 Greenlandic 1299 Cambodian 1300 Kannada 1301 Korean 1305 Kashmiri 1307 Kurdish 1311 Kirghiz 1313 Latin 1326 Lingala 1327 Laothian 1332 Lithuanian 1334 Latvian Lettish 1345 Malagasy 1347 Maori 1349 Macedonian 1350 Malayalam 1352 Mongolian 1353 Moldavian 1356 Marathi 1357 Malay 1358 Maltese 1363 Burmese 1365 Nauru 1369 Nepali 1376 Dutc...

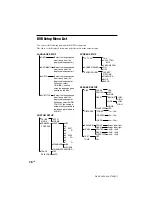
Страница 78: ...oy the language given priority on the disc SUBTITLE Select the language you want to use from the displayed language list When you select AUDIO FOLLOW the setting is automatically switched to the language selected in AUDIO CUSTOM SETUP PAUSE AUTO MODE FRAME PARENTAL LEVEL OFF CONTROL 8 7 NC17 6 R 5 4 PG13 3 PG 2 1 G STANDARD USA OTHERS CHANGE PASSWORD TRACK OFF SELECTION AUTO SCREEN SETUP TV TYPE 1...

Страница 79: ...ing a specific Point by watching the TV screen 38 M MEMORY 28 Multi angle function 49 Multilingual function 44 MUTING 31 N NAME 60 O On screen display Control Menu display 13 Setup Display 61 OSD 62 P PARENTAL CONTROL 53 64 73 PAUSE MODE 64 PBC Playback 33 73 PLAY MODE 34 Preset Station 28 58 Programme Play 34 Q Quick Overview 15 R Radio 58 RDS 59 Rear Panel 11 Region code 7 73 Remote 12 57 REPEAT...

Страница 80: ... x c ENTER Selects and executes the items or settings qj DVD SETUP Displays the setup display on the TV screen to set or adjust the items qk 1 standby Turns on and off the power of the system ql DIMMER Changes the brightness of the front panel display by two steps w TV VIDEO Changes the input mode of the TV wa REPEAT Displays the REPEAT display on the TV screen ws MUTING Mutes the sound wd TIME Di...

Отзывы: