background image

8

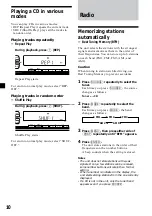
CD Player

Listening to a CD

1

Press 

(OPEN)

 and insert the CD.

Labeled side up

2

Close the front panel.

Playback starts automatically.

If a CD is already inserted, press 

(SOURCE)

repeatedly until “CD” appears to start
playback.

CD indication

When the last track on the CD is
over

The track number indication returns to “1,”
and playback restarts from the first track of the
CD.

To

Press

Stop playback

(OFF)

Eject the CD

(OPEN)

 then 

Z

Elapsed playing time

Track number

Changing the display item

Each time you press 

(DSPL)

 during CD TEXT

disc playback, the item changes as follows:

V

Track number/

Elapsed playback time

V

Disc name/Artist name

*

1

V

Track name

*

2

*

1

If you play a CD TEXT disc, the artist name
appears in the display after the disc name. (Only
for CD TEXT discs with the artist name.)

*

2

If the track name of a CD TEXT disc is not
prerecorded, “TRACK” and “NO NAME” appear
in the display.

After you select the desired item, the display
will automatically change to the Motion
Display mode after a few seconds.
In the Motion Display mode, all the items are
scrolled in the display one by one in order.

Tip
The Motion Display mode can be turned off. (See
“Changing the sound and display settings” on
page 16.)

Z

Содержание CDX-4000X - Fm/am Compact Disc Player

Страница 1: ...d connections see the supplied installation connections manual Owner s Record The model and serial numbers are located on the bottom of the unit Record these numbers in the space provided below Refer to these numbers whenever you call upon your Sony dealer regarding this product Model No Serial No 3 043 292 12 1 ...

Страница 2: ...urchasing the Sony Compact Disc Player This unit lets you enjoy a variety of features using the following controller accessory Optional accessory Rotary commander RM X4S Precautions CLASS PRODUCT LASER 1 This label is located on the bottom of the chassis CDX 4005 only CAUTION INVISIBLE DO NOT STARE INTO BEAM OR VIEW DIRECTLY WITH OPTICAL INSTRUMENTS LASER RADIATION WHEN OPEN This label is located ...

Страница 3: ...nning and may cause malfunction or ruin your discs Do not use second hand or rental CDs that have a sticky residue on the surface for example from peeled off stickers or from ink or glue leaking from under the stickers There are paste residue Ink is sticky Do not use rental CDs with old labels that are beginning to peel off Stickers that are beginning to peel away leaving a sticky residue Do not u...

Страница 4: ...cally Best Tuning Memory BTM 10 Memorizing only the desired stations 11 Receiving the memorized stations 11 Storing the station names Station Memo 12 Other Functions Labeling the rotary commander 13 Using the rotary commander 14 Adjusting the sound characteristics 15 Attenuating the sound 15 Changing the sound and display settings 16 Boosting the bass sound D bass 16 Additional Information Mainten...

Страница 5: ... OPEN D BASS SOURCE PRST PRST qd OFF button 1 6 7 8 qf SEEK AMS cursor left right buttons 7 9 11 12 15 16 Automatic Music Sensor 9 Manual Search 9 Seek 11 qg Frequency select switch located on the bottom of the unit 2 The AM FM tuning interval is factory set to the 10 k 200 k position Make sure that the 9 k 50 k position is selected qh ENTER button 7 9 10 11 12 13 16 qj Number buttons During radio...

Страница 6: ... do not use the built in amplifier the beep sound will be deactivated Getting Started Resetting the unit Before operating the unit for the first time or after replacing the car battery you must reset the unit Remove the front pannel and press the reset button with a pointed object such as a ball point pen Reset button Note Pressing the reset button will erase the clock setting and some memorized f...

Страница 7: ... and choose up down of PRST or choose left right of SEEK AMS PRST SOURCE SEEK AMS SOURCE Setting the clock The clock uses a 12 hour digital indication Example To set the clock to 10 08 1 Press MENU then press either side of PRST repeatedly until CLOCK appears 1 Press ENTER The hour indication flashes 2 Press either side of PRST to set the hour 3 Press side of SEEK AMS The minute indication flashes...

Страница 8: ...ou press DSPL during CD TEXT disc playback the item changes as follows V Track number Elapsed playback time V Disc name Artist name 1 V Track name 2 1 If you play a CD TEXT disc the artist name appears in the display after the disc name Only for CD TEXT discs with the artist name 2 If the track name of a CD TEXT disc is not prerecorded TRACK and NO NAME appear in the display After you select the d...

Страница 9: ...r off 1 During playback press MENU 2 Press either side of PRST repeatedly until A SCRL OFF appears 3 Press the side of SEEK AMS to select A SCRL ON 4 Press ENTER To cancel Auto Scroll select A SCRL OFF in step 3 Note For some CD TEXT discs with very many characters the following cases may happen Some of the characters are not displayed Auto Scroll does not work Locating a specific track Automatic ...

Страница 10: ...he number buttons A beep sounds when the setting is stored Notes The unit does not store stations with weak signals If only a few stations can be received some number buttons will retain their former setting When a number is indicated in the display the unit starts storing stations from the one currently displayed If a CD is not in the unit only the tuner band appears even if you press SOURCE MODE...

Страница 11: ...mber button 1 to 6 on which the desired station is stored Tip Press either side of PRST to receive the stations in the order they are stored in the memory Preset Search Function If you cannot tune in a preset station Press either side of SEEK AMS to search for the station automatic tuning Scanning stops when the unit receives a station Press either side of SEEK AMS repeatedly until the desired sta...

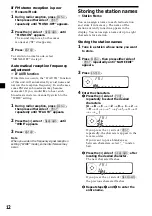
Страница 12: ...s the side of SEEK AMS the previous character flashes 3 Repeat steps 1 and 2 to enter the entire name If FM stereo reception is poor Monaural Mode 1 During radio reception press MENU then press either side of PRST repeatedly until MONO OFF appears 2 Press the side of SEEK AMS until MONO ON appears The sound improves but becomes monaural ST disappears 3 Press ENTER To return to normal mode select M...

Страница 13: ...e name you want to erase 2 Press MENU then press either side of PRST repeatedly until NAME DEL appears 3 Press ENTER 4 Press ENTER for two seconds The name is erased Repeat steps 1 through 4 if you want to erase other names 5 Press MENU twice The unit returns to the normal radio reception mode Note When you erase all of the station names NO NAME appears in step 4 Other Functions You can also contr...

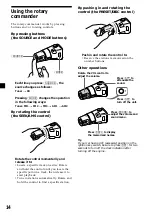
Страница 14: ...h time you press SOURCE the source changes as follows Tuner t CD Pressing MODE changes the operation in the following ways Tuner FM1 t FM2 t FM3 t AM1 t AM2 By rotating the control the SEEK AMS control Rotate the control momentarily and release it to Locate a specific track on a disc Rotate and hold the control until you locate the specific point in a track then release it to start playback Tune i...

Страница 15: ...ing the sound Press ATT on the rotary commander ATT ON flashes momentarily To restore the previous volume level press ATT again Tip When the interface cable of a car telephone is connected to the ATT lead the unit decreases the volume automatically when a telephone call comes in Telephone ATT function Changing the operative direction The operative direction of controls is factory set as shown belo...

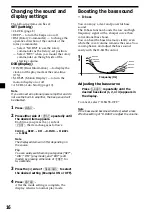
Страница 16: ... D INFO t M DSPL t A SCRL Note The displayed item will differ depending on the source Tip You can easily switch among categories SET DIS P M play mode and EDT edit mode by pressing either side of PRST for two seconds 3 Press the side of SEEK AMS to select the desired setting Example ON or OFF 4 Press ENTER After the mode setting is complete the display returns to normal play mode Boosting the bass...

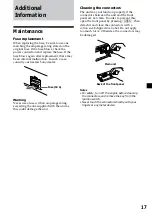
Страница 17: ...upplied with the unit as this could damage the unit Fuse 10 A Cleaning the connectors The unit may not function properly if the connectors between the unit and the front panel are not clean In order to prevent this open the front panel by pressing OPEN then detach it and clean the connectors with a cotton swab dipped in alcohol Do not apply too much force Otherwise the connectors may be damaged Ma...

Страница 18: ...y the front cover free 2 Repeat step 1 on the left side The front cover is removed 3 Use a thin screwdriver to push in the clip on the left side of the unit then pull out the left side of the unit until the catch clears the mounting 4 Repeat step 3 on the right side 5 Slide the unit out of the mounting ...

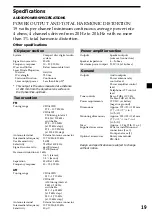
Страница 19: ...erval 9 kHz 10 kHz switchable 531 1 602 kHz at 9 kHz step 530 1 710 kHz at 10 kHz step Antenna terminal External antenna connector Intermediate frequency 10 7 MHz 450 kHz Sensitivity 30 µV AUDIO POWER SPECIFICATIONS POWER OUTPUT AND TOTAL HARMONIC DISTORTION 19 watts per channel minimum continuous average power into 4 ohms 4 channels driven from 20 Hz to 20 kHz with no more than 1 total harmonic d...

Страница 20: ...k Cause Solution Another CD is already loaded The CD is forcibly inserted upside down or in the wrong way Defective dirty CD The ambient temperature exceeds 50 C 122 F You have closed the front panel or pushed the disc forcibly into the unit while the unit was ejecting the disc after you pressed Z t Press the reset button Press the reset button The unit is installed at an angle of more than 60 The...

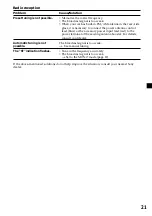
Страница 21: ... side glass it is necessary to connect the power antenna control lead blue or the accessory power input lead red to the power terminal of the existing antenna booster For details consult your dealer The broadcast signal is too weak t Use manual tuning Tune in the frequency accurately The broadcast signal is too weak t Set to the MONO mode page 12 If the above mentioned solutions do not help improv...

Страница 22: ...22 ...

Страница 23: ...23 ...

Страница 24: ...24Sony Corporation Printed in Korea ...

Отзывы: