background image

— 3 —

ATTENTION AU COMPOSANT AYANT RAPPORT

 À LA SÉCURITÉ!!

LES COMPOSANTS IDENTIFIÉS PAR UNE MARQUE 

!

 SUR

LES DIAGRAMMES SCHÉMATIQUES ET LA LISTE  DES

PIÈCES SONT CRITIQUES POUR LA SÉCURITÉ DE

FONCTIONNEMENT. NE REMPLACER CES COMPOSANTS

QUE PAR DES PIÈCES SONY DONT LES NUMÉROS

SONT DONNÉS DANS CE MANUEL OU DANS LES

SUPPLÉMENTS PUBLIÉS PAR SONY.

SAFETY-RELATED COMPONENT WARNING !!

COMPONENTS IDENTIFIED BY MARK 

!

 OR DOTTED LINE

WITH MARK 

!

 ON THE SCHEMATIC DIAGRAMS AND IN

THE PARTS LIST ARE CRITICAL TO SAFE OPERATION.

REPLACE THESE COMPONENTS WITH SONY PARTS

WHOSE PART NUMBERS APPEAR AS SHOWN IN THIS

MANUAL OR IN SUPPLEMENTS PUBLISHED BY SONY.

SAFETY  CHECK-OUT

(US model only)

After correcting the original service problem, perform the follow-
ing safety checks before releasing the set to the customer:
Check the antenna terminals, metal trim, “metallized” knobs, screws,
and all other exposed metal parts for AC leakage. Check leakage as
described below.

LEAKAGE

The AC leakage from any exposed metal part to earth Ground and
from all exposed metal parts to any exposed metal part having a
return to chassis, must not exceed 0.5 mA (500 microampers). Leak-
age current can be measured by any one of three methods.
1. A commercial leakage tester, such as the Simpson 229 or RCA

WT-540A. Follow the manufacturers’ instructions to use these
instruments.

2. A battery-operated AC milliammeter. The Data Precision 245

digital multimeter is suitable for this job.

3. Measuring the voltage drop across a resistor by means of a VOM

or battery-operated AC voltmeter. The “limit” indication is 0.75
V, so analog meters must have an accurate low-voltage scale.
The Simpson 250 and Sanwa SH-63Trd are examples of a pas-
sive VOM that is suitable. Nearly all battery operated digital
multimeters that have a 2V AC range are suitable. (See Fig. A)

NOTES ON HANDLING THE OPTICAL PICK-UP BLOCK
OR BASE UNIT

The laser diode in the optical pick-up block may suffer electrostatic
breakdown because of the potential difference generated by the
charged electrostatic load, etc. on clothing and the human body.
During repair, pay attention to electrostatic breakdown and also use
the procedure in the printed matter which is included in the repair
parts.
The flexible board is easily damaged and should be handled with
care.

NOTES ON LASER DIODE EMISSION CHECK

The laser beam on this model is concentrated so as to be focused on
the disc reflective surface by the objective lens in the optical pick-up
block. Therefore, when checking the laser diode emission, observe
from more than 30 cm away from the objective lens.

LASER DIODE AND FOCUS SEARCH OPERATION CHECK

Carry out the “S curve check” in “CD section adjustment” and check
that the S curve waveform is output repeatedly.

SECTION  1

SERVICING NOTE

Fig. A. Using an AC voltmeter to check AC leakage.

To Exposed Metal
Parts on Set

0.15µF

1.5k

AC
voltmeter
(0.75V)

Earth Ground

Содержание CDP-CX200

Страница 1: ...SM 213BKN M N Optical Pick up Type KSS 213B S N MICROFILM COMPACT DISC PLAYER CDP CX200 SERVICE MANUAL US Model Canadian Model AEP Model UK Model E Model Australian Model PX Model SPECIFICATIONS E PX Australia 240V AC 50Hz 120V AC 60Hz 220V 230V AC 50Hz USA Canada Europe and Singapore ...

Страница 2: ...ase Unit Section 1 KSM 213BKN M N 55 7 7 Base Unit Section 2 KSM 213BKN M N 56 8 ELECTRICAL PARTS LIST 57 US Model 0π Canadian Model 1π AEP German Model 2π UK Model 3π E PX Model 4π Singapore Model 5π Austrarian Model 6π CAUTION Use of controls or adjustments or performance of procedures other than those specified herein may result in hazardous ra diation exposure The laser component in this produ...

Страница 3: ...A battery operated AC milliammeter The Data Precision 245 digital multimeter is suitable for this job 3 Measuring the voltage drop across a resistor by means of aVOM or battery operated AC voltmeter The limit indication is 0 75 V so analog meters must have an accurate low voltage scale The Simpson 250 and Sanwa SH 63Trd are examples of a pas sive VOM that is suitable Nearly all battery operated di...

Страница 4: ... 3 Display window 4 SHUFFLE button 5 PROGRAM button 6 REPEAT button 7 Front cover 8 Remote sensor 9 JOG dial º ENTER button CHECK button CLEAR button p stop button P pause button play button AMS button OPEN button BLOCK 1 8 buttons AMS is the abbreviation for Automatic Music Sensor 1 23456 7 9 8 º ...

Страница 5: ... 5 PX This section is extracted from instruction manual ...

Страница 6: ... 6 ...

Страница 7: ... 7 ...

Страница 8: ... 8 ...

Страница 9: ...EL ASSEMBLY 3 Two screws BVTT 3x6 2 Three screws BVTT 3x6 4 Flat type wire CN601 1 Connector CN501 3 Five screws BVTT3x6 4 Screw BVTP3x10 2 Four screws BVTT 3x6 6 Back panel 5 Remove the PC board holder 3 2 BACK PANEL ASSEMBLY 7 Front panel assembly 1 Two screws BVTP 3x8 6 Remove the claw 5 Remove the claw ...

Страница 10: ...rews BVTT3x6 5 Three holder assemblies 3 4 MECHANISM DECK ASSEMBLY 1 Four screws BVTT3x6 3 Connector CN303 5 Guide assembly Jack board 4 Connector CN308 2 Screw BVTT3x6 Illumination board 6 Flat type wire 23core CN303 9 Nine screws BVTT3x8 º Mechanism deck Main board 7 Connector CN304 Main board Jack board 8 Connector CN504 ...

Страница 11: ... 11 3 5 BASE UNIT ASSEMBLY 1 Screw BVTT3x6 2 Fulcrum plate BU UPPER assy 3 Base unit ...

Страница 12: ...l buttons p stop button FL segment check Refer to FL Tube Check Patterns P pause button FL grid check Refer to FL Tube Check Patterns The pause LED also lights up simultaneously play button All FL segment and grid will light up The play LED also lights up simultaneously 2 PROGRAM REPEAT 1 REMOTE 1 Grid check When the jog dial is rotated to the right the Block indicators of FL light up in the order...

Страница 13: ...e pressing the STOP button turn ON the POWER button The test mode is set 5 The POWER button LED starts blinking Test mode LED POWER button STOP button BLOCK 1 button BLOCK 5 button Cam Pulley POWER NOTE 1 The cam will start rotating when the BLOCK 1 or BLOCK 5 button is pressed continuously in the test mode NOTE 2 If the power cannot be supplied the cam can be rotated by rotating the pulley with y...

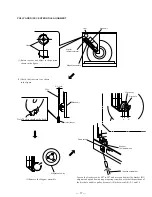
Страница 14: ...g 4 Moving the disc table right and left with a hand after the screw is fixed the table will move by the play of a disc table If the LEDs light up alternately the adjustment will be performed correctly Tepering screwdriver Luminus board Bracket sensor PLAY button PAUSE button Fixed screw 3 Loosen the fixed screw by 60 to 90 and use a tapering screwdriver to adjust the screw as shown in the figure ...

Страница 15: ...ate is as shown in the figure 4 Move the holder guide T with a tapering screwdriver and set the position of the guide disc T to A B 1 1 3 Loosen the fixed screw by about 60 Guide disc T Cam Holder guide T Fixed screw Disc Guide disc T A B Disc Holder guide T Tapering screwdriver Cam Guide disc T Holder guide T ...

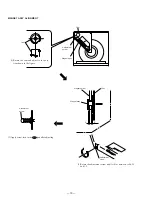
Страница 16: ...e figure 3 After applying screw lock to the part rotate the thrust screw until the holder Disc A comes to the center of the disc Cam Thrust screw Cam Disc Disc Holder disc A Thrust screw Holder disc A 0 1 mm 2 Check that the state is as shown in the figure Holder disc A 1234 1234 1234 ...

Страница 17: ...t Disc pulley Disc hole Holer disc A Fixed screw Bracket BU adjustment A B 3 Remove the Magnet assembly Cam Base unit Bracket BU adjustment Magnet assembly Cam Magnet assembly Tapering screwdriver Loosen the fixed screw by 60 to 90 and move and adjust the bracket BU adjustment up and down using a tapering screwdriver so that the positions of the disc hole and disc pulley become A B or between A B ...

Страница 18: ...o the posi tion shown in the figure Cam Adjustment screw Magnet assy B A Disc Magnet holder Magnet assy Adjustment screw 1234 1234 Adjustment screw 2 Rotate the adjustment screw until A B or between A B 2 1 and 1 2 3 Apply screw lock to the part after adjusting ...

Страница 19: ...ive track 4 Confirm that oscilloscope waveform is clear and check RF signal level is correct or not Note A clear RF signal waveform means that the shape can be clearly distinguished at the center of the waveform RF signal waveform oscilloscope BD board BD board TP RF TP VC oscilloscope level 1 2 Vp p VOLT DIV 200mV TIME DIV 500ns 0 25 0 20 symmetry within 3 1 Vp p A B 5 2 ELECTRICAL BLOCK CHECKING...

Страница 20: ...nter is 4 3218MHz RF PLL Free run Frequency Check Procedure 1 Connect frequency counter to test point TP PLCK with lead wire frequency counter BD board TP PLCK Adjustment Location MAIN BOARD Component Side IC307 IC303 R311 R310 R337 IC301 TP302 AFADJ TP301 ADJ BD BOARD Side B TP FE1 TP RF TP TE TP VC IC103 TP PLCK IC101 ...

Страница 21: ...ON 6 DIAGRAMS 6 1 CIRCUIT BOARDS LOCATION MAIN board T SENS board ILLUMINATION board DISP board DOOR SW board JOG board RAY CATCHER board T MOTOR board JACK board BD board L MOTOR board L SW board LUMINOUS board ...

Страница 22: ...put for analog EFM PLL Open VCO input from for analog EFM PLL Connected to Ground TEST pin connected normally to Ground Connected to Ground Digital Ground TEST pin connected normally to Ground TEST pin connected normally to Ground Charge pump output for analog EFM PLL Open Charge pump output for variable pitch PLL Open Clock input from variable pitch external VCO Connected to Ground Analog power s...

Страница 23: ...n DA 10 output when PSSL 1 XUGF output when PSSL 0 Open DA 09 output when PSSL 1 XPLCK output when PSSL 0 Open DA 08 output when PSSL 1 GFS output when PSSL 0 Open DA 07 output when PSSL 1 RFCK output when PSSL 0 Open DA 06 output when PSSL 1 C2PO output when PSSL 0 Open DA 05 output when PSSL 1 XRA0F output when PSSL 0 Open DA 04 output when PSSL 1 MNT3 output when PSSL 0 Open DA 03 output when P...

Страница 24: ...d Input pin for anti shock Connected to Ground Serial data input supplied from CPU Latch input supplied from CPU Serial data transfer clock input supplied from CPU Numbers of track counted signal output Open Digital power supply Mirror signal output Open Defect signal output Open Focus OK output Open Output to select spindle motor output filter Open Output to control ON OFF of spindle motor Open O...

Страница 25: ...l H Lighting up PAUSE LED control L Lighting up POWER standby LED conteol L Lighting up Front foor switch H Open Open Open Pull up for 5V CONTROL A1 out Loading motor PWM output for outside direction Loading motor PWM output for inside direction Table motor PWM output for left turn Table motor PWM output for right turn Power control H Power ON Data for fluorescent indicator and LED control Clock f...

Страница 26: ...h for servo IC Test mode input CONTROL A1 input L Active Latch for digital filter IC Clock for servo IC and digital filter IC Audio mute H Mute ON Data for servo IC and digital filter IC Clock for sub code Q Sub code Q data input Open Servo sensor signal Jog input Remote control signal Jog input Open Latch for fluorescent indicator driver IC Open Sub code Q synchronous signal Start at rising edge ...

Страница 27: ......

Страница 28: ......

Страница 29: ......

Страница 30: ......

Страница 31: ......

Страница 32: ......

Страница 33: ...1 PANEL BACK E PX 7 4 982 790 51 PANEL BACK SP 7 4 982 790 61 PANEL BACK AUS 8 3 703 244 00 BUSHING 2104 CORD EXCEPT E PX 8 3 703 571 11 BUSHING S 4516 CORD E PX 9 4 956 370 12 BAND PLUG FIXED UK AUS 10 4 962 200 01 PLATE TR GROUND 11 1 661 459 11 JACK BOARD 12 1 569 007 11 ADAPTOR CONVERSION 2P E PX 13 4 886 821 11 SCREW M3 CASE CNP901 1 575 042 21 CORD POWER US CND CNP901 1 575 651 21 CORD POWER...

Страница 34: ...A 4604 847 A MOTOR ASSY LOADING TABLE 51 1 661 466 11 T MOTOR BOARD 52 X 4947 230 1 BRACKET TABLE ASSY 53 X 4947 607 1 GEAR PULLEY ASSY 54 3 325 697 21 WASHER 55 4 982 867 01 BELT TIMING 56 4 982 893 01 GEAR CENTER 2 57 4 982 891 01 GEAR TABLE 58 4 982 892 01 SHAFT CENTER 59 1 661 468 11 LUMINOUS BOARD 60 1 661 469 11 RAY CATCHER BOARD 61 1 661 470 11 T SENS BOARD 62 3 356 601 11 SCREW STEP 63 3 7...

Страница 35: ... 109 4 977 593 11 RING DIA 50 ORNAMENTAL EXCEPT US CND 110 4 977 358 11 CUSHION 8X12 5 111 4 963 404 21 EMBLEM 5 A SONY 112 X 4947 219 1 PLATE A ASSY FULCRUM 114 4 982 799 01 CUSHION STOPPER 115 4 982 793 01 STOPPER A 117 A 4699 037 A DISP BOARD COMPLETE 118 4 982 786 01 HOLDER FL 119 1 661 464 11 DOOR SW BOARD 120 4 982 798 11 SPRING B TORSION 121 X 4947 220 1 PLATE B ASSY FULCRUM 122 3 354 963 0...

Страница 36: ...1 X 4946 326 1 HOLDER CLAMP ASSY 162 4 983 777 01 SPRING MG TENSION 163 A 4672 092 A MAGNET ASSY 164 3 366 559 02 MAGNET CHUCK 165 4 960 633 01 YOKE MAGNET 166 4 960 632 11 PULLEY B 167 4 983 319 01 SPRING THRUST COMPRESSION 168 4 976 456 01 WASHER STOPPER 170 X 4947 242 1 SLIDER C ASSY 171 X 4947 238 1 SLIDER B ASSY 172 X 4947 237 1 SLIDER A ASSY 173 4 982 880 01 SPRING SLIDER A TENSION 174 4 982...

Страница 37: ...2 4 976 466 01 GEAR LOADING 2 203 4 982 893 01 GEAR CENTER 2 204 X 4947 607 1 GEAR PULLEY ASSY 205 4 982 867 01 BELT TIMING 206 3 325 697 21 WASHER 207 1 661 465 11 L MOTOR BOARD 208 1 661 467 11 L SW BOARD 209 3 489 073 00 SCREW THRUST 210 X 4947 227 1 LEVER STOPPER ASSY 211 4 951 291 01 SCREW 212 X 4947 234 1 SLIDER LOCK ASSY 213 4 982 857 01 BEARING CAM 214 4 982 860 01 CAM A 215 4 982 861 01 C...

Страница 38: ...f No Part No Description Remark Ref No Part No Description Remark 251 3 356 601 11 SCREW STEP 252 X 4947 244 1 SLIDER BU ADJUSTMENT ASSY 253 X 4947 243 1 HOLDER BU ASSY 254 4 982 859 01 HOLDER DAMPER 255 4 982 878 01 SPRING F COMPRESSION 256 4 982 872 01 SPRING F 2 TENSION 257 4 982 871 01 SPRING F 1 TENSION 258 4 982 858 01 DAMPER 259 4 960 617 01 CAP F ...

Страница 39: ... le numéro spécifié 305 306 not supplied 303 M101 304 301 17 17 M102 13 Ref No Part No Description Remark Ref No Part No Description Remark 301 A 4699 038 A BD BOARD COMPLETE 302 2 626 907 01 GEAR A S 303 2 627 003 01 GEAR B RP 304 1 769 069 11 WIRE FLAT TYPE 16 CORE 305 2 626 908 01 SHAFT SLED 306 8 848 376 01 OPTICAL PICK UP BLOCK KSS 213B S N M101 X 2626 234 1 T T CHASSIS ASSY MG K SPINDLE M102...

Страница 40: ...163 019 00 CERAMIC CHIP 0 0068uF 10 50V C161 1 163 038 91 CERAMIC CHIP 0 1uF 25V CONNECTOR CN101 1 770 072 11 CONNECTOR FFC 23P CN102 1 770 014 11 CONNECTOR FFC FPC 16P IC IC101 8 752 369 78 IC CXD2545Q IC102 8 759 176 09 IC BA6392FP IC103 8 752 072 45 IC CXA1821M T6 MOTOR M101 X 2626 234 1 T T CHASSIS ASSY MG K SPINDLE M102 X 2625 769 1 MOTOR GEAR ASSY MB RP SLED TRANSISTOR Q101 8 729 010 08 TRAN...

Страница 41: ...CERAMIC 0 1uF 50V C506 1 162 282 31 CERAMIC 100PF 10 50V C511 1 164 159 11 CERAMIC 0 1uF 50V EXCEPT US CND E BD DISP DOOR SW ILLUMINATION JACK R162 1 216 101 00 METAL CHIP 150K 5 1 10W SWITCH S101 1 572 085 11 SWITCH LEAF LIMIT A 4699 037 A DISP BOARD COMPLETE 4 982 786 01 HOLDER FL CAPACITOR C751 1 162 207 31 CERAMIC 22PF 5 50V C752 1 164 159 11 CERAMIC 0 1uF 50V C753 1 124 584 00 ELECT 100uF 20 ...

Страница 42: ...62 11 SOCKET CONNECTOR 19P DIODE D601 8 719 301 49 DIODE SEL2810A CD P D602 8 719 303 02 DIODE SEL2510C D IC IC601 8 759 373 49 IC NJL54H400 TRANSISTOR Q601 8 729 900 89 TRANSISTOR DTC144ES RESISTOR R601 1 249 415 11 CARBON 680 5 1 4W F R602 1 249 407 11 CARBON 150 5 1 4W F R603 1 247 807 31 CARBON 100 5 1 4W R604 1 247 807 31 CARBON 100 5 1 4W R721 1 249 415 11 CARBON 680 5 1 4W F R722 1 249 417 ...

Страница 43: ...6 052 11 ELECT 100uF 20 10V C332 1 164 159 11 CERAMIC 0 1uF 50V C333 1 126 052 11 ELECT 100uF 20 10V C334 1 164 159 11 CERAMIC 0 1uF 50V C335 1 164 159 11 CERAMIC 0 1uF 50V C336 1 162 198 31 CERAMIC 8 2PF 10 50V C337 1 162 198 31 CERAMIC 8 2PF 10 50V C339 1 164 159 11 CERAMIC 0 1uF 50V C340 1 126 052 11 ELECT 100uF 20 16V C351 1 136 165 00 FILM 0 1uF 5 50V C352 1 164 159 11 CERAMIC 0 1uF 50V C361 ...

Страница 44: ... 1 4W R310 1 249 425 11 CARBON 4 7K 5 1 4W F R311 1 247 843 11 CARBON 3 3K 5 1 4W R312 1 249 429 11 CARBON 10K 5 1 4W R316 1 249 429 11 CARBON 10K 5 1 4W R317 1 249 429 11 CARBON 10K 5 1 4W R318 1 249 429 11 CARBON 10K 5 1 4W R319 1 249 429 11 CARBON 10K 5 1 4W R321 1 249 417 11 CARBON 1K 5 1 4W F R322 1 249 417 11 CARBON 1K 5 1 4W F R323 1 249 417 11 CARBON 1K 5 1 4W F R324 1 249 411 11 CARBON 33...

Страница 45: ...4 1 T T CHASSIS ASSY MG K SPINDLE M102 X 2625 769 1 MOTOR GEAR ASSY MB RP SLED M801 A 4604 847 A MOTOR ASSY LOADING TABLE M802 A 4604 847 A MOTOR ASSY LOADING LOADING T501 1 429 670 11 TRANSFORMER POWER US CND T501 1 429 671 11 TRANSFORMER POWER AEP G UK AUS SP T501 1 429 672 11 TRANSFORMER POWER E PX ACCESSORIES PACKING MATERIALS 1 473 800 11 REMOTE COMMANDER RM DX200 1 558 271 11 CORD CONNECTION...

Страница 46: ... 2 6X8 TYPE2 N S 5 7 685 871 09 SCREW BVTT 3X6 S 6 7 682 947 01 SCREW PSW 3X6 7 7 682 548 04 SCREW BVTT 3X8 S 8 7 624 111 04 STOP RING 7 0 TYPE E 9 7 624 106 04 STOP RING 3 0 TYPE E 10 7 621 772 20 SCREW B 2X5 11 7 682 552 09 SCREW B 3X16 12 7 621 775 00 SCREW B 2 6X3 13 7 621 772 30 SCREW B 2X6 15 7 624 109 04 STOP RING 5 0 TYPE E 16 7 621 775 20 SCREW B 2 6X5 17 7 682 255 15 SCREW P 2X3 ...

Страница 47: ... 64 CDP CX200 Sony Corporation Home A V Products Company 9 960 723 11 English 96G0992 1 Printed in Japan 1996 7 Published by Quality Engineering Dept Shibaura ...

Страница 48: ......

Страница 49: ......

Страница 50: ......

Страница 51: ......

Страница 52: ......

Страница 53: ......

Страница 54: ......

Страница 55: ......

Страница 56: ......

Страница 57: ......

Страница 58: ......

Страница 59: ......

Страница 60: ......

Страница 61: ......

Страница 62: ......

Страница 63: ......

Страница 64: ......

Страница 65: ......

Страница 66: ......

Страница 67: ......

Отзывы: