60
Chapter 3
Shooting
Chapter 3 Shooting
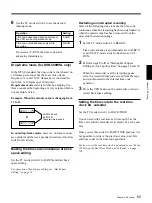
To change the playback speed
Press the REV or FWD button down firmly into
the inner position to make the tape move at the
faster speed. Press the button down lightly to
make the tape move at the slower speed.
Note
Do not shut off the power while using the edit
search function. The VCR may not be able to find
the continue point.
4
Release the REV or FWD button when you find
the tape location where you wish to continue
shooting.
The VCR enters recording pause mode.
5
Press the VTR button on the camcorder or the lens.
The VCR starts recording.
Using the Freeze Mix Function
The freeze mix function superimposes a freeze-frame
image of a previously recorded shot on the shooting
image displayed on the viewfinder screen.
You can use this function to easily frame a subject
within the same framework from a previous shot.
Note
When the camcorder is in EZ mode, the freeze mix
function is disabled. Press the EZ MODE button to
release the EZ mode beforehand. (See page 14.)
1
Connect a color monitor to the MONITOR OUT
connector and set the MONITOR OUT
CHARACTER switch to ON. (It is not necessary
to set the MONITOR OUT CHARACTER switch
to ON when using only the viewfinder for freeze
mix operation.)
2
Perform steps
2
to
10
from “Basic Procedure for
Shooting” (pages 49 and 50).
3
Play back the tape on which the image to be used
for framework alignment has been recorded, and
press the MENU switch to ON position.
The following indication appears on the screen.
For details of the playback operation, see page 61.
4
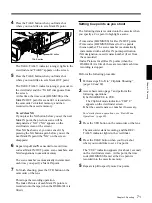
Press the MENU dial when you see the image you
want to freeze.
The frozen playback image is displayed, mixed
with the shooting image, in monochrome. The
indication “FREEZE MIX ON” appears on the
screen.
To release the freeze mix mode, press the MENU
dial again.
To change the freeze-frame image
Press the PLAY button.
Use the tape transport buttons to find the desired
image and then perform step
4
again.
5
Once you have framed your subject, press the
MENU dial to cancel the freeze mix function.
6
Find the recording start point or insert a new
cassette for recording, then begin recording.
Notes
• If you use the tape transport buttons during back
space editing, the back space editing mode will be
stopped. When you were using the ClipLink function
at shooting, if you simply restart the recording you
will lose any ClipLink data that was recorded.
To avoid this, press the ClipLink CONTINUE button
before restarting recording.
• The signal is not output from the DV OUT connector
while using the freeze mix function.
Back Space Editing
P L A Y
m
F R E E Z E M I X ( O N
m
P U S H )
E X I T M E N U ( Y E S
m
P U S H )
F R E E Z E M I X O N
M I X O F F ( Y E S
m
P U S H )
Содержание 500WSPL
Страница 102: ......
Страница 124: ......
Страница 143: ......
Страница 144: ...Sony Corporation Printed in Japan ...


