background image

CommuniCorder

59

This is the Internet version of the user’s guide. © Print only for private use. 

M

EDIA

CommuniCorder

With the built-in CommuniCorder camera you can record video 
clips and take pictures, view them on your phone screen and 
send them directly to friends or colleagues via multimedia 
messaging. You can also send the video clips and pictures you 
have saved in your P910i via messaging, infrared 
communication or Bluetooth wireless technology to, for 
example, a PC. It is also possible to exchange video clips and 
pictures between the P910i and the Web.

The pictures in your P910i can be set as background, wallpaper, 
or they can be added to the contacts in your phone book. See 

‘Personalizing your P910i’ 

on page 142 to find out more about 

using pictures.

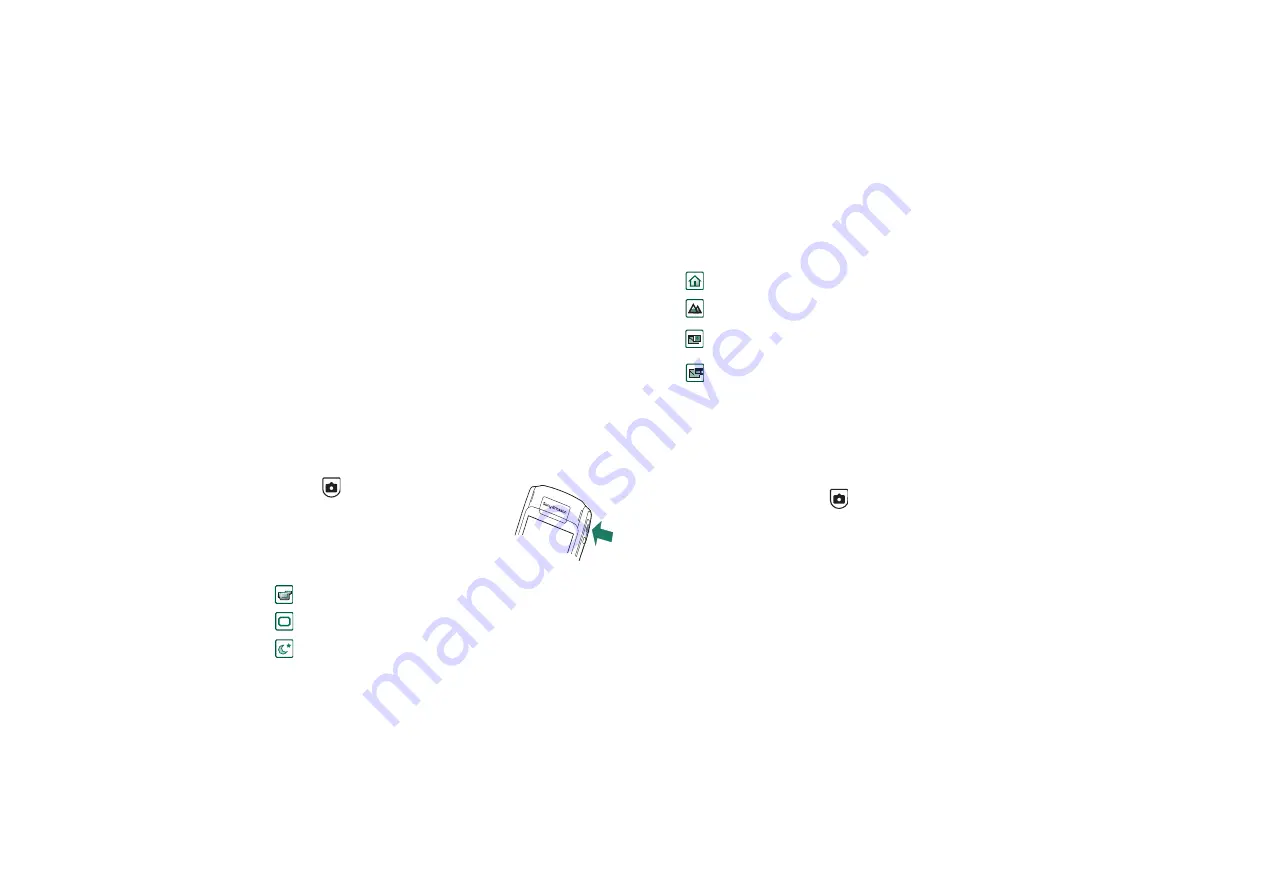
A button 

 on the camera activates the 

CommuniCorder application and acts as the 
shutter release when taking pictures.

The Jog Dial is used to set the 
CommuniCorder working mode:

Recording video clips

You can record a video clip with the flip open as well as closed.

To record a video clip

1. Press the camera button 

 to activate the CommuniCorder 

application.

2. Rotate, if required, the Jog Dial to the Video mode or 

Message video if the video clip is to be sent in an MMS.

3. Press again to start recording. The status indicator flashes red 

during the recording.

4. Press the Jog Dial to stop recording. The video clip is 

automatically saved in 

Video

.

Video camera

Video

Automatic setting

Still camera

Auto

Automatic setting

Still camera

Night

Set for dark environment

Still camera

Indoor

Set for indoor light

Still camera

Outdoor

Set for outdoor light

Still camera

Message 
picture

Set for picture size 160x120 
pixels

Video camera

Message 
video

Set for video clips to be 
appended to messages

Содержание 910i

Страница 1: ...This is the Internet version of the user s guide Print only for private use P910i User Guide ...

Страница 2: ... dotted end Accented letters Write the character as described above then write the accent above the arrow Other such characters for example ö and ü follow the same principle Note Start each stroke at the dotted end Numbers Numbers are written above the arrow Note Start each stroke at the dotted end a b c d e f g h k l m n o p q r s t u v y z w x 1 2 i j 1 1 1 1 1 1 2 1 2 2 2 2 2 2 0 1 2 3 4 5 6 7 ...

Страница 3: ...s and status bar icons 21 Memory Stick 22 Connecting the accessories 24 Services 25 Applications overview 25 Updating the software 28 General functions 28 Entering text with the flip closed 32 Entering text with the flip open 33 P910i locks 37 Phone 40 Call handling with the flip closed 40 Call handling with the flip open 43 Handling two or more calls 45 Call list and call log 47 Hints and smart f...

Страница 4: ...he flip open 103 Creating and editing contacts 104 Managing contacts 106 Making an owner card 107 Preferences 107 Calendar 108 Creating calendar entries 108 Managing calendar entries 109 Sending and receiving calendar entries 110 Preferences 110 Tasks 111 Creating task entries 111 Managing task entries 112 Moving task entries 112 Sending and receiving task entries 113 Preferences 113 Jotter 114 Cr...

Страница 5: ...ice 132 Connecting to other devices 133 Connection via SyncStation 133 Connection via Infrared port 134 Connection via Bluetooth wireless technology 134 Synchronization and backup 138 Local synchronization 138 Remote synchronization 139 Backing up data 140 Restoring data 141 SETTINGS Personalizing your P910i 142 Themes 142 Changing your application shortcuts 142 Setting a background picture 142 Se...

Страница 6: ... tokens 166 Storage manager 167 WIM PIN settings 168 Getting started with Internet and Messages 169 Introduction 169 Automatically set up service provider and messaging 170 Manually set up service provider 170 Manually set up messaging 171 Setting up WAP accounts 172 Using your P910i as a modem 172 GPRS connection information 174 REFERENCE Troubleshooting 176 Guidelines for safe and efficient use ...

Страница 7: ... countries or both This product contains software copyright Beatnik Inc 1996 2002 Java and all Java based trademarks and logos are trademarks or registered trademarks of Sun Microsystems Inc in the U S and other countries End user license agreement for Sun Java J2ME 1 Restrictions Software is confidential copyrighted information of Sun and title to all copies is retained by Sun and or its licensor...

Страница 8: ... copyright laws You and not Sony Ericsson are entirely responsible for additional content that you download to or forward from your mobile phone Prior to your use of any additional content please verify that your intended use is properly licensed or is otherwise authorized Sony Ericsson does not guarantee the accuracy integrity or quality of any additional content or any other third party content ...

Страница 9: ...and 3D games New content can be downloaded quickly and easily from Internet sites or transferred to the phone via Bluetooth Wireless Technology an infrared port or a cable Extra memory is available through a Memory Stick which also serves as a convenient way to exchange content and applications such as Java games The P910i can be used as a corporate phone with Ericsson MD110 and Business Phone exc...

Страница 10: ...tailer Note Before you can use your P910i you need to insert the SIM card and insert and charge the battery Always detach the charger before you insert or remove the SIM card B C A E F K H J N P910i M G D L A P910i with stylus B Battery C Travel charger D SyncStation E Stereo headset F Protective bag and strap G Extra stylus H Memory Stick J Memory Stick adapter K Flip replacement cover L Flip rep...

Страница 11: ... and keyboard D Indicator light for network and battery green red E CommuniCorder activation and shutter release F Internet button for activation of the browser G Slot for Memory Stick A B C D F G E A Stylus B External antenna connector C CommuniCorder D Battery compartment E Connector for accessories and charger F Connector for stereo headset G Jog Dial H Infrared port I On Off button A B C D E F...

Страница 12: ...ld be defined as international numbers starting with for example 4613244500 In order to speed up calling while at home the same numbers can also be added in the national number format for example 013244500 For more information see Copying contacts to and from the SIM card on page 106 Battery Before you use your P910i for the first time charge the battery provided for at least 4 hours Use the suppl...

Страница 13: ... on the screen pulsing continuously and the indicator at the top of the P910i showing a steady red light or green if the P910i is switched on See also Battery Use and Care on page 183 4 Wait approximately 4 hours or until the battery meter on the screen is full and the indicator on the top of the P910i shows a steady green light 5 Remove the charger by tilting the plug upwards Tip You can also use...

Страница 14: ...ill use the other functions Set your P910i in Flight mode where the use of mobile phones is not allowed or if you want to use the other functions but do not want incoming calls Importing phone book entries You may want to import existing contact information from another mobile phone to your P910i You can do this in several ways Beam the phone book entries from the other phone by infrared or Blueto...

Страница 15: ...an application Press the Jog Dial inwards or to start the application Tip When view is selected it is also possible to start an application by pressing its specific number Closing applications The current application automatically closes and the data is saved when you return to the standby view or switch to another application To return to standby press and hold or press the Jog Dial backwards A S...

Страница 16: ...te on the screen A Shortcut to the Messages application B Shortcut to the Contacts application C Shortcut to the Phone application D Shortcut to the Calendar application E Shortcut to the Internet application F Shows all applications available in flip open mode CommuniCorder Pictures Video Music player Internet Messages Contacts Phone Calendar Tasks Quicksheet Sound recorder Pdf Time Storage wizar...

Страница 17: ...ng selected items and by using the Jog Dial see Jog Dial on page 19 Flip removed The flip can also be removed which makes the organizer applications easier to access When the flip is removed the P910i works in flip open mode Note Turn off the P910i before you remove the flip to avoid to damage your phone To remove and attach the flip refer to the separate instructions Note Please note that Sony Er...

Страница 18: ... the same as the application It contains the system services used by most applications such as Find Send as and Delete the edit menus contain editing items such as Cut Copy Paste Zoom Preferences and Help With the flip closed the menu bar often shows the function of the key C Application area Applications use this central area of the screen to display the essential information Many of the applicat...

Страница 19: ...ssage Press the Jog Dial inwards Selects a highlighted item dials selected phone numbers Generally the same action as in flip closed Press the Jog Dial backwards Goes back to the previous screen dismisses dialogs and sends a busy signal to the calling party when you receive a call It will not end a call Always the same action as in flip closed and in flip open Press the Jog Dial forwards Flip clos...

Страница 20: ...dy when the Music player is open Press and hold to put the P910i into silent mode when in the standby view OPTIONS Open the menu with different options for different applications Press and hold to open Applications STAR Enter the character Press and hold to enter a p pause character Press to switch between different input modes Abc 123 This is useful when writing SMS or similar texts Press and hol...

Страница 21: ...ication Icon Function Signal strength GPRS avialable Signal strength GPRS not avialable Battery strength Bluetooth on Bluetooth discoverable Bluetooth headset connected Infrared on GPRS active GPRS data transfer in progress Ongoing data call Ongoing call Missed call Divert all calls notification Calls screened SMS notification MMS notification Email notification SMS overflow Time Time alarm set Ke...

Страница 22: ...e picture Make sure it is securely inserted A click should be heard Note Insert the Memory Stick correctly to avoid damage to your P910i or the Memory Stick The Memory Stick supplied with the P910i may or may not be a version that contains the lock function Remember you can overwrite existing files without the lock function To remove the Memory Stick Press the edge of the Memory Stick using your f...

Страница 23: ...ry Stick slot This may damage the product Always insert the adapter in the slot with the connector end marked with a triangle first Compatibility The P910i defines its own folder structure on a Memory Stick Each application has its own set of folders A folder created in one application is not visible in another Other devices must access the same folder structure to interact with the P910i files If...

Страница 24: ...vel charger is connected to the desk stand or to the P910i Note The design of the charger will differ depending on the market B The USB connector from the desk stand is connected to a PC C The headset is connected to the P910i D Other accessories can be connected to the connector at the base of the P910i E A car holder can be connected to the antenna connector at the rear Note Remove the plastic p...

Страница 25: ...page 132 for how to uninstall the demo application and Installing applications on your P910i on page 130 for how to reinstall it To start the demo 1 Select the Applications icon 2 Select the Demo icon and the demo starts To stop the demo Tap the screen or rotate the Jog Dial to stop the demo The demo also stops when any other dialog is opened Note When the flip is open an incoming text or MMS mess...

Страница 26: ...clips You can record video with CommuniCorder download them from Internet or transfer them from your PC You can stream video and audio from the Internet Music player Plays music tracks and other audio files You can download these from the Internet or transfer them from your PC The player supports the most common sound formats You can save music tracks on the Memory Stick Internet flip open only Th...

Страница 27: ... in the P910i and on the Memory Stick Storage Wizard flip open only Helps you to release memory The icon appears in the status bar when the memory is running short Tap it to start the Storage Wizard Remote Sync flip open only Performs synchronization over the air Using GPRS the P910i can be continuously connected to the remote synchronization server Remote Sync works equally well over CSD or HSCSD...

Страница 28: ...een than on a handheld device If you make it a habit to set up specific folders to suit your needs and use them to categorize all your information working with it becomes easy Each application has its own set of folders A folder created in one application is not visible in another For each application there is a default Unfiled folder Since there is no way of seeing on your P910i whether a file in...

Страница 29: ...ion menu first select Select all and then Copy 2 Select the destination Folder from the list and select Copy To move a file from one folder to another Open the file in detail view In the folder menu select the destination folder To copy a file to another folder 1 Open the file in detail view In the folder menu select the destination folder Select Copy to in the main application menu for example Mu...

Страница 30: ...tacts and images To send an item using Send as 1 Enter the Send as menu in the specific application 2 Depending on the application and item you can choose between the following transfer methods Text message using SMS P910i will create a new text message Add the mobile number of the recipient and tap Send Email the P910i will create a new message with the item included as an attachment Complete wit...

Страница 31: ...plication Select Done and any unsaved items will be automatically saved for you in the Beamed inbox in Messages Methods for storing data Your P910i can store data in different ways Internal memory Used for storing pictures messages music applications and so on Memory Stick expansion memory SIM card for phone numbers and associated names See Copying contacts to and from the SIM card on page 106 Sev...

Страница 32: ... each new text edit field 123 numeric entry only ABC uppercase entry abc lowercase entry When you are editing text you can Press and select Text options Input type to select text input type Press to switch between the input types in text edit mode Inserting symbols When you are editing text you can press and depending on the application choose Add symbol or Text options Add symbol to select an ite...

Страница 33: ...of the alternative words 4 Continue writing your message Press to enter a full stop To enter other punctuation marks press and use the Jog Dial If you press and select Text options when writing you get a list of options Spell word to edit the entered word My words to view the user dictionary Language to change language Show suggestion list Hide suggestion list to switch the candidates window on an...

Страница 34: ...gnition translates stylus gestures into letters numbers or other characters and displays these characters as text Handwriting recognition is only active in places where text can be input The text mode screen is split into an upper and a lower part by an arrow in the middle of the right edge Write lowercase letters below the arrow and uppercase letters in line with it Write numbers above the arrow ...

Страница 35: ...h stroke at the dotted end Accented letters Write the character as described above then write the accent above the arrow Other such characters for example ö and ü follow the same principle Note Start each stroke at the dotted end Numbers Numbers are written above the arrow Note Start each stroke at the dotted end a b c d e f g h k l m n o p q r s t u v y z w x 1 2 i j 1 1 1 1 1 1 2 1 2 2 2 2 2 2 0...

Страница 36: ...ed after approximately 1 second Press to delete the character or spaces to the left of the cursor Press and hold to delete several characters and then whole words Press the space key to enter a character space to the right of the cursor Press and hold the space key to move the cursor forward by inserting 6 space characters at a time Note When typing press the keys one after another Not for example...

Страница 37: ...Note You can usually make an emergency call without unlocking the P910i SIM card lock The SIM card lock protects your SIM card not the P910i against unauthorized use It is unlocked by the PIN and PUK codes which you receive from your service provider You can choose to have to unlock the SIM card every time you turn the P910i on or to have the SIM card unlocked Your PIN Personal Identification Numb...

Страница 38: ...perator can block your SIM if you report that your phone has been stolen The device lock is not on when you buy your P910i You can change the device lock code to any four to eight digit personal code The default device lock code is 0000 To activate the device lock 1 Select Control panel Device Locks 2 Select a lock option 3 Select Done You can choose to have the P910i locked every time you turn it...

Страница 39: ... pressed When this setting is active the keypad will become automatically locked after a period of inactivity To activate or change the keylock Select Control panel Device Locks To unlock the keys Select Screen lock This option locks the screen of your P910i This is to protect the device if the screen is accidentally pressed in flip open mode or with the flip removed When this setting is active th...

Страница 40: ... those who should be able to reach you Access to other applications while talking on the phone Office handsfree speakerphone which starts when you open the flip making it easy to access applications such as Calendar and Jotter while talking Flight mode which enables the P910i to be used as a PDA in situations where radio transmitters may not be used The GSM and Bluetooth transmitters and receivers...

Страница 41: ... picture is also shown 2 Press To make a call using the Call list 1 Select on the standby screen 2 Press the Jog Dial or 3 Scroll the list by rotating the Jog Dial and select an entry 4 Press the Jog Dial or To make a call using Contacts 1 Select on the standby screen 2 Press the Jog Dial or 3 Scroll the list by rotating the Jog Dial and select a contact 4 Scroll by rotating the Jog Dial and selec...

Страница 42: ...to call a speed dial number Press twice to call the last dialled number Press and hold any of the keys from to to open your Contact list Press again to reach the next letter Additional key presses will add letters to your search Press any digit followed by to reach a phone number in the SIM phone book Press for the last dialled number Incoming calls When you receive a call the name of the caller w...

Страница 43: ...ake a new call during a call Add to contacts Create a new Contacts entry if the phone number of the active call is known and not already stored in Contacts Show contact Display the entry in Contacts if any that corresponds to the phone number of the active call Transfer sound Transfer the call to a Bluetooth wireless technology headset Turn On Off tones You can send DTMF tones with the keypad Cont...

Страница 44: ...2 Use the Jog Dial or tap with the stylus to select an entry To make a call using the Call list 1 Select from the button bar 2 Select an entry by rotating the Jog Dial and pressing it inwards You can also tap the entry using the stylus 3 Select To make a call using the Contact list 1 Select in the application picker 2 Select an entry by rotating the Jog Dial and pressing it inwards 3 Select a phon...

Страница 45: ...ld call Retrieve call Put the active call on hold retrieve the held call Add to contacts Create a new Contacts entry This option appears automatically after a call if the phone number of the call is known and not already stored in Contacts See Add to contacts on page 54 Show contact Display the entry in Contacts if any that corresponds to the phone number of the active call Copy number Copy a phon...

Страница 46: ...hone number of the active call With the flip open choose options by tapping the screen buttons by tapping the field with the other party s details or selecting from the menus Conference calls A conference call can be started when you have an active call and a held call The conference call view is automatically displayed whenever a party has been added to the conference If an incoming call is answe...

Страница 47: ...last dialled call at top The Call log available with the flip opened keeps track of date time length and cost information if available for each call It shows all calls in order with the most recent call at the top To view the Call list with the flip closed 1 Press 2 Select Call list or 1 Select on the standby screen to open the Call list 2 Press and select which calls in the list you want to displ...

Страница 48: ... is open tap the sounds icon in the status bar to open a dialog where you can switch silent mode on or off The vibrating alert still works in silent mode if not deactivated Set up speed dial numbers Speed dial is a fast way to call one of nine selected phone numbers The view contains nine speed dial positions Each speed dial entry consists of a picture or an icon and a name or a number The names n...

Страница 49: ...menu The Power menu has the following options Phone on Start the P910i in the normal way Flight mode Start the P910i in flight mode Power off Turn the P910i off To set flight mode on and off when Power menu is selected 1 Press the On Off button 2 On the Power menu select the option you want 3 Press the Jog Dial or tap Done To set flight mode on or off 1 Select Control panel Device Flight mode 2 Se...

Страница 50: ... You should not store any personal codes in your P910i in case your phone is stolen or lost Support for TTY Teletype TTY accessory text phone is an aid for people with speech impairments To use the TTY device together with the P910i 1 Connect the TTY device to the accessories connector at the base of the P910i 2 In Phone go to Edit Preferences TTY Accessory and select the check box to set the P910...

Страница 51: ...er line With the flip closed press and select Switch to line 1 or Switch to line 2 depending on the previously preset line With the flip open tap and select Switch to line 1 or Switch to line 2 depending on the previously preset line Corporate phone services in P910i The P910i can be used in a corporate environment like centrex mobile centrex and corporate switchboards PABX equipped with a mobile ...

Страница 52: ...ng card to Call directly When storing numbers in Contacts you should use the international number format starting with This allows you to use Contacts when you are outside the corporate telephony environment when you are abroad and when you are sending SMS or MMS messages Incoming calls via the PBX may be routed to the P910i as well as to your desk phone and you can answer in either telephone When...

Страница 53: ...f the person you want to call and the P910i will try to call the person Instead of the magic word you can also press and hold the Jog Dial or press the handsfree set call button Note Magic word is not supported with the Bluetooth headset car kit in the P910i Instead of magic word push the button on the Bluetooth headset After a confirmation tone you should say the name Voice dialling Select or uns...

Страница 54: ...e phone number is not already stored in the Contacts you are asked if you would like to add it Set the function On or Off Handsfree Specify how to manage calls when the P910i is used with a handsfree kit connected Answering mode Select the option you want Normal Answer calls as normal Any key Press any key except on the keypad to answer After 5 seconds P910i answers automatically after five second...

Страница 55: ...o the Accepted list 1 Select Add new 2 Select Lookup and choose a contact or write the name and number of the contact 3 Select Done Tap a contact on the list to remove it Call waiting Use these settings to control how P910i handles incoming calls during an ongoing call On You will be alerted by incoming calls Off The P910i sends a busy tone to the calling party Restrict calls You can set restricti...

Страница 56: ...card supplier for more details To create a new calling card Select New and enter the account information Access tab Name Enter a name for the calling card account Access number Enter the phone number of the calling card server Verification code Enter the verification code International prefix Enter the international prefix used by the server Set up tab Sending order Number then code means that the...

Страница 57: ... the check box if you prefer to stay in the ongoing program when you answer a call with the flip open GPRS Alert If you make a new telephone call you can interrupt an ongoing GPRS session for example an incoming email Select the check box to get a warning in such a case TTY Accessory Select the check box when you want to use the P910i together with a TTY accessory Teletype TTY accessory text phone...

Страница 58: ...in a network that does not provide charging information ALS settings subscription dependent Use Alternate Line Service to make calls on two lines with separate phone numbers Some of the phone settings are used on a per line basis In most cases the settings displayed apply to the selected line This is then indicated in the dialog title bar In other cases the lines correspond to separate settings or...

Страница 59: ...the camera activates the CommuniCorder application and acts as the shutter release when taking pictures The Jog Dial is used to set the CommuniCorder working mode Recording video clips You can record a video clip with the flip open as well as closed To record a video clip 1 Press the camera button to activate the CommuniCorder application 2 Rotate if required the Jog Dial to the Video mode or Mess...

Страница 60: ... flip to access the full range of CommuniCorder settings With the flip open the CommuniCorder is activated by selecting To delete the last video clip 1 Select CommuniCorder Delete clip 2 Confirm the delete operation To delete a video clip you have just recorded in flip closed select Delete clip from the flip closed context menu To manage video clips tap to go directly to Video See Video on page 68...

Страница 61: ...he capture button at the bottom of the screen to take a picture By default the pictures you take are stored internally in the Unfiled folder Tap the folder menu to the right in the menu bar to change the storage location to another location for example on a Memory Stick See Folders on page 28 for more information on using folders To send a picture you have just taken in flip closed select Send as ...

Страница 62: ...nged in the screen after you have taken it To take a picture with delay timer 1 Select 2 Tap CommuniCorder Delay timer 3 Press the camera button The timer beeps for the set time and a timer icon is shown before the picture is taken When the delay timer is set you will see the timer status icon 4 Tap CommuniCorder Delay timer to deactivate the timer Image status Above the viewfinder you will find t...

Страница 63: ...clips and also the sound quality of video clips To restore default CommuniCorder preferences 1 Tap CommuniCorder Preferences 2 Tap Default 3 Tap Yes Move the slider to change the brightness of the picture Move the slider to change the contrast Turn the backlight On when the light behind the subject is brighter than the light in front of the subject Turn the flicker free function On to reduce the e...

Страница 64: ...etween the thumbnail view and the list view The thumbnail view gives an overview of all the pictures in your P910i while the list view shows a more compact list At the bottom of the screen you can see how many pictures you have saved in the current folder Tip To take a new picture tap to go to the CommuniCorder Move among the pictures with the arrow buttons or Jog Dial You can search for specific ...

Страница 65: ...res in JPEG can also be imported exported from to a memory card Note Pictures with Forward lock cannot be sent further Zooming pictures widescreen and full screen From the detail view of the picture you can Tap and to zoom in and out Tap and drag the zoomed picture to view specific details in the picture Tap a picture to display it over the whole screen Tap it again to zoom in or zoom out Press th...

Страница 66: ...pened in Pictures select Edit Edit picture Editing pictures Editing is controlled from the toolbar below the picture Tapping the tool icons will bring up a palette with choices You can save the edited image by selecting Image editor Done Copy and paste by selecting Edit Copy and Edit Paste You can only copy and paste whole pictures If you make an error when editing the picture you can undo the las...

Страница 67: ...ou can move the text on the picture by tapping and dragging on the text You can return to the text editor by tapping on the text item Note As soon as you tap outside the text item the text is merged with the picture and cannot be edited or moved To crop a picture 1 Tap and select the cropping tool A frame with 8 handles is placed around the picture 2 Tap and drag one of the handles to define how t...

Страница 68: ...o clips both internally and externally You can also copy them between the internal memory and the Memory Stick See Folders on page 28 To adjust the volume Rotate the Jog Dial up to increase the volume and down to decrease the volume Video clips A video clip is a short video sequence Playing video clips The Video player opens in the list view In this view you get an overview of all the MPEG 4 video...

Страница 69: ...Managing video clips The detail view is intended for managing one clip at a time You can play and pause the clip by tapping and and stop by tapping The slider under the video area shows the current play position within the clip Tap and drag the slider to move to another position In this view you can send rename delete or move your video clips Only the video clips saved in your P910i or on the Memo...

Страница 70: ...u can send and receive video clips using Video Send as See Sending and receiving items on page 30 Streaming Streaming is a data transfer method making multimedia available in real time You can for example listen to audio and watch video almost at the same time as it is sent The data in the file is divided into small packets that are sent in a continuous flow a stream You can then begin viewing the...

Страница 71: ...ferences When you view a video clip in full screen mode you can select the orientation of the picture To change the orientation of the picture in full screen mode 1 Select Edit Preferences 2 Select the Display tab 3 Tap Left handed or Right handed orientation Done When you view a video clip from a Web site using the streaming function a media buffer is used to provide a steady flow of data Increas...

Страница 72: ...n you view a video clip from a Web site you may have to set the proxy settings To change the proxy settings 1 Select Edit Preferences 2 Select the Proxy tab If the proxy settings set in the control panel are to be used tap Automatic configuration If the manual settings are to be used enter the relevant information ...

Страница 73: ...g sound files You can play MP3 music both in flip closed and in flip open In flip closed with the Jog Dial select select Music player and select the track you want to play Press to find other commands If you navigate to the standby screen while you play music you can press to pause Press it again to play Press to go back to the standby screen and launch another application The music will still pla...

Страница 74: ...unction to play the tracks randomly To loop a list Select Music Loop To play a list randomly Select Music Random Managing sound files File list view In the file list view you can see how many tracks you have in the current folder Tapping a file name will open the detail view and allow you to play and manage that file To copy delete or move multiple files select the files you want to delete move or...

Страница 75: ...from the P910i 1 Select Music Delete track 2 Select Yes Viewer If you play sound tracks remotely for example music on an Internet site a view similar to the detail view displays The commands you find in this view are similar to those in the Detail view Managing track folders In the track folder view the Music player plays the MP3 files of the selected folder With one exception the All folder If yo...

Страница 76: ...aving sound files When you receive sound files in other applications such as email and multimedia messages you activate the viewer in your P910i From the viewer you can then save the sound file to your P910i To save a track from another application 1 Tap the save floppy disk icon or select Music and tap Save 2 Select the folder you want to save the track in and tap Save Sending and receiving sound...

Страница 77: ...s a message that contains a WAP link to the site with the information you subscribe to Before you can use Internet you need to set up an Internet account in the Control panel If you intend to use certain WAP services it might be necessary to set up a WAP account in the Control panel as well See Getting started with Internet and Messages on page 169 To start the browser Start the browser by pressin...

Страница 78: ...ss technology Find Enter text and search for the text in the page Find next Search for the next occurrence of the search text Scan text Go to the area with the greatest amount of text Back Move bact to the previously viewed page Reload page Reload the page Load all images Load all images of the page Page information Show the page information Bookmarks Open the bookmark view Edit menu Cut Cut out t...

Страница 79: ...the Jog Dial inwards to select the link Scroll up and down In an open page rotate the Jog Dial fast to scroll up and down Scan text function Press the Jog Dial inwards when no link is selected to scan the page for text The screen will navigate to the area with the greatest amount of text Repeat the operation to find the next greatest area of text Short forwards In Normal view change between the In...

Страница 80: ...en a specific Web page 1 Select Internet Open page 2 Enter the page URL or select a previously viewed page from the drop down list 3 Select Open To navigate through recently opened pages 1 Select to move back to previously viewed pages 2 Select to move forwards again To save a page for off line browsing 1 Select Internet Save page 2 Change the page name if required and select a folder to save it i...

Страница 81: ... please contact your service provider or IT department Signing documents You have to enter the signing PIN each time a signing operation is going to be performed User authentication request Whenever a user authentication is requested you have the possibility to either select a certificate and confirm the user authentication to select to continue anonymously or to cancel the connection If Connect a...

Страница 82: ...es Show all saved pages Unfiled Show the bookmarks that are not in a folder Edit folders Categorise your contacts in folders business personal and so on The contents in the Folders menu can change depending on the pages and bookmarks stored in the P910i Icons Bookmark Saved page Push message from the WAP service provider Signed document To open a bookmark 1 Select the bookmark text 2 The bookmarke...

Страница 83: ...he WAP accounts Other proxy settings should be set in the Internet accounts To set up the browser 1 Select Edit Preferences 2 Perform the setup according to the following Basic settings Enter the URL for the page to be shown when the browser is started from the Internet button either a page stored in the P910i or a page on the Internet Select the WAP account to be used when the home page is loaded...

Страница 84: ... the URL in WAP Push messages Select if you want to remove out of date messages automatically Select a sound that notifies you when a Push message arrives Set the size of the cache memory The cache is the part of the memory where viewed pages are stored Stored pages will load faster when you visit them again Select Clear history to empty the list of pages visited and cookies stored Select Clear ca...

Страница 85: ...r Name Give the game a name so you can return to it later if you have to interrupt it Notes Write a note about the game You play Choose to play white or black Against Select the level of your opponent Played Select if you want to play locally against your P910i or against another P910i user 3 Tap Play to start the game To play Chess 1 Select the piece you want to move The square where it is standi...

Страница 86: ...urther card is then dealt face up from the layout card Cards can only be played from the bottom of the piles To play a pile card it must have a face value of one more or one less than the layout card Aces are low and may not be played onto kings Jokers can be played onto any card and any card can be played onto a joker Play Solitaire Solitaire is only available with the flip open 1 Select the icon...

Страница 87: ...saging accounts to see the details of the messaging accounts on your P910i You can have any number of email accounts a typical configuration will be one business and one personal account When you set up a synchronization with your PC an account for synchronized email is automatically created on your P910i With the flip closed text and multimedia messages can be sent and received using the Jog Dial...

Страница 88: ...eived messages You can reply to forward and delete messages but not edit them Outbox Outbox contains messages that are ready to be sent If you are creating several messages and not using GPRS you can reduce connection time by saving them to Outbox and then connect and send them all at the same time To save an email message to Outbox 1 After composing your message select Send 2 Select Save to outbo...

Страница 89: ... that is subfolders will be shown on the same level as main folders Use the Get send command to download messages from the folders you have subscribed to The accounts in Messages When you open Messages a list of your accounts appears The top items in the list Create SMS and Create MMS are shortcuts for directly creating new messages An asterisk next to an account indicates that a message has arriv...

Страница 90: ...ou wish to add Tap to insert one of the smilies that appear Tap to insert a picture or an animation The pictures and animations last used appear Tap More to get more pictures and animations to use Tap New to draw a picture of your own Tap to insert a sound The sounds last used appear Tap More to get more sounds to use Tap to write bold text Tap to change the size of the text you write To format th...

Страница 91: ...hout using Contacts in a text message multimedia message or in an email enter a comma between each address Incoming multimedia messages To play a received multimedia message Open the MMS inbox and select the new message The first time a multimedia message is opened it plays automatically The next time you open the message you can play it by pressing the Play Button flip open or by choosing Play fr...

Страница 92: ... it 5 Tap if you want to change the time this page should be shown Default time is 5 seconds 6 Select Edit Background colour to give the message a background colour 7 Tap to add a new page to the multimedia message in which you can insert items 8 Select Edit Page order to change the page order in the message To enter the recipient s phone number 1 Select the address tab 2 Select To and select the ...

Страница 93: ...r played 1 Select the item so it is highlighted 2 Select Edit time 3 Set the Start which is the number of seconds before the item appears after the start of the page The default is 0 meaning show or play immediately 4 The default Duration is for the item to continue for the remaining duration of the page To change this un check Page time and change the duration to the required value in seconds Sta...

Страница 94: ...ted in Outbox To mark an email as urgent On the address tab select High in the Priority list To enter addresses from Contacts when writing an email 1 Select To 2 In the Select contact dialog select the check box for each entry you want to send the email to 3 Select Done Tip To enter several addresses manually without using Contacts in a text message multimedia message or in an email enter a comma ...

Страница 95: ...lect Add 2 Select the type of attachment you want to add and select the item Send as email You can send the entry you are viewing as an attachment to a new email from the following applications Music player Video Viewer Internet Calendar Contacts Tasks Jotter Sound recorder and Pictures To attach a Calendar entry to an email message 1 Open the entry in Calendar and select Calendar Send As 2 Select...

Страница 96: ...mory Stick See Folders on page 28 Downloading You can choose not to download large messages and receive just a header instead A header contains the subject line sender s details and date but not the full message To specify a size limit for email above which you only receive a header 1 Select Control panel Connections Messaging accounts Email select the email account Edit 2 Select Inbox 3 Select an...

Страница 97: ...isconnecting and connecting If your P910i is already connected to the Internet when you send an email it will remain connected after sending it If your P910i is not connected before sending an email it will connect and send the message and then disconnect Note You can send text messages while connected to the Internet If your connection is CSD or HSCSD it must be disconnected before you can make o...

Страница 98: ... connection see Secure tokens on page 166 you must have the flip open when you use Get send If the flip is closed you will see an error message Mark read and unread Use commands on the Edit menu to mark your received messages read or unread You can also make P910i show just unread messages If you have selected connection type IMAP for your email account the read or unread status will be updated fo...

Страница 99: ...tatus bar 2 Select Disconnect from the pop up menu 3 The dialog Do you want to disconnect from Internet Yes No appears 4 Select Yes If your service provider or network is unavailable Sometimes a message cannot be sent because your P910i cannot connect to a network Please check that the Messaging Account and Internet Account information in the Control Panel is correct If you have both GPRS and Dial...

Страница 100: ...c report When you receive an area information message the message automatically appears on the screen When you dismiss the information it will be stored in the Area info Inbox until it is replaced by a new message received on the same channel Please consult your service provider for more information about the availability of area information services and area information channel numbering See Area...

Страница 101: ...nd text or multimedia messages Contacts has two views when the flip is closed Menus In both list view and detail view you can use to access some of the P910i s contact functions The options will vary depending on the situation Menu options in list view SIM Display the contacts of the SIM card Send my card Send your owner card See Making an owner card on page 107 via infrared or Bluetooth wireless ...

Страница 102: ... Then either Scroll down to the desired contact Press a number key The first contact corresponding to the first letter of the key appears To search further continue to enter the letters with the keys Select Find from the menu and search for the contact 3 Select a contact and press the Jog Dial or press to open the detail view for a contact To return to the list view press Note To make a call to a ...

Страница 103: ...entry that begins with the first letter on a tab select the tab once To highlight the first entry that begins with the next letter on the tab select the tab again and again for the third letter on the tab Making a call with the flip open To open Contacts Tap or select Contacts in the Application launcher To make a call 1 If required change folder from the Folders menu 2 Scroll down to the desired ...

Страница 104: ... Contacts New 2 Enter the desired information When applicable select from the drop down menus To add a field to a contact 1 Select the contact 2 Select Edit Edit contact 3 Select Edit Add field 4 Select the field to be added from the drop down list 5 Select Add To add a DTMF tone sequence 1 Select a field and set it to Phone h Add a new field if necessary 2 Enter a p and then the tone digits Enter...

Страница 105: ...e and select Delete image To personalize the ring melody for a contact Contacts with a personalized ring melody are shown in Personal ring type in the folders menu 1 Against Ring Tone select Find sound from the drop down menu 2 If required change folder 3 Select the required sound 4 Tap and to preview the sound 5 Tap Select to set this sound for the contact Note The selected ring melody will only ...

Страница 106: ...ept the SIM Clicking the Select all check box will select all the contacts in the current folder 3 Select Send Move Delete 4 Follow the instructions for example select a folder or a sending method 5 Tap Done or Yes to confirm the action To search for an entry containing specific text 1 Select Contacts Find 2 Enter the text string you wish to search for 3 Select either In all fields or In Names Com...

Страница 107: ...s Send my card 2 Send the card using Send as Read more about sending items in Sending and receiving items on page 30 To view or edit your owner card Select Contacts View my card Preferences Contacts tab To sort the contact list and show the preferred phone number 1 Select Edit Preferences 2 Select the desired sorting option first name last name or company and tap Done 3 If you want a phone number ...

Страница 108: ... the Jog Dial To navigate to a specific date in the current view Tap the day week or month heading at the top of the display to show a calendar pop up in which you can select a specific date Creating calendar entries To create a new calendar entry 1 Select Calendar New and enter a short description of the entry This is the description you see in the calendar 2 Tap Unfiled the folder menu in the me...

Страница 109: ...e set to occur twice or more in a week For example eating lunch with a friend Tuesday and Friday every week Note You cannot repeat All Day Events To edit an entry 1 Open the entry by tapping it in the calendar 2 Make the changes in accordance with the instructions above Managing calendar entries To find a certain entry 1 Select Calendar Find 2 Enter a search word in the menu that appears 3 Select ...

Страница 110: ...neral tab 1 Select Edit Preferences 2 Select the General tab and fill in the required details To customize the alarm settings 1 Select Edit Preferences 2 Select the Alarm tab Now you can change the Alarm precedes event by setting the length of time before an entry that the alarm goes off To assign colours to your entries using the folders 1 In Calendar select the folders menu to the right in the m...

Страница 111: ...st 2 Select Unfiled the folder menu in the menu bar and select a folder to store the task in 3 Continue to enter information for the items on the detail page Completed Select the check box when the task is done This can also be done directly in the Tasks list Priority Set a priority for the task You can sort the tasks by priority Due date Select the check box to set a deadline for the task Select ...

Страница 112: ...te an entry Open the entry in the task list and then select Delete To restore a deleted entry Select Edit Undo delete To delete all completed entries In your Tasks list select Tasks Delete completed Note When you delete All Completed Entries they are deleted permanently and cannot be restored Moving task entries To move an entry to the Calendar Open the entry and select Tasks Move to Calendar The ...

Страница 113: ...k entries using Send as See Sending and receiving items on page 30 Preferences Select Edit Preferences to change the settings The following settings are available Display due dates Select whether or not to display them in the Tasks list Display completed Select whether or not to display them in the Tasks list This will not delete the completed tasks ...

Страница 114: ...ct Unfiled the folder menu in the menu bar and select a folder to store the jotter in 3 Select the drawing page tab to draw a sketch for this note 4 Select to save and close the note To edit a note while working with it For text select Edit Revert The text returns to its original state All changes are lost For sketches select Edit Undo This choice removes your last pen stroke If you change your mi...

Страница 115: ...same way as you draw with an ordinary pen Select to change colour Select to change the virtual nib Select to activate the eraser Tap the eraser again to re activate the pen All jotter files both text and drawings are automatically stored in the P910i The list view will be presented to you as soon as you start the Jotter application Managing notes To delete a note 1 Select the note in the notes lis...

Страница 116: ... save a sound recording 1 Select New A new sound recording is created 2 Select and start recording after the beep 3 Select to finish the recording The new sound recording is automatically saved in the list of sound recordings with the current date and time To append to the end of a previous sound recording 1 Select the required recording 2 Select and start recording after the beep 3 Select to fini...

Страница 117: ...ing as a ring signal see Sounds and alerts on page 147 Sending sound recordings You can send Sound recorder recordings via Bluetooth wireless technology infrared communication email or as a multimedia message To send a sound recording 1 Select Sound recorder Send as 2 Select how you want to send the sound recording See To send an item using Send as on page 30 for more information Note All other so...

Страница 118: ...ample 10 of 50 enter 50x10 The result is displayed when you tap the key Key functions You can copy and paste values to and from other applications by selecting Calculator Copy or Paste Values stored in the memory are retained while using other applications mr Tap once to retrieve a value from the memory and enter it into the screen Tap twice to clear the memory m Tap once to store an entered value...

Страница 119: ...s summer time and tap Done This is only required if you are currently in a country region with summer time 5 Tap the time box then tap the upper half of the hour or minute box to increase the number displayed or the lower half to decrease the number Use the am pm box to switch between am and pm This is only possible if you use the 12 hour time format Confirm by tapping outside the time picker 6 Se...

Страница 120: ...lling in another country region it can be useful to know what the time is in your home country region as well as the country region you are in The city you select as Other City will be displayed below the clock in Time To set the locations 1 Select 2 Tap Time Set location 3 Tap the Current Country Region box and select the country region you are in at that moment 4 Tap the Current City box and sel...

Страница 121: ...y be heard in the headset To activate an existing alarm Select the check box in the alarm slot is displayed on the status bar on the screen To set a new alarm 1 Select 2 Select one of the alarm slots 3 Select Time and choose at what time you want the alarm to go off Confirm by tapping outside the time picker 4 Select When and choose how often you want the alarm to go off Once The alarm will go off...

Страница 122: ...see Folders on page 28 The functions available differ depending on the document type Common functions are similar between the applications and are described first Common viewer and editor functions To open a document from an email or Internet page Select the document link The document viewer opens the document in the detail view To open a document from the list view 1 Select the Application launch...

Страница 123: ... In the toolbar you find icons for performing the most common word processing functions When you have finished editing and leave the document your P910i saves it automatically Quicksheet To save and copy the document to a special folder 1 In the list view select Quicksheet Copy to 2 Select where to save the document and select Copy To edit a document The first time you edit a document in native Mi...

Страница 124: ...ument Control the viewing from the toolbar at the bottom of the screen Bookmarks view Select a heading to go to the corresponding page You can also use the Jog Dial to select a bookmark and then use the icon below to go to the corresponding page Takes you to the selected page Returns you to the page view Previous page Next page Full screen To return to the normal view select the icon and de select...

Страница 125: ...op of the window Note There is an important distinction between External media and External other External other lets you view folders that have been placed on the Memory Stick by other equipment such as digital cameras This is the only place where these folders can be viewed From the file manager it is possible to reach the Control Panel storage manager see Storage manager on page 167 You can als...

Страница 126: ...ne or more folders or files Note Only empty folders can be deleted 1 Select the folders or files to delete 2 Select File Delete 3 Tap Delete To change properties for one or more folders or files 1 Select the folders or files to change 2 Select File Properties 3 Change the properties as required 4 Tap Done ...

Страница 127: ...teract and operate with the P910i It may provide services ranging from weather forecasts to the latest information from the stock market Online service are placed on your SIM card by your operator Note Contact your operator to find out which services are available for your account Note If this service is available on your SIM the Online services application will appear in the application list unde...

Страница 128: ...w sonyericsson com support Dial Up Networking Wizard Wizard for GPRS and HSCSD settings for using your P910i as a modem Drivers Drivers for modem and the USB cable connected SyncStation Refer to the online help for each specific application Installation of the Sony Ericsson PC Suite The Sony Ericsson PC Suite programs can be used with Windows ME 98 2000 and XP When inserting the CD in the PC a sta...

Страница 129: ...r P910i and used together with its applications Games Audio files Pictures Video clips MMS templates MMS editor Image editor Themes editor Opening the Multimedia CD for P910i When you insert the CD in the PC a start menu opens automatically Select an item from the menu and follow the instructions on the PC screen If the start menu is not automatically shown use the Run command in the Windows Start...

Страница 130: ... install in the P910i Applications which are not approved by Sony Ericsson are not guaranteed to work correctly or securely and users install them at their own risk Product failures caused by applications not approved or made for Sony Ericsson will not be covered by your warranty Installing applications on your P910i Installation file security Installation files in SIS format are typically used fo...

Страница 131: ... or Bluetooth wireless technology When connected an icon is shown in the status area to the right in the taskbar on the PC 2 Start the PC software Install Software and select the application sis file to install You can also open a sis file directly in your PC 3 Confirm to install the application in the P910i 4 Select target drive phone memory or Memory Stick Download to the P910i begins 5 Installa...

Страница 132: ...or more options regarding removal of applications and user data Some removed applications can be reinstalled from the PC Suite for the P910i and the multimedia CD Sony Ericsson Update Service With Sony Ericsson Update Service you can keep your phone updated with the latest P910i software When a new software version is available you can download and install it using the deskstand and an Internet co...

Страница 133: ... and Bluetooth wireless technology With Bluetooth wireless technology you can for example connect a cordless headset PC connectivity software Your P910i is delivered with a CD Sony Ericsson PC Suite This software must be installed in the PC you want to connect to See Installing applications on page 130 for more information You do not need to install the Sony Ericsson PC Suite if you only want to p...

Страница 134: ...On or On for 10 minutes You can also change the infrared port state with the flip closed in the Connections application To activate the infrared port on the PC 1 Right click in the status area to the right on the taskbar 2 Select Properties 3 Select the Infrared check box 4 Click Close Note Clear the Infrared check box when ready Send and receive You can send items via the infrared port beam in an...

Страница 135: ...less technology operation mode can also be changed with the flip closed through the Connections application When the Bluetooth wireless technology is activated appears on the screen and the left indicator light on top of your P910i flashes blue Pairing To let your P910i initiate pairing with another device such as a headset 1 In Control panel Connections Bluetooth Settings set Bluetooth to On Make...

Страница 136: ...ction activated and that it is in visible mode 2 In Control panel Connections Bluetooth Settings set Bluetooth to On 3 Follow the headphone s manual to initiate pairing on the headphone 4 In the Devices tab tap Add Your P910i searches for all devices in the vicinity and lists them 5 When asked for a passcode enter the headphone s passcode on your P910i 6 If in the future you want to allow the head...

Страница 137: ...ox appears with three options Delete View or Done Delete deletes the item View opens the associated application which shows the item Done saves it in the Beamed folder in Messages Bluetooth share You can make it possible for other users to transfer items from your P910i To make an item accessible select Send as Bluetooth Shared The item is then copied to the Shared folder accessible by other users...

Страница 138: ...the PC and then select the desired command Refer to the online help find in Help in the menu bar in the PC software to get more information about synchronization and backup Note If you have imported SIM phone book entries into Contacts in your P910i these entries will not be synchronized with the corresponding entries in your PC when synchronizing your P910i and PC You will instead get duplicates ...

Страница 139: ... the PC application you want to synchronize with might ask you to allow the P910i access to it Answer Yes and the synchronization continues To make a manual synchronization 1 Connect your P910i via cable infrared or Bluetooth wireless technology For more information see Connecting to other devices on page 133 2 In the PC click on on the PC taskbar and select Synchronise The synchronization starts ...

Страница 140: ...nized 2 Select the Enable task check box 3 Fill in the Task name or leave default 4 Fill in the Server database contact your corporate information services help desk or your service provider 5 The item you selected to be synchronized is now above the divider in the list Disabled items are below the divider 6 Repeat for other items Making a remote synchronization Open Applications Remote Sync and t...

Страница 141: ...on in your P910i can be restored from an earlier backup A backup from the phone can only be restored to the phone and a backup from a Memory Stick can only be restored to a Memory Stick To restore a backup 1 Turn on your P910i and connect it to the PC via cable 2 In the PC click on on the PC taskbar and select Back up and restore 3 Select your P910i in the menu that appears Several P910is can be b...

Страница 142: ... closed and the five first shortcuts in the Application picker area in flip open not the Application launcher The flip closed shortcuts can even be hidden if you wish Setting a background picture You can change the background image wallpaper for the standby screen in Control panel Device Display You can use any image stored internally or on a Memory Stick Tip More background images can be found on...

Страница 143: ...ng Line Identity service your P910i can display the contact s picture together with the other information when an incoming call is received with a CLI matching that contact not all numbers can be displayed The contact s picture is also displayed when you make a call to that person To choose the contact s picture size 1 Select Phone Edit Preferences Incoming call picture 2 Select the Show large pop...

Страница 144: ...nge the default ring signal that is played in all other cases To do this see Sounds and alerts on page 147 Note If your P910i finds that you have renamed moved or deleted a ring signal it will play the default instead Alarm tones and sound notification You can choose different sounds for alarms and notifications in these applications Note If you use an audio file as alarm or notification signal it...

Страница 145: ...our of your P910i device itself Application shortcuts Use this dialog to configure the application shortcuts shown in the flip closed standby view and the Application picker shortcuts in the flip open mode See Standby view on page 15 and Navigation on page 17 You can change the five shortcuts shown If you feel that the flip closed shortcuts obscure your background you can choose to have them hidde...

Страница 146: ...ck the keyboard lock will activate when the time runs out Read more about the automatic keylock in Automatic keylock on page 39 Occasionally you may find that you tap one item for example a button or menu option but another is activated Calibrating the screen ensures that the correct item is activated Tap Calibrate screen and follow the instructions Power tab You can set if the power save should s...

Страница 147: ...national Use these settings to set the locations shown in Time as well as the units for distances numerical separators and how currency values should be shown There are two tabs Location and Numbers On the Location tab Set Current country region and Current city to your current location Set Other country region and Other city to an alternative location for example your home location if you are abr...

Страница 148: ...arning The volume may be uncomfortably loud at the higher volume levels if the phone is close to your ear Exposure to excessive volume may damage hearing Note To set vibrating alert silent mode speakerphone or mute the microphone tap the volume icon on the status bar Calls tab These settings set incoming call alerts For more information see Ring signals on page 143 You may personalize the ring mel...

Страница 149: ...i See Entering text with the flip closed on page 32 and Entering text with the flip open on page 33 Use the settings on the Primary Alternative and Flip Closed tabs to set methods for entering text in your P910i If you load other text input software select it and adjust its settings here Themes You can set the look of the user interface by changing the theme To change the theme select a theme from...

Страница 150: ...e picker If the locations you have set under Control panel International are in a country region that currently has summertime daylight saving time you can adjust the time and date To turn daylight saving time on 1 On the Time date tab select Summertime select the check boxes for the zones that currently have daylight saving time 2 Select Done Format tab You can specify how you want the time and d...

Страница 151: ...itting devices will have an effect on the performance Read more about connecting to other devices using Bluetooth wireless technology in Connection via Bluetooth wireless technology on page 134 Bluetooth settings are shown on two tabs Tip You will probably find that the preset name of your P910i and of devices you pair it with are not very meaningful or easily recognisable It is a good idea to cha...

Страница 152: ...choose what network to use when you are outside your operator s area Choose if you want to search for a new network or use a preferred one You can also make a list of preferred networks Search mode Select between automatic or manual search for a network Select network Tap the button to get a list of available networks New search Tap the button to search for available networks Bluetooth on All Blue...

Страница 153: ... your P910i automatically uses to access the Internet You need to set up an Internet account before you can Access Web pages and download multimedia messages Set up an email account to send and receive email messages Tip A simple way of setting up an Internet account is to ask your service provider to send you a message that contains the required information to create an account automatically on y...

Страница 154: ...pear while a connection is being established the text GPRS is automatically added to names of GPRS accounts 3 Choose the Connection type for the type of account that you want to create GPRS or Dial Up 4 Continue entering settings as required These will differ depending on the type of account GPRS Dial Up or High Speed Dial Up New GPRS account For some accounts you may need to make advanced setting...

Страница 155: ...ith This arrangement can be used for connections to Remote Sync servers or within a company network If this setting is needed your company s Information Services department or Remote Sync provider must give you instructions Other If your ISP supports Point to Point Protocol PPP extensions you can select the Enable PPP extensions check box PPP extensions allow your P910i to provide features such as...

Страница 156: ...y of your connection will be restored Select the check box Post connect terminal if The login script of the account that you are setting up requires that you input certain information or you will need to respond to prompts from the Internet accounts You are connecting to a Dial Up account that uses Secure Access generated by a separate smart card or password generator Proxy For an explanation of t...

Страница 157: ...transfer Icon your P910i may not receive incoming calls As soon as the transfer stops Icon incoming calls will be accepted Setting the Preferred mode lets you choose how you want to use your P910i Select GPRS only if you do not want to be disturbed by incoming phone calls while browsing the Web All incoming voice and GSM data calls are rejected If you disconnect from the Internet incoming calls ca...

Страница 158: ... on the tabs Email You can have any number of email accounts To receive and send email you must first set up an Internet account if one is not already set up See Internet accounts on page 153 SMS You can only have one SMS Short Message Service account The settings on this tab also apply to EMS Extended Message Service messages MMS You can only have one MMS Multimedia Messaging Service account To r...

Страница 159: ...t are waiting in your Outbox will not be sent at the same time Email account Outbox tab settings Outgoing server address Your Internet Service Provider ISP supplies you with its Outgoing server address which identifies the computer through which your outgoing email messages are sent Use SMTP authentication Some SMTP servers might also require authentication when sending email In that case select t...

Страница 160: ...s you to Secure password authentication A secure connection means that all information including your username password and all messages is encrypted to maximize security while you are connected to the Internet In contrast secure password authentication means that only your password is encrypted Email account Advanced tab settings Messaging accounts SMS tab settings SMS Service centre address The ...

Страница 161: ...ages No restrictions the size of the incoming messages does not matter all messages will be received Smaller than messages smaller than the limit will be received bigger messages will be deflected MMS Advanced settings tabs Send The values you give these settings will be default for all multimedia messages that you send You can of course choose other values for an individual message in Messages Yo...

Страница 162: ...red not active To add a new channel 1 Select New 2 Enter the number of the new channel in the New Channel dialog Channel numbers can be from 0 to 999 If there are too many channels defined New will be disabled and you will see a message Maximum channels on SIM Channel numbering is operator dependent Please consult your network operator for information To turn a channel on or off Select the channel...

Страница 163: ... list and Edit or Delete an existing account Note You access WAP pages through an Internet Service Provider ISP so when you create a WAP account you must choose one of your existing Internet accounts or first create a new one To create a new WAP account 1 Enter the name of the WAP account 2 Select the Internet account you want to use Preferred indicates the account set as preferred in the Internet...

Страница 164: ...k The certificates on your P910i have been created and issued by an independent organization that ensures their authenticity Security information Security information is displayed when Certificate manager cannot be sure of the origin of the page or software For example security information will be displayed if The certificate on a page has expired The identity of a software manufacturer cannot be ...

Страница 165: ...our P910i comes with one Memory Stick When you format a disk you delete all the information on it including any applications that you may have installed You also delete all information placed on it by other devices these folders are hidden except in File Manager IP Security manager The IP security manager displays stored policies and only one policy can be activated at a time This is used for secu...

Страница 166: ...ata files from the Multimedia for P910i CD or from the Web If you want to keep installed applications clear the Delete user installed applications check box Secure tokens If you need access to a network that requires secure access often known as strong authentication for example a corporate intranet you can set up the Internet account you use to log in to that network to use secure access and gene...

Страница 167: ...e In Messages delete any old messages from your Inbox or Sent folders In Calendar delete all entries in a specified time period by selecting Calendar Remove entries in your list of entries In Tasks delete all completed entries by selecting Tasks Delete completed in your list of entries Throughout your P910i use folders as you create and receive information to speed up housekeeping later Deleting o...

Страница 168: ...he WIM items list changes content dynamically displaying only the keys that are protected by the selected PIN and also have an associated certificate Other keys that are protected by the selected PIN but do not have an associated certificate are not shown in the WIM item list This is the case when WIM PIN PIN G is selected Note The PIN G applies to the whole WIM and any items that do not have a di...

Страница 169: ...or retailer may have pre installed services check with them Connection type When your P910i connects to a service provider it will use a GSM or GPRS network provided by a network operator Many network operators offer both GPRS and GSM services The connection type defines which network your account uses to connect to the Internet GPRS Internet accounts use the GPRS network and Dial Up Internet acco...

Страница 170: ...m support To check that your SMS messaging settings are correct 1 Select Control panel Connections Messaging accounts SMS 2 Check the information for example the address of the service centre Accepting new Internet or Messages settings New phone set up messages will appear in the Auto setup account inbox of Messages Phone set up messages for email accounts will however be found in your SMS message...

Страница 171: ...ting to the corporate network to access your work email account Your network operator in the case of SMS message and Cell Broadcast Services The dialog has four tabs one for each type of messaging service email The provider of your email service or for a corporate account your information services manager can provide you with the necessary details All settings are described in Email tab on page 15...

Страница 172: ...ount you must choose one of your existing Internet accounts or first create a new one Manually set up a WAP account Instead of setting up a WAP account automatically you can enter the settings manually from Control panel Connections WAP accounts First collect all the information you will need You can obtain this information from the WAP service provider or if you are connecting to a corporate netw...

Страница 173: ... will be used when you make a DUN connection You can view or change the DUN entries created with the wizard using the standard Windows DUN user interface The Dial Up Networking Wizard software included in the Sony Ericsson PC Suite must be installed in your PC and your P910i must be connected to the PC via cable infrared or Bluetooth wireless technology See Connecting to other devices on page 133 ...

Страница 174: ...wser or email client GPRS connection information Icons on the status bar let you overview the information on data connection calls A combined signal strength and GPRS signal icon provides information on the GPRS service status The GPRS connection status appears above the signal strength icon There are three states for the icon unavailable available and attached The HSCSD CSD and GPRS icons are dis...

Страница 175: ...on an account 1 Select an account in the list 2 Information on the account is shown The data log is updated dynamically Buttons allow you to delete or reset the current data These buttons are disabled during an active or suspended connection To delete the log for an account 1 Select an account in the list 2 Select GPRS data log Delete To reset the log of an account 1 Select an account in the list ...

Страница 176: ...eed to hand in your P910i for repair please note that you may lose information and content that you have saved in your P910i You are advised to make a copy of such information make a backup before handing your P910i in for repair Start up problems P910i will not start Handheld phone recharge or replace the battery Make sure the contacts on the battery and charger are clean and avoid charging the b...

Страница 177: ...layed there is no network within range See Telephone does not work on page 177 Communication problems Telephone does not work The received signal can be too weak possibly because you are being shielded from the signal Check your display signal strength indicator Move outdoors or up from the ground to obtain a sufficiently strong signal Make sure the P910i is not set in Flight mode Your P910i might...

Страница 178: ...ntre phone number Check the settings in the Control panel Contact you service provider or visit www sonyericsson com support and use the MMS phone setup message generator Make sure that Flight mode is deactivated Phone memory might be full Delete some pictures or music for example Cannot use e mail Check with your service provider that your subscription includes email The settings might not be cor...

Страница 179: ...in the Sync Station In the PC open My P910i and browse through the P910i file system to find the picture Cannottransfer items with Bluetooth wireless technology Make sure that Bluetooth wireless technology is activated Make sure that the devices are in range with each other Maximum range is 10 metres Cannot establish connection with a Bluetooth wireless technology handset or handsfree Make sure th...

Страница 180: ...ormation Storage Wizard Tap the icon in the status bar to start the Storage Wizard or start it in the application launcher Then use the storage wizard to move items from the P910i internal memory to a Memory Stick or remove items from the P910i memory Storage Manager You can also use the storage manager to free up memory Select Applications Control panel Device Storage manager A list of all applic...

Страница 181: ...talled a new language you have to turn your P910i off and then on again for the change to take effect Incorrect character appears when keyboard key is pressed The wrong keyboard type can be specified in the control panel Make sure the correct settings are defined in Control panel Device tab Flip settings Flip keyboard Applications stop responding Close the flip and open it again Turn off the P910i...

Страница 182: ... it is turned on it emits low levels of radio frequency energy also known as radio waves or radio frequency fields Governments around the world have adopted comprehensive international safety guidelines developed by scientific organizations e g ICNIRP International Commission on Non Ionizing Radiation Protection and IEEE The Institute of Electrical and Electronics Engineers Inc through periodic an...

Страница 183: ...attempting to clean it The AC power adapter must not be used outdoors or in damp areas Never alter the cord or plug If the plug will not fit into the outlet have a proper outlet installed by a qualified electrician Emergency Calls Mobile phones operate using radio signals which cannot guarantee connection under all conditions Therefore you should never rely solely upon any mobile phone for essenti...

Страница 184: ...in accordance with the terms and conditions stipulated herein Sony Ericsson and its service partners reserve the right to charge a handling fee if a returned Product is found not to be under warranty according to the conditions below Please note that your personal settings downloads might be lost when the Product is repaired or replaced Conditions 1 The warranty is valid only if the original proof...

Страница 185: ...n or limitation of incidental or consequential damages or limitation of the duration of implied warranties so the preceding limitations or exclusions may not apply to you The warranty provided does not affect the consumer s statutory rights under applicable legislation in force nor the consumer s rights against the dealer arising from their sales purchase contract European Union EU If you have pur...

Страница 186: ...nmental information look at the Environmental Declaration for P910i at www sonyericsson com Declaration of Conformity We Sony Ericsson Mobile Communications AB of Nya Vattentornet S 221 88 Lund Sweden declare under our sole responsibility that our product Sony Ericsson type FAB 1021012 BV and FAB 1021012 CN and in combination with our accessories to which this declaration relates is in conformity ...

Страница 187: ...g 1 4 8 or 24 bit colour depth No compression so files can be large Bookmark A URL and header title stored in the phone enabling the user to go directly to a Web or WAP page bps Bits per second rate of data flow cHTML A version of HTML optimised for small devices CLI Calling Line Identity Shows the number of the person calling you in your mobile phone display Your P910i will also display the name ...

Страница 188: ...hich regulates radio communications GIF Graphics Interchange Format Format for storing images which also supports animated images Highly compressed by limiting the colour palette to 16 or 256 colours It is one of the two most common file formats for graphic images on the World Wide Web The other is JPEG GPRS General Packet Radio Services A radio technology for GSM networks that adds packet switchi...

Страница 189: ...transmit HTML pages to the client browser IMAP4 Internet Message Access Protocol the latest version is IMAP4 is a standard client server protocol for accessing email from your local server The email is received and held for you by your IMAP server You or your client email receiver can view just the heading and the sender of the letter and then decide whether to download the mail IrDA The Infrared ...

Страница 190: ...ports photo quality pictures and sounds in WAV MIDI AMR or Melodies format MP3 MPEG 1 Audio Layer 3 is a standard technology and format for compression a sound sequence into a very small file about one twelfth the size of the original file while almost preserving the original level of sound quality when it is played MPEG 4 The Moving Picture Experts Group develops standards for digital video and d...

Страница 191: ...es on file with data compression but without lowering of quality loss of information POP3 Post Office Protocol 3 is a standard client server protocol for receiving email The email is received and held for you by your POP server Periodically the P910i Messages application can check your mail box on the server and download any mail Protocol In information technology a protocol is the special set of ...

Страница 192: ... a universal protocol for data synchronization developed by the SyncML Initiative Ltd TCP IP Transmission Control Protocol Internet Protocol TCP IP is the basic communication language or protocol of the Internet It can also be used as a communications protocol in a private network either an intranet or an extranet TLS Transport Layer Security Used by Web browsers for example URL Uniform Resource L...

Страница 193: ...ere is tremendous interest in VPNs over the Internet especially due to the constant threat of hacker attacks WAP Wireless Application Protocol is a specification for a set of communication protocols to standardise the way that wireless devices such as cellular phones and radio transceivers can be used for Internet access including email the World Wide Web and newsgroups WAV A Wave file is an audio...

Страница 194: ...plications W3C The main standards body for the WWW xHTML Extensible Hypertext Markup Language A reformulation of HTML 4 01 in XML Being XML means that XHTML can be viewed edited and validated with standard XML tools At the same time it operates as well as or better than HTML 4 in existing HTML 4 conforming user agents XML Extensible Markup Language An initiative from the W3C defining an extremely ...

Страница 195: ...sages and third party applications up to 64 MB Additional storage Memory Stick Duo up to 128 MB supported Memory Stick PRO Duo up to 1 GB supported 32 MB Memory Stick Duo supplied plus adapter Operating temperature 15 to 55 C Screen type TFT Screen size Flip closed 208 x 208 pixels 40 x 40 mm Flip open 208 x 320 pixels 40 x 61 mm Pixel size 0 192 x 0 192 mm or 132 ppi Pixels Per Inch Colour resolu...

Страница 196: ... Rx 36 2 53 6 62 4 85 6 Tx 9 05 13 4 15 6 21 4 9 6 kbps per time slot 14 4 kbps per time slot 2 1 Rx 19 2 28 8 Tx 9 6 14 4 Personal ring tones supported formats Sound clips as personal ring tones and default ring tone MP3 AMR AU iMelody MIDI RMF Beatnik and WAV Image size 640 x 480 pixels VGA 320 x 240 pixels QVGA 160 x 120 pixels QQVGA 176 x 144 pixels QCIF video Colour depth 24 bit 16 million co...

Страница 197: ...e Profile cHTML WAP version 2 0 Scripting Compiled WML scripts Style sheets WCSS Images BMP WBMP GIF including animated JPEG PNG Security WTLS Class 1 2 3 WTLS Cipher RC5 with key length 128 TLS SSL TLS Cipher RC4 with key length 128 SignText WIM WIM interface including SIM WIM SWIM Cache 15 120kbyte user configurable 30kbyte default Content download OMA Download OTA ver 1 0 Bearer GSM and GPRS Co...

Страница 198: ...stalled viewer for Microsoft Word documents cannot be used to view files in Rich Text format RTF Incoming mail server support POP3 IMAP4 Outgoing mail server support SMTP Content coding MIME compliant Security SMTP authentication SSL encrypted IMAP4 and SMTP Attachments Receiving and sending Microsoft Word Microsoft Excel Adobe Acrobat PDF ...

Страница 199: ...ing entries 108 managing entries 109 preferences 110 sending and receiving entries 110 Calibrate 146 Call costs 57 Call list 47 Call waiting 55 Calling cards 56 Calls answering 42 45 conference 46 diverting 54 emergency 42 flip closed 40 flip open 43 incoming 44 international 41 making 40 43 options 43 45 preferences 53 rejecting 42 45 restricting 55 retrying automatically 44 speed dialling 44 two...

Страница 200: ... open 16 Folders 28 Folders in Messages 88 Formatting disks 164 G Games 85 General functions 28 Getting help 31 GPRS 169 174 H Handsfree 54 Handwriting recognition 34 accented letters 2 35 extended characters 36 letters 2 35 numbers 2 35 Help texts 31 I Icons 21 Image editor 66 Image status 62 Importing phone book entries 14 Incoming call picture 53 Incoming calls 44 Increasing ring 148 Indicator ...

Страница 201: ...120 handwriting 2 35 O Off 14 On 14 Online services 127 Options menu 16 Owner card 107 P P910i Locks 37 P910i overview 11 P910i package 10 PC connectivity software 133 PC Suite for P910i 128 Pdf documents viewing 122 Personalizing your P910i 142 Phone book importing entries 14 Pictures 64 drawing 115 sending and receiving 65 taking 61 viewing 64 PIN 37 PIN2 38 PUK 37 R Radio Frequency 182 Recordin...

Страница 202: ... Text input 32 147 Text messages 89 Themes 142 Time 119 alarms 121 locations 120 number formats 120 settings 119 workdays 120 Time date settings 164 Tone based services 49 Touchscreen lock 39 Transfer items with Send As 30 Troubleshooting 176 TTY settings 57 TTY support 50 Turning on and off 14 U Uninstalling applications 132 167 Updating the software 132 User greeting 150 V Vibrating alert 45 Vid...

Отзывы: