


2
Installation Preparation
Prior to installing the Tempo SATA E2P into your system and
connecting any drive enclosures, you should familiarize yourself
with the parts to be installed. We also strongly recommend
that you read the sections in your computer’s user manual that
address PCI Express card installation.
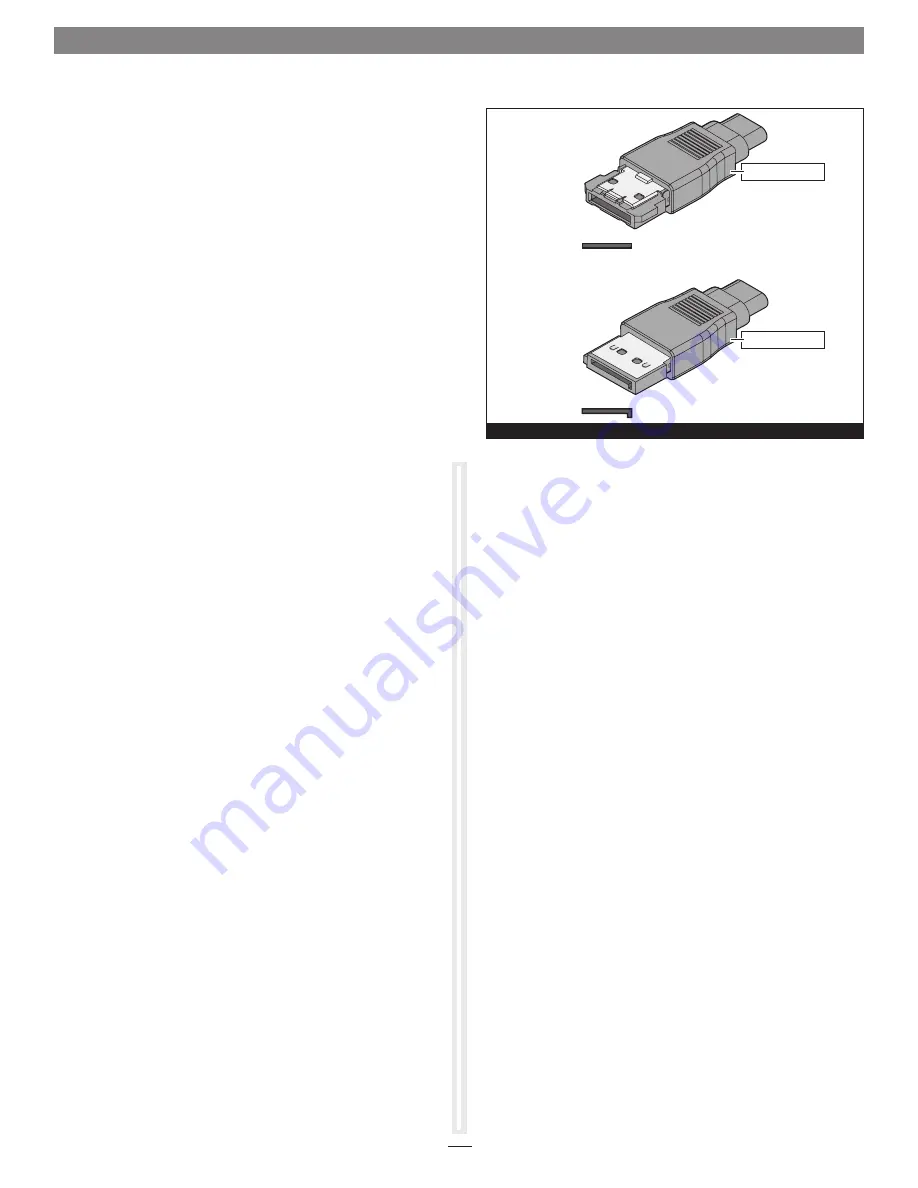
Data cables with eSATA connectors are required for use with
the Sonnet Tempo Card and drive enclosures. Bare SATA drives
and some old drive enclosures use SATA I connectors; use of
these devices with the Tempo card require cables with a SATA I
connector on one end. SATA I to eSATA cables are available
separately from Sonnet.
Figure 1
shows both eSATA and SATA I
connectors.
Hardware Installation Steps for All Users
Before installing software, you must first install the Tempo card.
1.
Shut down you computer, and then open it to access
the expansion card area (PCI Express slots); refer to your
computer’s user manual for specific information.
2.
Locate an available PCI Express slot and remove its access
cover. Windows users skip to the next step; Mac OS users:
• Mac Pro (Mid 2012), Mac Pro (Mid 2010), Mac Pro (Early
2009) and pre-2008 Mac Pro users may install the card
into any available slot; Mac Pro (Early 2008) users must
only use slot 3 or 4.
• Power Mac G5 users should use slot 2 or 4, or slot 3 if
necessary.
3.
Remove the Sonnet card from its packaging, and then
install it into the slot;
make sure the card is firmly seated
and secured
.
4.
Close your computer. Windows users, please skip to next
page.
Software Installation Steps for OS X Users
1.
Turn on your computer; depending on the computer and
operating system used:
• If you installed the card into a Mac Pro (Mid 2012), Mac
Pro (Mid 2010), Mac Pro (Early 2009), Mac Pro (Early
2008), or Power Mac G5, proceed to step 2.
• If you installed the card into a pre-2008 Mac Pro,
depending on which version of Mac OS X your computer
is running, Expansion Slot Utility will open. If it does
not open by itself, you must do so manually (Expansion
Slot Utility is located in the /System/Library/CoreServices
folder). Select the appropriate configuration (your Sonnet
card is an x1 card), and then click Quit if the default
configuration was appropriate, or click Save and Restart if
you changed the configuration.
2.
Log onto the Internet. Go to http://www.sonnettech.com/
support/kb/kb.php, click on the Computer Cards link, and
then click on the PCIe Cards link.
3.
Locate and click the Tempo SATA E2P link, then click the
Driver link, and then click the Tempo SATA E2P Driver
(OS X) appropriate for your setup.
4.
Click the Download Now button. If your browser is set to
open files automatically after downloading, the software
installer will launch automatically; skip to step 8. Otherwise,
the file will be downloaded.
5.
Locate the file you just downloaded and double-click it; a
new window will appear.
6.
Double-click the Sonnet installer package icon to launch the
installer.
7.
When the Welcome to the SonnetSATA E1P/E2P/E342P Installer
window appears, click Continue.
8.
When the Important Information window appears, click
Continue.
9.
When the Software License Agreement window appears, read
the license, click Continue, and then click Agree.
10.
When the Select a Destination window appears, accept the
default destination or choose a new destination, and then
click Continue.
11.
When the Easy Install window appears, click Continue, enter
your name and password, and then click OK.
12.
While the driver is installed, a progress bar appears. When
the Software was successfully installed screen appears, click
Close; you may now use the Tempo card with your system.
Skip to Formatting Drives Connected to Tempo SATA E2P on
the next page.
Quick Start Guide for Tempo SATA E2P
eSATA connector
SATA I connector
Figure 1
eSATA connector
SATA
I
connector


