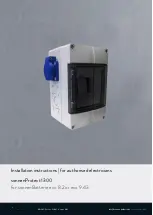
Installation instructions | for authorised electricians
sonnenProtect 1300
for sonnenBatterie eco 8.2 or eco 9.43
KD-345 • Part no. 22041 • Version X02
[email protected] •
sonnenbatterie.de
Страница 1: ...Installation instructions for authorised electricians sonnenProtect 1300 for sonnenBatterie eco 8 2 or eco 9 43 KD 345 Part no 22041 Version X02 info sonnenbatterie de sonnenbatterie de...
Страница 2: ...Email Document Document number 345 Part number 22041 Version X02 Valid for UK Publication date 19 02 2018 IMPORTANT Read this documentation carefully before installation operation Retain this documen...
Страница 3: ...nProtect 13 4 Transport and storage 14 5 Mounting 15 5 1 Scope of delivery 15 5 2 Selecting the installation location 15 5 2 1 Requirements for the installation location 15 5 2 2 Observe minimum dista...
Страница 4: ...1 1 Switching on the miniature circuit breaker 27 8 1 2 Switching on the storage system 27 8 1 3 Switching on the grid voltage 27 8 2 Testing function 27 8 3 Setting up the sonnenProtect 28 8 3 1 Gen...
Страница 5: ...nations are used in this document Complete designation Designation in this document sonnenBatterie eco 8 2 Storage system sonnenBatterie eco 9 43 sonnenProtect 1300 sonnenProtect 1 3 Explanation of sy...
Страница 6: ...1 Information about this document 6 36 Installation instructions sonnenProtect 1300 Symbol Meaning List Table 1 Additional symbols...
Страница 7: ...ed the nominal power in continuous operation and maximum power when switched on of the sonnenProtect The sonnenProtect must only be used at suitable installation location The transport and storage con...
Страница 8: ...ng order Safety devices must never be overridden blocked or tampered with The interfaces of the sonnenProtect and the storage system must be wired in accordance with the product documentation The numb...
Страница 9: ...n approx 5 seconds Dimension Weight Dimensions H W D in mm 235 150 124 Weight in kg approx 2 kg Safety Protection class I PE conductor Degree of protection IP21 Overvoltage category III Protective fun...
Страница 10: ...System components sonnenProtect 1 sonnenProtect 2 Plug outlet 3 F1 P Z6 miniature circuit breaker 4 K2 P insulation monitor 3 2 2 Control and display elements 5 20 40 60 80 100 ON AL Test Reset 4 6 3...
Страница 11: ...errupted for as long as the test key is held 5 Reset key No function 6 RAL setting Turning sets the RAL alarm value recommended setting 100 k V Table 3 Description of the control and display elements...
Страница 12: ...tivated ON LED lights up This protects against indirect contact If an insulation fault occurs RE RAL the insulation monitor terminates the connec tion to the plug outlet The AL LED lights up When the...
Страница 13: ...g electrical voltage Wait five minutes after switching off capacitor de energising time CE mark The product meets the requirements of the applicable EU Directives WEEE mark The product must not be dis...
Страница 14: ...tallation instructions sonnenProtect 1300 4 Transport and storage Transport and storage conditions are defined in the product documentation of the storage system Observe the same transport and storage...
Страница 15: ...including connection cable 2 M20 cable gland 3 Mains filter 4 Pre assembled strand PE 5 Pre assembled strand N 6 Pre assembled strand L 7 Locking nut 8 Wire end ferrule only for installation with eco...
Страница 16: ...the storage sys tem if possible This keeps the cable length as short as possible The minimum distances ensure that the sonnenProtect can be easily reached and there is sufficient space for installati...
Страница 17: ...carry out electrical work 6 1 Removing the inverter cover NOTICE Contact with the components inside the inverter Damage to components due to electrostatic discharge ESD Use ESD compliant equipment Do...
Страница 18: ...the end stop on the left side of the relay K1 on the mounting rail Install the mains filter on the mount ing rail 6 2 2 Case 2 Not enough free space on mounting rail LINE LOAD N L N L Illustration 10...
Страница 19: ...my plugs on the top of the storage system Tools Screwdriver with a thin blade 0 4 mm Remove the dummy plug 1 A screwdriver with a thin blade can be used for this purpose 6 3 2 Installing the cable gla...
Страница 20: ...t through the cable gland to the inside of the storage sys tem 6 3 4 Connecting the cables and strands Tools Spanner 10 mm 5 Nm Stripping pliers Strip approx 1 cm from the end of the black and grey ca...
Страница 21: ...AD N L N L 5 6 4 2 Illustration 14 Wiring inside the storage system 1 Inverter 2 Connection cable of the sonnenProtect 3 Cable gland 4 Mains filter 5 Earth bolt 6 Self locking nut 6 4 Completing insta...
Страница 22: ...is will ensure that the full scope of the storage system and sonnenProtect is available at all times 7 1 2 Measurement concept used The GP measurement concept setup 4 is recommended when installing a...
Страница 23: ...do so proceed as follows Remove the clamp on current transformer at measurement point C consump tion and install it at measurement point G grid Change the power meter setting and select the Setup 4 me...
Страница 24: ...ration 16 Dummy plugs on the top of the storage system Tools Screwdriver with a thin blade 0 4 mm Remove the dummy plug 1 A screwdriver with a thin blade can be used for this purpose 7 3 2 Installing...
Страница 25: ...ferrule of the green yellow strand of the connection cable and attach the supplied cable lug instead Mount the supplied wire end ferrules 7 to the grey and black strand Install the supplied orange X3...
Страница 26: ...nenProtect 1300 4 6 5 3 8 7 X3 X2 1 LINE LOAD N L N L 2 Illustration 19 Wiring inside the storage system 1 Inverter 2 Connection cable of the sonnenProtect 3 Mains filter 4 Earthing bolt 5 Cable lugs...
Страница 27: ...uc tions 8 1 3 Switching on the grid voltage Switch on the grid voltage using the AC miniature circuit breaker 8 2 Testing function Before the sonnenProtect is operated a function test must be carried...
Страница 28: ...re installing the sonnenProtect on the premises of the storage system operator Conditions There must be an Internet connection You must have access details for the Internet portal Enter the following...
Страница 29: ...r preferred language and log in as Installer The password was given to you throughout the certification training for the storage system The Dashboard page appears Click on the button Commissioning Ass...
Страница 30: ...missioning 30 36 Installation instructions sonnenProtect 1300 Click on the button Settings Select Backup Buffer Change the percentage of the Backup Reserve to a desired value Illustration 23 Settings...
Страница 31: ...hat is too high is connected to the plug outlet of the sonnenProtect Only connect consumers with a power consumption that does not exceed the nominal power of the sonnenProtect Only connect consumers...
Страница 32: ...ely 10 1 Switching off the plug outlet Switch off the F1 P miniature circuit breaker The plug outlet of the sonnenProtect is switched off 10 2 Disconnecting the sonnenProtect from the power supply Bef...
Страница 33: ...tion of the sonnenProtect Danger to life due to electrocution The sonnenProtect must only be uninstalled by authorised electricians 11 2 Disposal Illustration 24 WEEE symbol The sonnenProtect must not...
Страница 34: ...sonnen GmbH Am Riedbach 1 D 87499 Wildpoldsried...
Страница 35: ......
Страница 36: ......