2 Configuration & Controls - DHY-04G, DHY-04HD
6
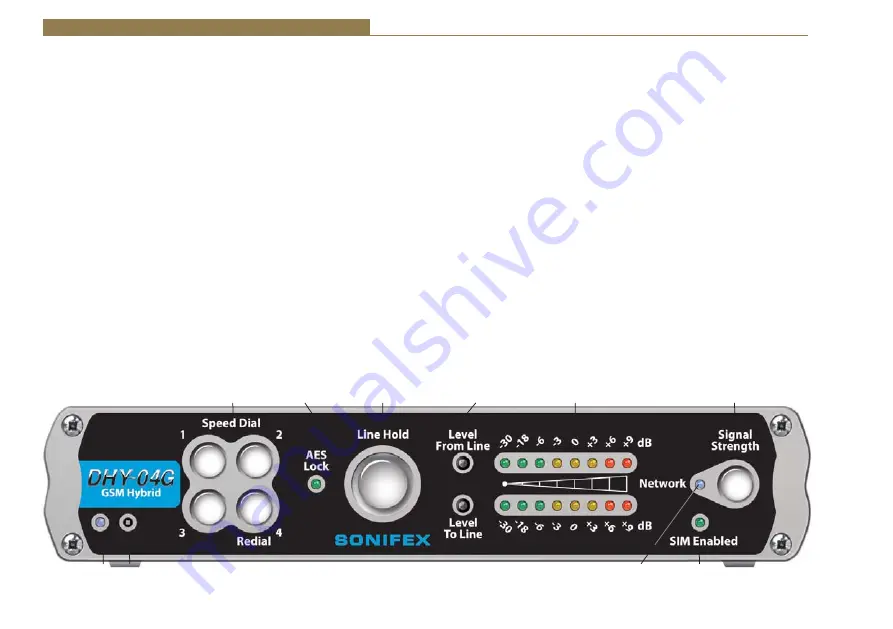
Figure 2-1: Front Panel Controls
Line Hold/Connect
Button
Speed Dial
Buttons
AES Lock
LED
Gain Switches
Level Adjustment
LED Bargraphs & Signal
Strength Indicator
Signal Strength
Button
2 Configuration & Controls - DHY-04G, DHY-04HD
to redial the last number. The numbers are configured using the embedded
webserver.
AES/EBU Lock LED
This is a red/green LED with green indicating a successful lock to the
incoming AES/EBU signal, i.e. a valid AES signal is present. The LED is red for
a non-valid AES/EBU input.
Line Hold/Connect Button
This is the front panel button used to connect calls to, and disconnect calls
from, the telephone line. The line connect button flashes when an incoming
call is detected and illuminates to indicate the call has been connected.
Operation of this button can be remotely controlled by GPI.
Gain Switches (Level To & From The Line)
These switches allow gain/attenuation to be applied to the incoming &
outgoing analogue audio. Each switch has 3 positions. Rotating the switches
clockwise give gains of -6dB, 0dB & +6dB. The normal position for both the
Power
LED Indicator
Reset Button
SIM Enabled LED
Network LED
Front Panel Controls
Power LED Indicator
The power LED indicates that the equipment is powered and operational
when illuminated.
Reset Button
In the unlikely event that the DHY-04G/HD unit fails to respond, press the
reset button to reboot the unit.
In extremis (especially valuable when the network settings have been
incorrectly entered) the unit can clear the settings to factory default by
pressing the reset three times in succession as follows – press reset; wait
for 7 seconds; press reset again; wait for 7 seconds; press reset again and
the unit will clear all the current settings and return to the factory defaults.
Speed Dial Buttons
Press the appropriate button to call Speed Dial settings 1-4. Press and hold
buttons 1-3 to call Speed Dial numbers 5-7 or press and hold Speed Dial 4


