


6
© 2012 Observint Technologies, Inc. All rights reserved.
Click to open/close the submenu
6. Click the
Apply
button to complete the recording mode setup for the camera.
7. Setup the recording modes for other cameras in the system as needed.
Step 6. Live view
Click the
Video
button in the header to return to the video display. Verify that you can see a thumbnail-
sized video stream from your camera in the
Camera List
near the top of the window.
To see and expanded view of a camera, drag and drop the thumbnail for the camera into a cell in the View
frame. See above.
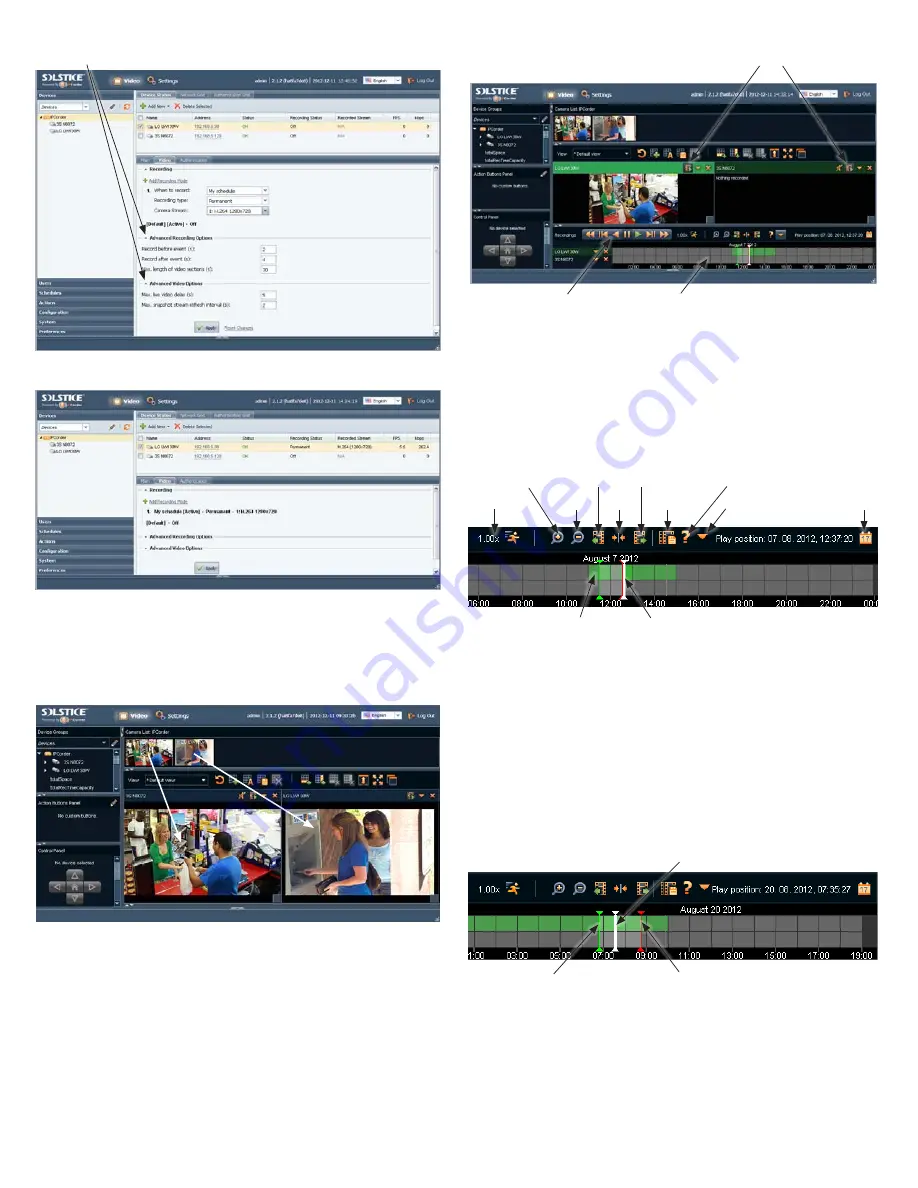
Step 7. Playback and export recordings
1. In the Video view, click the
Recordings
icon for the camera you want to playback or download
video from. A timeline will open at the bottom of the window indicating when video and other
recordings were made. In the screen below, the Playback icons were selected for both cameras.
Recordings icons
Playback control buttons
Timeline
2. To play recorded video (see screen capture below):
a. Click on the camera used to record the video you want to payback.
b. Click the calendar icon, then select the day on which the video was recorded.
c. In a section of the timeline that shows recorded video (green segment, see below), click (once)
the time at which you want to start playing video. The current play position is indicated by a
white marker.
Shift left
Center
Payback rate
Expand
Contract
Open Legend
Open calendar
Export video
More actions
Shift right
Play position marker
(white)
Video recorded area
(green)
Controls on the time line include:
-
Click the
Expand
icon to widen the timeline
-
Click
Shift left
icon
or
Shift right
icon to shift the time span
-
Click the
Playback rate
icon to adjust the playback speed.
d. Click the Play button (
u
) in the playback controls to watch the video. Click the Pause icon
(
;
) to Stop.
e. To mark a segment of the time line for repeated playback (or export), drag your mouse cursor
from the start of the segment to the end of the segment. The segment you selected will be
indicated by a green marker at the start and a red marker at the end.
Playback start marker (green)
Playback end marker (red)
Play position (white)
f. Click anywhere between the red marker and the green marker to set the play position, then click
the play button to continuously replay the segment. Click the Pause icon (
;
) to stop.
g. To export the video segment between the green marker and the red marker:
i.
Stop the video playback.
ii.
Click the
Export video
icon.


