


Installation
Page 9
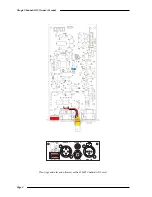
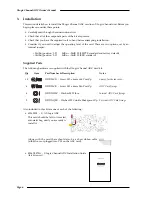
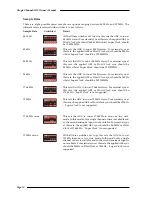
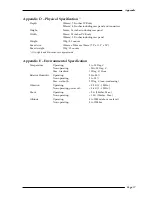
3. Remove the ADC card from its sealed anti-static bag, either fold back or remove and place to one
side the short ribbon cable attached to PL5. Slide the ADC card through the apperture in the rear
of the XLogic unit that was revealed in step 2. above. It may be necessary to lift the ‘OUTPUT’ and
‘Gnd’ (S1) cables on the main PCB to avoid them snagging under the ADC card.
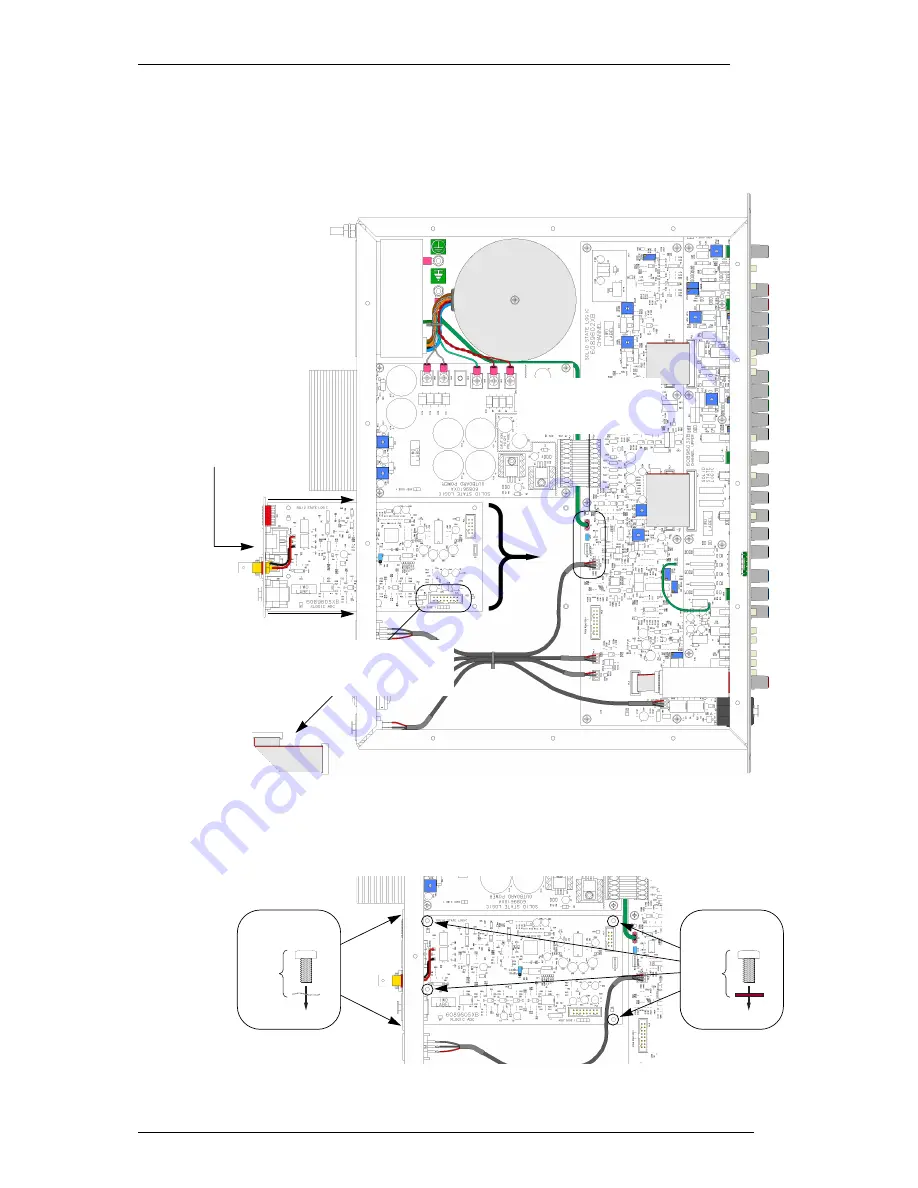
4. The ADC card is retained in the XLogic unit by a total of six screws; two for the rear plate and four
for the PCB. Loosely fit four M3 x 6mm panhead screws and fibre washers in the PCB holes,
followed by two M3 x 6mm panhead screws and wave washers to the rear panel.
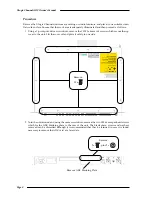
Slide the ADC Card
into the XLogic unit
Take care not to snag
the ‘Gnd’ (S1) and
‘OUTPUT’ cables
Fold back or remove the
ribbon cable from PL5 before
sliding the ADC card in.
Fit:
4 x
Fit:
2 x
Содержание XLogic Super-Analogue
Страница 16: ...XLogic Channel ADC Owner s Manual Page 14...
Страница 20: ...XLogic Channel ADC Owner s Manual Page 18 Notes...


