background image


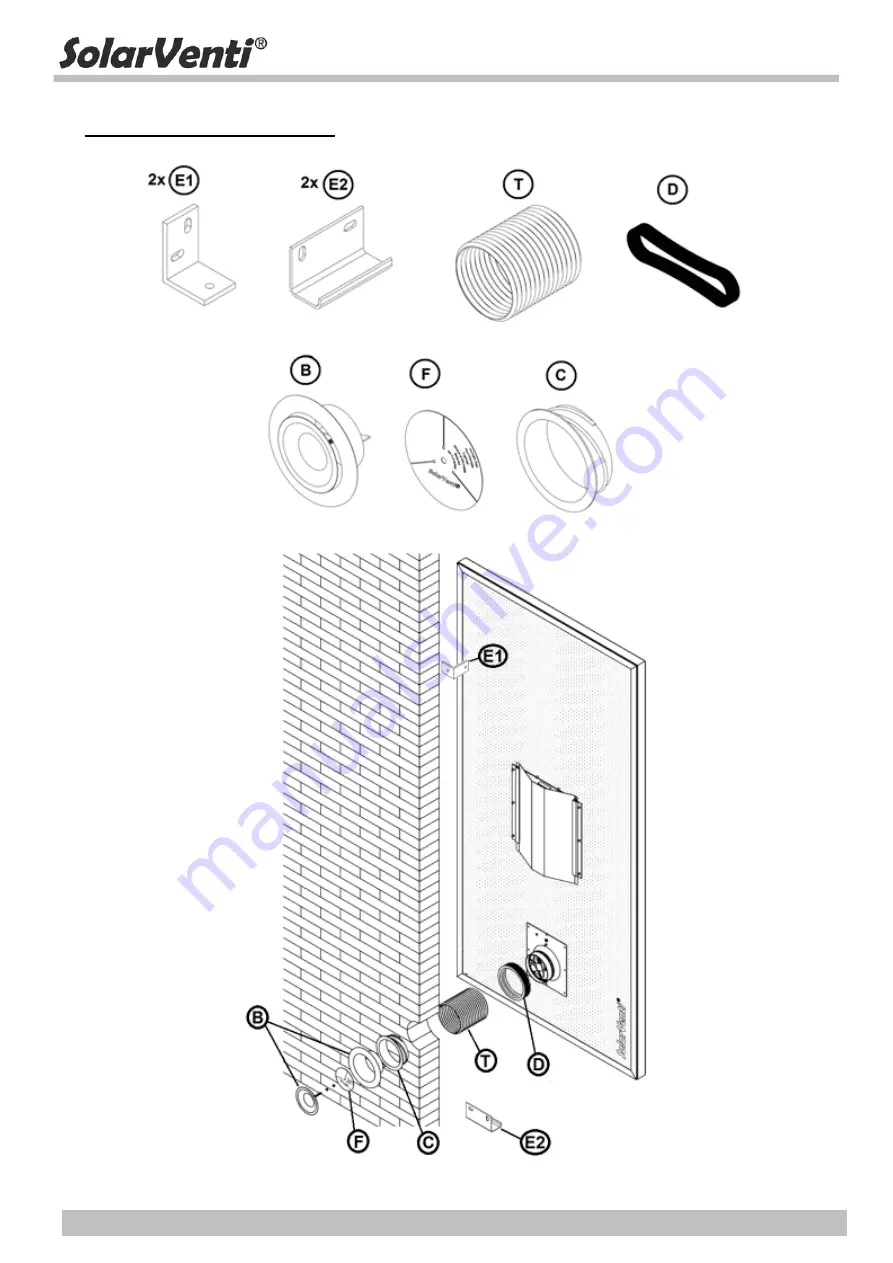
 II. Wall Mounting Kit 


SolarVenti


®


www.solarventi.com


II.


Wall


Mounting


Kit


Содержание SV14

Страница 1: ...tandard SV Wall Installation Manual Wand Installationsanleitung Væg Installationsvejledning Manuel d installation murale Vägg Installationsanvisningar Pared Manual de instalación Seinäsarja Asennusohje Zed Montážní instrukce ...

Страница 2: ......

Страница 3: ...General information Check reference on page 19 Weitere Erläuterungen siehe Seite 20 Se noter på side 24 Reportez vous à la page 21 Se anmärkningarna på sidan 25 Comprobar referencias en el pagina 22 Katso ohjeet sivulta 26 Další informace naleznete na straně 23 ...

Страница 4: ...red Seinäkiinnityssarja Montážní sada na zed III Angle Wall Mounting Kit 7 Winkelset Vinkelmontagesæt til væg Kit d installation murale en angle Vinkelmonteringssats till vägg Kit paramontage angular Kulma asennus seinään Sada se zaúhlením III I Stand Assembly 9 Zusammenbau der Winkel Samling af vinkelstativer Support d assemblage Hopsättning av stativ Montage de soportes Telineen asennus Skládání...

Страница 5: ...ator 17 Komfortregler Regulator Régulateur Regulator Regulador Säädin Regulátor VII Additional installation tips 19 Weitere Montage Tipps 20 Précisions complémentaires d installation 21 Más consejos para la instalación 22 Další instalační tipy 23 Yderligere tips til installationen 24 Fler tips för installation 25 Lisää vinkkejä asennukseen 26 ...

Страница 6: ...I Collector Assembly SolarVenti www solarventi com 1 I Collector Assembly SV3 SV7 mm SV3 SV7 I 524 704 II 704 1004 III 262 320 IV 175 175 V 240 460 PV Cell 303x180 6 W 350x350 12 W PV cell ...

Страница 7: ...mbly SolarVenti www solarventi com 2 I Collector Assembly SV14 SV20 SV30 mm SV14 SV20 SV30 I 704 1004 1020 II 1974 1974 3000 III 320 320 370 IV 175 335 370 V 820 820 1235 PV cell 350x350 12 W 350x350 12 W 555x305 18 W ...

Страница 8: ...II Wall Mounting Kit SolarVenti www solarventi com 3 II Wall Mounting Kit ...

Страница 9: ...II Wall Mounting Kit SolarVenti www solarventi com 4 1 mm I II III IV SV3 262 420 600 536 SV7 320 600 900 716 SV14 320 600 1800 716 SV20 320 800 1800 1016 SV30 375 800 2800 1032 ...

Страница 10: ...II Wall Mounting Kit SolarVenti www solarventi com 5 2 ...

Страница 11: ...II Wall Mounting Kit SolarVenti www solarventi com 6 3 ...

Страница 12: ...III Angle Wall Mounting Kit SolarVenti www solarventi com 7 III Angle Wall Mounting Kit ...

Страница 13: ...III Angle Wall Mounting Kit SolarVenti www solarventi com 8 ...

Страница 14: ...III I Stand Assembly SolarVenti www solarventi com 9 III I Stand Assembly ...

Страница 15: ...III I Stand Assembly SolarVenti www solarventi com 10 SV7 14 SV20 30 y 20 28 Option 1 Option 2 ...

Страница 16: ...III I Stand Assembly SolarVenti www solarventi com 11 1 mm I SV3 600 SV7 900 SV14 1874 SV20 1874 SV30 2800 ...

Страница 17: ...III I Stand Assembly SolarVenti www solarventi com 12 2 ...

Страница 18: ...III I Stand Assembly SolarVenti www solarventi com 13 ...

Страница 19: ...III I Stand Assembly SolarVenti www solarventi com 14 3 ...

Страница 20: ...IV Ventilation Kit SolarVenti www solarventi com 15 IV Ventilation Kit COOLING EXTRACTION ...

Страница 21: ...V Switch SolarVenti www solarventi com 16 V Switch ...

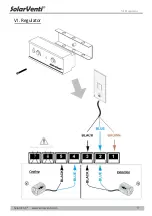
Страница 22: ...VI Regulator SolarVenti www solarventi com 17 VI Regulator ...

Страница 23: ...Notes SolarVenti www solarventi com 18 Notes ...

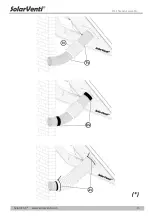
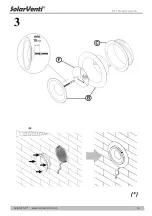
Страница 24: ...erial of the wall Contact your local SolarVenti installer for further advice regarding the drilling and the installation Take care not to drill into cables power sockets etc The optimal diameter of the hole is Ø133 mm on the inside and Ø140 mm on the outside However it is possible to use a diameter of Ø135 mm both inside and outside Cable The cable of the Solar Air Collector may either go through ...

Страница 25: ...larVentis ist die Installation durch einen SolarVenti Fachbetrieb durchzuführen Stellen Sie sicher dass Sie nicht in Kabel u Ä bohren Der optimale Durchmesser des Loches im Innenraum beträgt Ø133 mm und an der Außenwand Ø140 mm Haben Sie nur einen Bohraufsatz können Sie stattdessen Ø135 mm sowohl für den Innen und Außenbereich benutzen Kabelführung Das Kabel des Warmluftkollektors kann entweder du...

Страница 26: ...s selon la nature de la construction Prenez garde de ne pas endommager des câbles électriques tuyaux divers etc Le diamètre nécessaire du trou est de 133mm du côté intérieur et 140 mm côté extérieur Un percement d un diamètre de 135 mm des deux côtés est correct Cable le câble du capteur solaire à AIr SOLARVENTI peut soit sortir par le trou réalisé pour la sortie d air ou par un trou séparé de 6 8...

Страница 27: ...u instalador SolarVenti local para que le puedan aconsejar Al hacer cualquier tipo de perforacion hay que tener cuidado de no dañar ningun cable tuberia etc El diametro óptimo del orificio de entrada de aire es de Ø133 por la cara interior y Ø140 en la exterior Sin embargo es posible utilizar un unico diametro de Ø135 Cable El cable del colector puede o bien ir por el orificio de entrada de aire o...

Страница 28: ...í zdi Zeptejte se svého prodejce či technika pokud si přejete rady s vrtání otvoru Zajistěte aby v místě prostupu nevedly žádné kabely či zásuvky Lze využít korunkový vrták s průměrem Ø135 142 mm Kabel Kabel z panelu je možné protáhnout přímo skrz prostupové potrubí anebo pro něj vyvrtat zvláštní díru 6 8 mm dle Vašich potřeb Stativy Postupujte dle instrukcí na str 11 Vyvrtejte dvě dírky v každém ...

Страница 29: ... installatør hvis du er i tvivl om installationen Sørg for at der ikke er nogen ledninger stikkontakter e l hvor boringen skal foretages Den optimale diameter af hullet er Ø133 mm på indersiden og Ø140 mm på ydersiden I tilfælde af at du kun har en borekrone kan du dog bruge Ø135 mm til både det indvendige og udvendige hul Kabel Luftsolfangerens kabel kan enten føres igennem indblæsningshullet ell...

Страница 30: ...installatör ifall du är tveksam inför installationen Säkerställ att det inte är några ledningar stickkontakter eller liknande där borrningen skall utföras Den optimala diametern för hålet är Ø133 mm på insidan och Ø140 mm på utsidan Ifall du enbart har ett borr kan du använda Ø135 mm för både det invändiga och det utvändiga hålet Kabel Luftsolfångarens kabel kan antingen dras genom inblåsningshåle...

Страница 31: ...aessa yhteyttä paikalliseen SolarVentin asentajaan saadaksesi tarkempaa tietoa asennuksesta Varo poraamasta sähköjohtoihin pistorasioihin jne Reiän halkaisijan optimaalinen koko on Ø133 mm sisällä ja Ø140 mm ulkona Ø135 mm halkaisijaa voidaan käyttää sekä sisällä että ulkona Johto Aurinkokeräimen johto voidaan viedä tuloaukon kautta kuten yläpuolella tai sille voidaan porata erillinen 6 8 mm reikä...

Страница 32: ...y indoor climate in your basement Avoid humidity Avoid stale smell Avoid mould and fungus Produced in Denmark SolarVenti A S Fabriksvej 8 DK 8881 Thorsø Tlf 45 8696 6700 www solarventi dk www solarventi com Local dealer installer ...

Отзывы: