Step 10: Final Assembly, Tuning and Touch-Ups
14
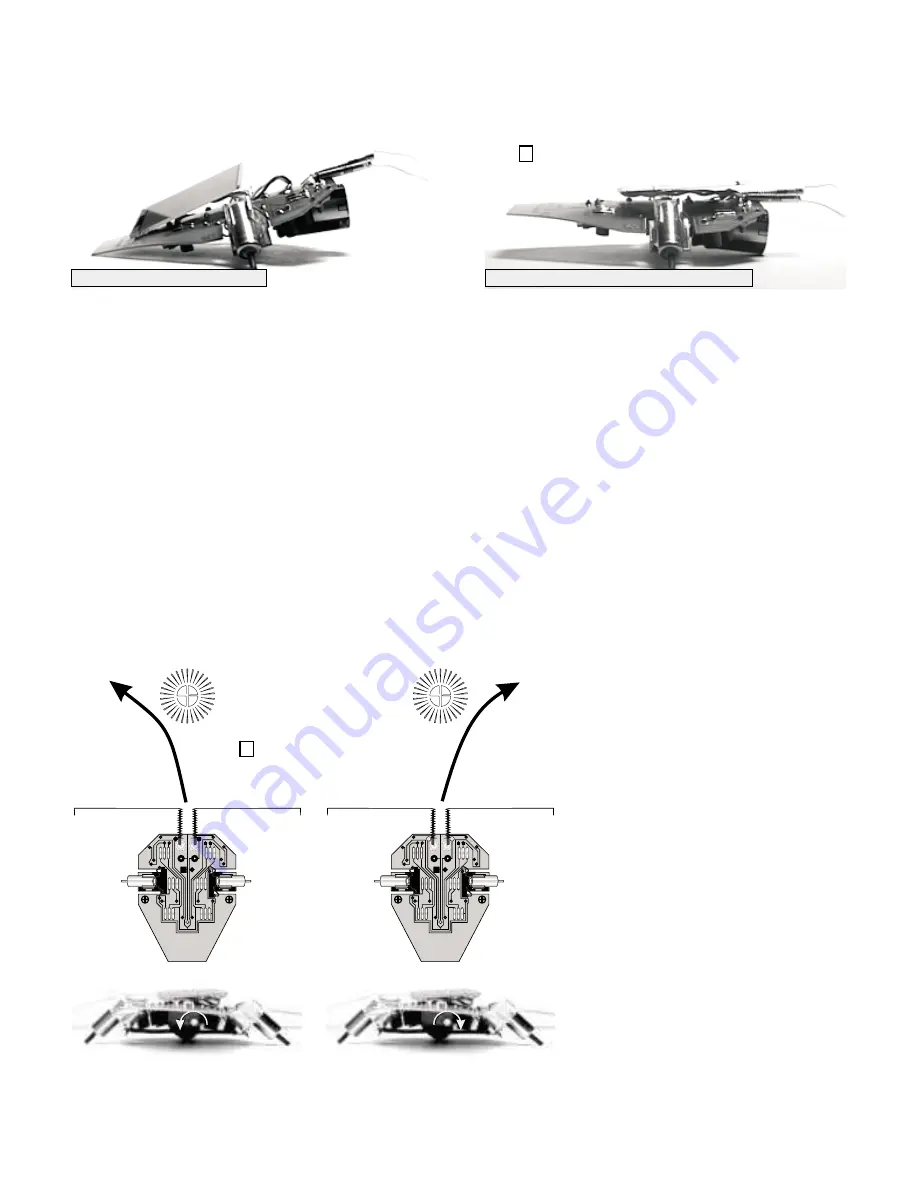
Up until now you may have noticed that we haven't glued the solarcell down in place. There's been a good reason for that -
balance. Now that you have everything installed, you can now find the optimum position for the solarcell. Best way to do this is
to move the solarcell until the Photopopper balances just forward of the wheels. When it does, glue the solarcell in place.
Balancing the Photopopper like this is good for several reasons. When the Popper moves, it will tend to do a bit of a "wheelie",
lifting the power capacitor off the surface. This lowers friction and increases the performance. Also, I've found that when the
sensors get stuck in something, the Popper's tilting backward motion helps free it up.
Tuning the Optics so it goes
Straight for the Light
31
30
Move the solarcell forward until....
..
! It tips forward. Glue the solarcell down.
clunk
Solarbotics
PHOTOPOPPER 4.2
BEAM Photovore
Solarbotics
PHOTOPOPPER 4.2
BEAM Photovore
Solarbotics
PHOTOPOPPER 4.2
BEAM Photovore
Solarbotics
PHOTOPOPPER 4.2
BEAM Photovore
If your Photopopper prefers the right,
rotate the trim pot to the right.
We're going to use the trim pot to fine-tune your Photopopper so that it is
directional and will head directly towards the
brightest source of light in the vicinity.
Start by placing your Photopopper near some very directional, single-source light, like on a sunny desktop or a table with a
single light bulb. It should make a bee-line towards the source of the light. If you get a left or right side preference behaviour (see
the images), then turn the trim pot a 1/2 turn in the direction of the "slower" motor. As you get close to the "sweet spot" on the
trim pot, the Photopopper will start tracking very near dead-straight for the light source. Once tuned, it shouldn't need tuning
every again!
When the Photopopper is properly tuned, it
will pivot around one motor until it is zoned
in on the source of light it wants, then will
start alternating steps in a "left / right / left /
right" pattern.
Lastly, you may need to adjust your touch-
sensors. If you find that your Photopopper is
acting erratically when it triggers on one
side, the sensor may be set too sensitive.
You can reduce the sensitivity by sliding the
tuning sleeve forward towards the pin tip.
This means the sensor must bend more
before it activates. Experiment over time to
see what sensitivity works best for your
Photopopper.
Now that you're done, try putting shadows
and obstacles in front of it, and see what
happens!
very
Balancing the Photopopper
This is the very final thing you have to do before you can start thoroughly playing with, ummm - I mean
your Photopopper's behaviour.
examin-
ing,
If your Photopopper prefers the left,
rotate the trim pot to the left.
Содержание BEAM Robotics Kit 2
Страница 2: ...This page left blank intentionally ...


