PRINT REGISTRATION & IMPRESSION ADJUSTMENT
(Multi Color)
The following set of instructions are to assist you in setting up the press for a multi color label.
The same guidelines will remain for the first station as in printing with one color. The second print
station should be set up at this time.
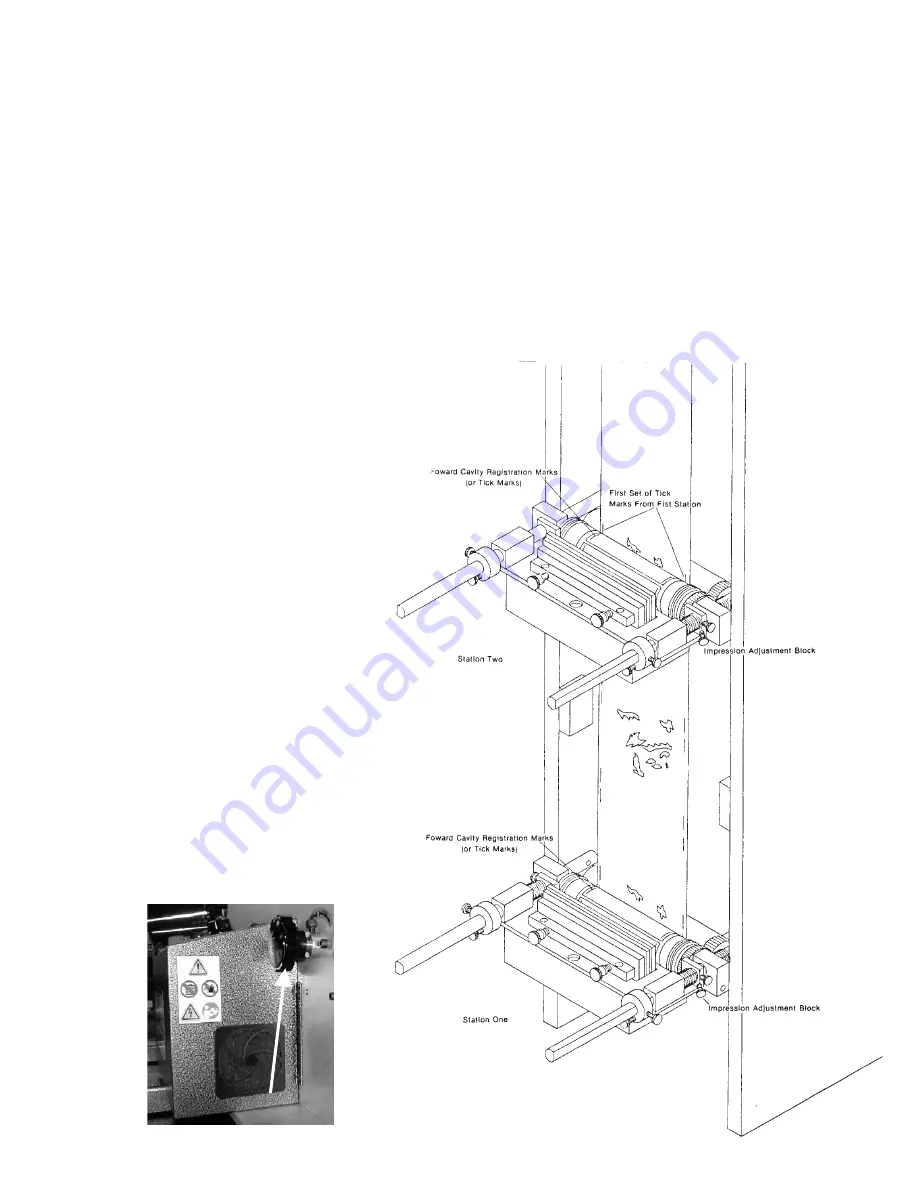
1. Run the machine forward and mark, with a pen, the beginning cavity by the first set of tick
marks. Run this marked label forward to the second station anvil shaft. Position the forward cavity
registration marks (tick marks) on the second printing plate, in line with the tick marks left on the
web by the first printing plate. (See Illustration)
Push in the print cylinder on the corresponding tooth until the gears mesh. Push in the ink
fountain and tighten the fountain adjustment collar set screw.
2. Run the machine slowly and
again move the ink fountain inward
to achieve print. Once this is done,
o b s e r ve
w h e r e
t h e
s e c o n d
impression is register ing in
comparison with station number
one.
If you are close to proper
registration, you can advance or
retard the impression by using the
registration knob for that station.
(see below). If registration cannot
be achieved by use of the advance
or retard, you will have to move the
print cylinder to the proper tooth
manually.
NOTE:
Before attempting any
adjustment, the machine should be
shut off.
After moving the print plate, check
the impression again.
You now
should be able to register using the
registration knobs.
Once this is
done you can now set your die cut
and remove waste.
Repeat the
above procedure from each plate.
REGISTRATION KNOB
12
Содержание 4400
Страница 7: ...D D E G D E G WEB DIRECTION WEB DIRECTION 5 ...
Страница 8: ...F N D D E E F N E D 6 O ...
Страница 13: ...MODEL 4400 PRINT STATION 11 ...


