background image

2021.01

1

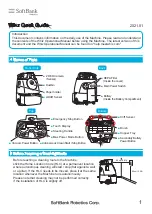
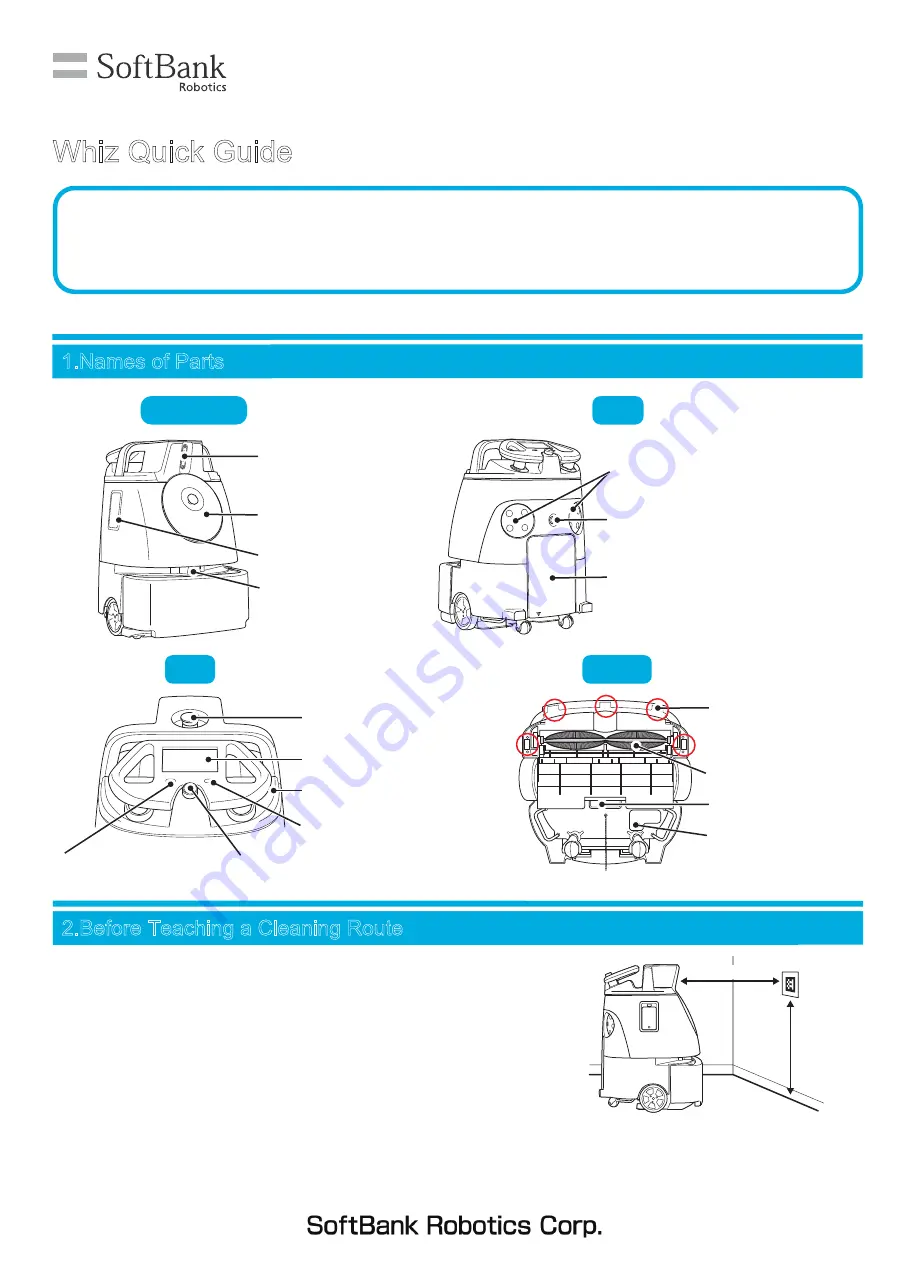
 HEPA Filter 

   (Inside the cover)

 Battery

   (Inside the Battery Compartment)


Cliff Sensor


Brush

  2D/3D Camera 

    (Sensor)

 LIDAR Sensor

Front / Side

Back

Top

Bottom

 Touch Display

 Vacuum Power Button

 Autonomous Clean Start / Stop Button

 Max Power Mode Button

 Emergency Stop Button


Hopper Tray

 Dustbin


Secondary Battery


Power Button

 Steering Handle

 Main Power Switch

 Pager holder

2.Before Teaching a Cleaning Route

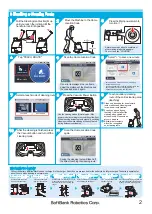
Before teaching a cleaning route to the Machine,

stick the Home Location Code (HLC) at a permanent location

where autonomous cleaning will start / stop (flat against a wall

or a pillar). If the HLC needs to be moved, place it at the same

location whenever the Machine runs autonomously. 

Please note that cleaning may not be performed correctly

if the installation of HLC is slightly off.

80cm (2.6ft)

60cm (2.0ft)

1.Names of Parts

This document contains information on the daily use of the Machine. Please read and understand

the contents of the Whiz Operational Manual before using the Machine. The latest version of this

document and the Whiz Operational Manual can be found on "help.meetwhiz.com".

Introduction

Whiz Quick Guide

Содержание Whiz

Страница 1: ... the Home Location Code HLC at a permanent location where autonomous cleaning will start stop flat against a wall or a pillar If the HLC needs to be moved place it at the same location whenever the Machine runs autonomously Please note that cleaning may not be performed correctly if the installation of HLC is slightly off 80cm 2 6ft 60cm 2 0ft 1 Names of Parts This document contains information on...

Страница 2: ...tery lock 3 Pull the battery halfway out toward you Pull the bottom left of the battery door toward you Press the battery lock with your right thumb Recharge the battery 6 Insert the battery in the battery compartment Once the battery is properly inserted the lock in the battery compartment will pop into place making a click Pull the battery out toward you as you release your thumb from the lock B...

Страница 3: ...ous cleaning Operate in a time when there are few passerby and objects around the cleaning area For safety the Machine will operate slightly away from the wall When cleaning areas close to the wall operate manually Stow the Steering Handle Remove the Notification Pager from the Machine and carry it with you during autonomous cleaning As for a cleaning route created automatically its autonomous cle...

Страница 4: ...erates and move it to an appropriate place as required When recreating the original layout is difficult teach a cleaning route again Close curtains to block light in a place where there is sunlight Adjust the brightness in a place where there are lights or LED lights Wipe the sensors with the attached Micro fiber cloth When the change of the layout takes place after teaching the cleaning route rec...

Отзывы: