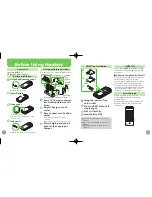
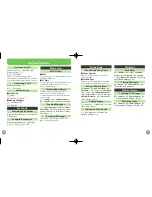


Accessories
Battery (SHBCC1)
•
Desktop Holder (SHECJ1)
•
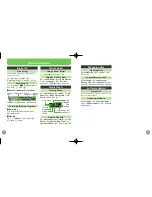
Battery Installation
Unlock and remove cover
11
Slide switch as shown.
.
Insert battery
21
Close cover
31
Press along edges
Fit cover top into slot, then press
.
down
fi
rmly.
Lock cover
41
Slide switch as shown until it clicks.
.
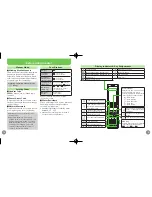
Charging (Desktop Holder)
Use speci
fi
ed AC Charger
ZTDAA1
(sold
separately) only.
Connection Port
Release
Tabs
Arrows
AC 100V
Outlet
Charger Connector
Small Light
AC Charger
Blades
1
3
2
Insert AC Charger connector
11
into Desktop Holder until it
clicks
Plug AC Charger into AC
21
outlet
Place handset onto Desktop
31
Holder
Small Light illuminates red while
.
charging.
Small Light goes out when battery is full.
.
After charging, disconnect
41
handset, then unplug AC
Charger
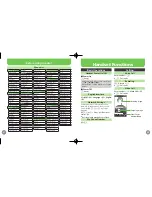
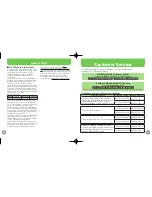
Before Using Handset
ii
USIM Card Installation
1
2
3
Notch
Using Tab, pull out Tray
11
until it clicks
Slide in USIM Card with IC
21
chip facing up
Push in Tray fully
31
Insert battery (P.ii)
41
First power off handset and remove
.
battery.
Do not force USIM Card into/out of
.
handset.
USIM Card must be inserted to use
.
handset.
USIM PIN
4-digit code (
9999
by default); activate
PIN Entry to restrict usage. Change PIN
as needed.
PIN Lock & Cancellation (PUK Code*)
■
Entering incorrect PIN three consecutive
times activates PIN Lock, limiting
handset use. Enter PUK Code to unlock.
For details, contact SoftBank Mobile
Customer Center, General Information.
Each USIM Card has a unique Personal
*
Unblocking Key (PUK Code). Do not
disclose it to unauthorized persons.
Solar Charging
936SH has built-in solar charger. Charge
with sunlight outdoors or through a
window indoors.
Solar charger is only supplementary to
Desktop Holder or AC Charger (sold
separately).
iii


