User’s Manual
BT-UC156
Embedded Printer
V1.0
Shandong New Beiyang Information Technology Co., Ltd.
Страница 1: ...User s Manual BT UC156 Embedded Printer V1 0 Shandong New Beiyang Information Technology Co Ltd...
Страница 2: ...nsmitted in any form or by any means electronic or mechanical for any purpose without the express written permission of SNBC Copyright This manual was published in 2007 and SNBC owns the copyright Mad...
Страница 3: ...5 Do not place the printer on a place exposed to vibration and impact 6 No dew condensation is allowed to the printer In case of such condensation do not turn on the power until it has completely gon...
Страница 4: ...osition 3 2 3 1 Print position 3 2 3 2 Tear off position 3 3 Appearance and Parts 4 3 1 Appearance and parts 4 3 2 LED and Buzzer explanation 5 4 Printer mount 6 4 1 Unpacking 6 4 2 Fixing the printer...
Страница 5: ...C156 User s Manual 4 5 4 Printout adjustment 16 6 Interface Signal 18 6 1 Serial interface 18 7 Troubleshooting 19 7 1 Print doesn t function 19 7 2 Error LED and Buzzer 19 7 3 Problems during printin...
Страница 6: ...t is mainly used in applications where real time label or receipt printing is necessary like label scale electric scale and so on BT UC156 is connected with other devices via serial interface 1 2 Main...
Страница 7: ...B 49 Data buffer Receiving buffers 1KB or 45bytes NV image data 64KB RAM image data 8KB Communication interface RS 232C Power supply DC 24V 5 average current 2 5A Print head lifetime 50Km Operating te...
Страница 8: ...ff mode 90 25 Peel off mode 90 25 e Mark height 10 2 Caution Do not paste paper to the paper supply hanger or base paper rewinder 2 3 Print and tear off position 2 3 1 Print position Paper is located...
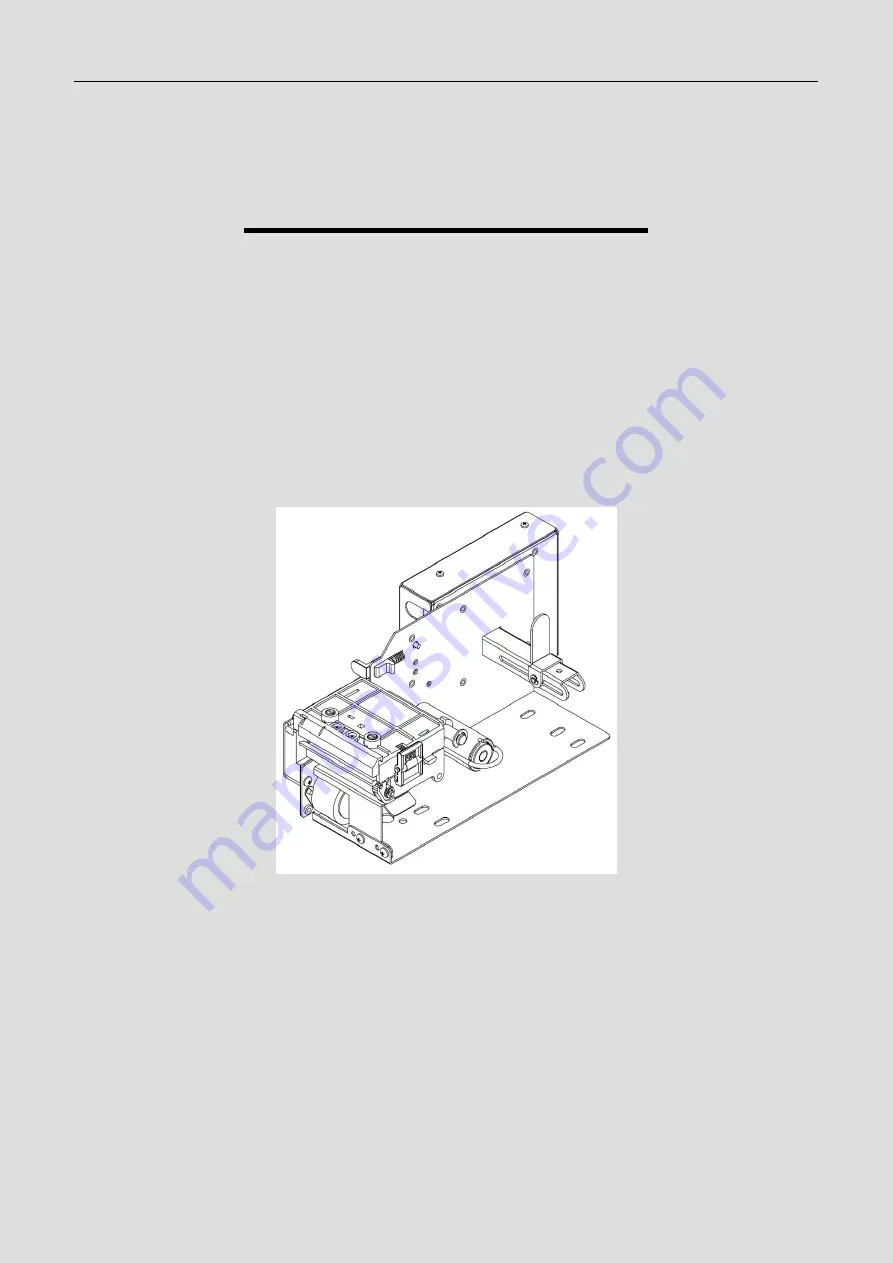
Страница 9: ...t 3 Middle board 4 retraction shaft 5 paper guide ring 6 motor protection panel 7 motor module 8 press adjustment knob Figure 3 1 2 Structure 9 Mechanism 10 Top cover limit 11 Key LED 12 Keyboard 13 T...
Страница 10: ...locate next label to printing position after pressing this key Press this key and power the printer printer will perform paper checkout Press this key to get rid of error status under paper location e...
Страница 11: ...le and side cover fixing hole You should select suitable space and fixing position of the printer referred to figure 4 2 1 Figure 4 2 1 Dimension Caution The printer should be mounted on a fixed plane...
Страница 12: ...the printer for easy paper load key operation daily maintenance printing pressure adjustment and cable connection disconnection Figure 4 2 2 Operating Space paper loading Figure 4 2 3 Operation Space...
Страница 13: ...aligned with the printer outlet and reserve suitable space to avoid paper impacting the outlet edge of the casing Due paper is somewhat curl dimension A should be set reasonable to avoid paper impacti...
Страница 14: ...ck media specification Media type BT UC156 printer supports thermal label and continuous paper Please check the media type used by the printer and select peel off mode or tear off mode Media specifica...
Страница 15: ...load It has peel off mode and tear off mode 1 Peel off mode 1 Load the selected thermal label onto paper roll shaft Notice Paper roll should drop to the end of paper roll shaft Paper shall move accor...
Страница 16: ...nter paper path and press the first label head on the platen Notice Be sure that the lower edge of label should reach the holding surface and the end of first label shall not exceed the tear off bar o...
Страница 17: ...platen and mount shaft according to the figure as below Then fix the mount on rewinding shaft with the clip and turn the rewinding shaft to tight the mount according to the direction in the figure as...
Страница 18: ...l should drop to the end of paper roll shaft Paper shall run according to above figure during the print Pay attention to paper roll direction when loading 2 Press the latch to open top cover of TPH 3...
Страница 19: ...adjust the paper guide ring up and down until a suitable position It is recommended that paper guide path should be 0 5 1 mm wider than paper Loading thermal continuous paper The way of thermal contin...
Страница 20: ...ohol 4 Wait for 5 10 minutes until alcohol volatilize completely then close top cover of the printer Figure 5 1 1 Cleaning TPH 5 2 Cleaning sensors When one or more of the following cases occur clean...
Страница 21: ...ide top cover limitation block and open top cover module to be vertical 2 With a cotton swab dipping with ethyl alcohol wipe off stains and dust on the surface of platen 3 Wait for 5 10 minutes until...
Страница 22: ...printing sample and stop the adjustment until reaching a satisfied printout Figure 5 4 1 Pressure Adjustment Caution Before starting routine care make sure that the printer has been shut down Do not...
Страница 23: ...is as below Pin No Signal name Signal direction Function 1 RTS DTR Output Serial handshaking signal 2 TXD Output Serial data output port 3 RXD Input Serial data input port 4 GND Signal ground Users c...
Страница 24: ...ead temperature is normal Input voltage is abnormal Turn off printer power and check input voltage Paper end Load a new paper roll and send command 0x10 0x05 0x01 or power on again Label position dete...