background image

www.snapper.com

14

Maintenance

Driven and Drive Disc Service

If the mower does not propel itself properly, check for the
following problems:

1. Grease on the drive disc 

(A, Figure 23)

causing

slippage.

2. Broken or disconnected drive spring 

(B)

.

3. Driven disc 

(C)

is out of adjustment.

4. Driven disc rubber is worn - does not contact drive disc

properly.

5. Worn Poly-V belt 

(D)

or engine drive belt 

(E)

.

If any of the above (1 thru 5) are causing problems, service
as follows:

Cleaning Drive Disc & Driven Disc

If oil or grease on the drive disc or driven disc is causing
slippage, clean the discs as follows:

1. Wipe away any oil or grease with a clean cloth.
2. Use either an approved grease solvent or hot, soapy

water to clean drive disc or driven disc.

3. Rinse components with clean water.
4. Dry components with a clean cloth.

Drive Spring Repair/Replacement

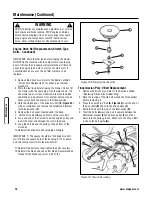
If the drive spring 

(A, Figure 24)

is loose, reconnect. If the

spring is broken, replace with a new spring.

Note: Use a pair of needle nose pliers to install the drive
spring.

IMPORTANT: If the drive system continues slipping, refer to
the Troubleshooting section.

Driven Disc Adjustment

If the drive disc and driven disc are clean and the mower
drive is still slipping, adjust the driven disc as follows:

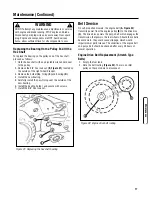
1. Move the ground speed control 

(A, Figure 25)

into the

‘fast’ position.

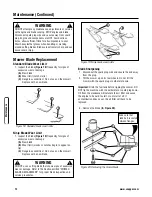
WARNING

DO NOT attempt any maintenance, adjustments or service
with engine and blade running. STOP engine and blade.
Disconnect spark plug wire and secure away from spark
plug. Engine and components are HOT. Avoid serious
burns, allow sufficient time for all components to cool.

!

!

B

C

A

D

Figure 23: Wheel drive components

E

A

Figure 24: Replacing the drive spring

C

Figure 25: The ground speed control

Maintenance (Continued)

Содержание SERIES 20

Страница 1: ...al sustained engine power will likely be lower due to operating limitations and environmental factors Please refer to Engine Power Rating Information for further details Manual No 7102718 Rev 10 24 20...

Страница 2: ...__________________________ Retailer_________________________________________________________________________ Retailer s Phone Number___________________________________________________________ Equipmen...

Страница 3: ...k Engine Drive Belt 11 Check Transmission Belt 11 Service Periodic 11 Engine 11 Air Filter 11 Engine Oil 11 Storage Procedure 11 Mower Blade Replacement 12 Blade Sharpening 12 Wheel Drive Control Adju...

Страница 4: ...y of the machine Preparation 1 Read understand and follow instructions and warnings in this manual and on the mower engine and attachments Know the controls and the proper use of the mower before star...

Страница 5: ...grass bag and or clearing grass Operation Continued From Previous Column 13 DO NOT operate mower without the entire grass catch er or guards in place discharge guard rear guard or other safety device...

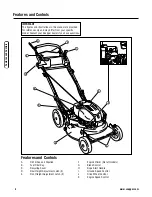
Страница 6: ...your Snapper dealer if you have questions Features and Controls A Oil Fill Cap and Dipstick B Fuel Filler Cap C Recycling Cover D Rear Height Adjustment Latch 2 E Front Height Adjustment Latch 2 F En...

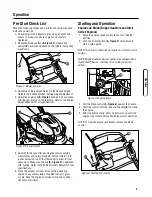
Страница 7: ...the Engine Owners Manual for fuel specifications 6 Clean the exterior surfaces of the cutting deck and engine of any accumulation of spilled fuel dirt grass oil etc Keep the engine air intake screen a...

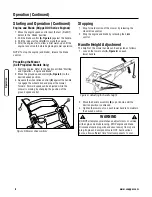
Страница 8: ...drive and propel the mower forward Forward speed can be adjusted while the mower is moving by changing the position of the ground speed control Stopping 1 Stop forward motion of the mower by releasing...

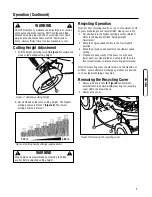
Страница 9: ...er than the front wheel latches to improve recycling performance Note The recycling cover should remain on the machine at all times unless alternate discharge operations are desired such as side disch...

Страница 10: ...f the adapter fits over the stud where the front of the recycling cover was originally secured The slot C on top of the adapter slips under the restraining nut on top of the deck under the right front...

Страница 11: ...service with engine and blade running STOP engine and blade Disconnect spark plug wire and secure away from spark plug Engine and components are HOT Avoid serious burns allow sufficient time for all c...

Страница 12: ...ission fill plug A Figure 15 Roll the machine forward or backward while looking down into the plug hole 2 If liquid grease is not visible on the input gear the small gear below the plug hole add an am...

Страница 13: ...for service instructions Storage Procedure Refer to the Engine Owner s Manual for directions regarding engine storage preparations Prepare the mower for end of season storage as follows 1 Drain the f...

Страница 14: ...ug down Oil from the crankcase will saturate the air filter and cause the engine to be hard to start or not start at all If contamination does occur the air filter will have to be replaced 3 Remove th...

Страница 15: ...ction required to extend or shorten the spring length 3 Rehook the upper spring to the cable eye and check clearance Repeat the procedure if required Note The vinyl spring cover B should be kept over...

Страница 16: ...ean water 4 Dry components with a clean cloth Drive Spring Repair Replacement If the drive spring A Figure 24 is loose reconnect If the spring is broken replace with a new spring Note Use a pair of ne...

Страница 17: ...to the slow position then back to the fast position Recheck the 1 8 measurement described previously Readjust as needed Tighten the nut when finished 7 Reinstall the driven disc spring to the driven d...

Страница 18: ...n disc bearing requires replacement replace the bearing as follows 1 Remove the driven disc assembly Refer to the Section entitled Driven Disc Replacement 2 Remove both snap rings A Figure 30 that sec...

Страница 19: ...ve disc C The drive disc powers the poly v belt which engages the transmission that powers the rear wheels Should these belts become worn they could cause slippage which would impair mower performance...

Страница 20: ...lley on the bottom of the drive disc 10 Reinstall the drive disc and retaining hardware IMPORTANT 1 The square shoulder of the drive disc bolt must fit into the square hole of the bushing 2 The square...

Страница 21: ...Damage and Replacement Page 13 16 X Change oil every 25 hours when operating under heavy load or high temperatures Clean more often under dusty conditions or when air debris is present Maintenance Rep...

Страница 22: ...belt Mower Will Not Move Loss Of Traction Self Propelled Models 1 Build up of debris on or around wheel drive components 1 Clean debris 2 Driven disc slipping 2 Clean or replace driven disc 3 Drive b...

Страница 23: ...purchase date SNAPPER will not be responsible for any installation cost incurred The battery warranty only covers original equipment batteries and does not cover damage to the battery or machine caus...

Страница 24: ...www snapper com 22 Notes...

Страница 25: ...23...

Страница 26: ...www snapper com 24 Notes...

Страница 27: ...25 Notes...

Страница 28: ...r when used in a given piece of power equipment actual on site or net power This difference is due to a variety of factors including but not limited to accessories air cleaner exhaust charging cooling...

Страница 29: ...ct ristiques techniques peuvent tre modifi es sans pr vis La puissance d utilisation du moteur sera vraisemblablement inf rieure en fonction des conditions d utilisation et de l environnement Se repor...

Страница 30: ...___ Revendeur ____________________________________________________________________________ N de t l phone du revendeur ____________________________________________________________ quipement R f rence...

Страница 31: ...n 12 Entretien p riodique 12 Moteur 12 Filtre air 12 Huile de moteur 12 Proc dure d entreposage 12 Remplacement de lame de coupe 13 Aff tage de lame 13 R glage de commande d entra nement de roues 14 E...

Страница 32: ...eur la machine et les accessoires Avant le d marage famil iarisez vous avec les commandes et la tondeuse 2 L utilisation de la tondeuse doit tre uniquement r serv e des personnes s res responsables et...

Страница 33: ...ramassage et ou de d boucher le conduit d jection N UTILISEZ PAS la tondeuse sans que les d flecteurs la protection de d versement la pro tection arri re et les autres dispositifs de s curit ne soien...

Страница 34: ...ns Caract ristiques et commandes A Bouchon de remplissage et jauge d huile B Bouchon de remplissage d essence C Couvercle de recyclage D Loquet de r glage de hauteur arri re 2 E Loquet de r glage de h...

Страница 35: ...our les sp cifications de l essence 6 Nettoyez sur les surfaces ext rieures de la plate forme de coupe et du moteur toute accumulation de carburant renvers salet herbe huile etc Maintenez d gag es en...

Страница 36: ...a tondeuse vers l avant La vitesse en marche avant peut se r gler pendant le d place ment de la tondeuse en modifiant la position de cette com mande Arr t 1 Stoppez le d placement vers l avant de la t...

Страница 37: ...es arri re en dessous du niveau de celui des roues avant afin d am liorer la performance du recyclage Remarque Le couvercle de recyclage doit rester sur la machine en permanence sauf si d autres types...

Страница 38: ...tateur s adapte sur le goujon sur lequel le couvercle de recy clage tait fix l origine La fente C en haut de l adaptateur se glisse sous l crou de retenue du dessus de ch ssis sous l angle avant droit...

Страница 39: ...me tournent STOPPEZ moteur et lame D branchez et fixez le c ble de bougie l cart Le moteur et certains com posants sont CHAUDS Pour viter de s rieuses br lures laisser assez de temps aux composants po...

Страница 40: ...lissage de la transmission A Figure 15 Fa tes rouler la machine en avant et en arri re tout en regardant dans le trou du bouchon 2 Si de la graisse liquide n est pas visible sur l engrenage d entr e l...

Страница 41: ...r les instruc tions de service pour l huile Proc dure d entreposage R f rez vous au manuel d utilisation du moteur pour les instruc tions relatives aux pr parations du moteur pour son entreposage Pr p...

Страница 42: ...n bas L huile du carter saturerait le filtre air et rendrait le d marrage du moteur difficile ou impossible Si une telle contami nation arrivait il faudrait remplacer le filtre air 3 Enlevez la lame B...

Страница 43: ...ger ou raccourcir sa longueur 3 Raccrochez le ressort sup rieur sur l il du c ble et mesurez l espacement Recommencez la proc dure si n cessaire Remarque Le cache de ressort en vinyle B doit tre maint...

Страница 44: ...3 Rincez l eau claire 4 S chez en passant un linge propre R paration remplacement de ressort d entra nement Si le disque entra nant A Figure 24 est flottant resserrez le Si le ressort est cass remplac...

Страница 45: ...tue puis ramenez la en position rapide V rifiez nouveau l espacement de 3 2 mm d crit pr c demment Refaites le r glage si n cessaire Serrez l crou quand c est termin 7 Remettez en place le ressort de...

Страница 46: ...besoin d tre remplac proc dez comme ceci 1 D montez l ensemble de disque entra n Reportez vous la section intitul e Remplacement du disque entra n 2 tez le circlip A Figure 30 qui maintien le moyeu B...

Страница 47: ...nant actionne la courroie Poly V qui fournit le mouvement pour les roues arri re Si ces courroies deviennent us es cela peut provo quer des patinages qui impactent la performance de la tondeuse L tat...

Страница 48: ...s du disque entra nant 10 Remettez en place le disque entra nant et la visserie de fixa tion IMPORTANT 1 L paulement carr du boulon de disque entra nant doit s adapter dans le trou carr de la bague 2...

Страница 49: ...ant V rifier l usure et changer si n cessaire Page 13 16 X En utilisation pleine charge ou en pleine chaleur changer l huile toutes les 25 heures Nettoyer plus souvent en environnement poussi reux ou...

Страница 50: ...Courroie granuleuse ou effiloch e 4 Remplacer la courroie La tondeuse n avance pas ou perte de traction ou perte de traction 1 D bris accumul s sur ou autour des composants d entra nement de roues 1...

Страница 51: ...prendra en charge aucun co t d installation r sultant La garantie de la batterie ne cou vre que les batteries d origine et ne couvre pas les dommages la batterie caus s par n gligence ou abus destruc...

Страница 52: ...www snapper com 22 Notes...

Страница 53: ...avez des doutes utilisez ce guide et ne ton dez pas si la pente fait plus de 15 Si la tondeuse est utilis e avec une remorque ou un accessoire mont derri re ne tondez pas si la pente fait plus de 10 U...

Страница 54: ...www snapper com 24 Notes...

Страница 55: ...25 Notes...

Страница 56: ...r site Cette diff rence est due une vari t de facteurs incluant sans y tre limit acces soires filtre air chappement charge de la balterie refroidissement carburateur pompe carburant etc limitations du...

Отзывы: