background image


10 

Section 4 - REPAIR & ADJUSTMENTS 


WARNING 

DO NOT attempt any maintenance, adjustments or 
service with engine and blade running. STOP engine 
and blade. Disconnect spark plug wire and secure 
away from spark plug. Engine and components are 
HOT. Avoid serious burns, allow sufficient time for all 
components to cool. Wear heavy leather gloves when 
handling or working around cutting blades. Blades 
are extremely sharp and can cause severe injury. 


4.1  MOWER BLADE REPLACEMENT 

4.1.1.  STANDARD BLADE WEAR LIMIT 
1.  
Inspect blade frequently for signs of excessive wear 
or damage.  See Figure 4.1. 


FIGURE 4.1 

 
4.1.1A.  NINJA BLADE WEAR LIMIT 
1A. 

Inspect blade frequently for signs of excessive 

wear or damage.  See Figure 4.2. 


FIGURE 4.2 


2.  Replace the blade if it is badly chipped, bent, 
noticeably out of balance or has cracks or notch in 
either tip. See Figure 4.1 & 4.2. Replace with new 
blade. 


WARNING 

DO NOT use a cutting blade that shows signs of 
excessive wear or damage. Refer to Section 
“MOWER BLADE REPLACEMENT” for proper blade 
inspection and service procedures.  

 
4.1.2. BLADE SHARPENING 
1.
  Disconnect spark plug wire and secure end away 
from plug. 
 

IMPORTANT: DO NOT tip machine with carburetor or 
spark plug down. Oil from crankcase will saturate the air 
filter and cause the engine to be hard to start or not start at 
all. If contamination does occur, the air filter will have to be 
replaced. 

 
2. Tilt mower up on its rear wheels. Do not tilt 
mower with spark plug or carburetor down. 
3.  Remove blade. See Figure 4.3. 


FIGURE 4.3 


BLADE 
HUB 

MAKE SURE THAT 
BLADE HUB IS 
SEATED 
BETWEEN 
FLANGES 

FLANGE 

BLADE 

CONE WASHER 
(Concave Side Up) 

CAPSCREW  

NEW BLADE 

WEAR LIMIT 
(NOTCH STARTS) 

DANGEROUS CONDITION ! 
DO NOT USE ON MOWER ! 
REPLACE WITH NEW 
BLADE. 

NEW BLADE 

WEAR LIMIT. 
CRACKS OR 
NOTCHES 
BEGIN TO 
APPEAR ON TIP 

DANGEROUS ! 
DO NOT USE A BLADE IN 
THIS CONDITION ! 

Содержание 216015, 216515BV

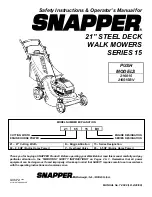
Страница 1: ...rse Power V Overhead Valve 65 6 5 HP Engine Horse Power Thank you for buying a SNAPPER Product Before operating your Walk Behind read this manual carefully and pay particular attention to the IMPORTANT SAFETY INSTRUCTIONS on Pages 2 3 Remember that all power equipment can be dangerous if used improperly Also keep in mind that SAFETY requires careful use in accordance with the operating instruction...

Страница 2: ... extreme CAUTION when changing directions on slopes DO NOT mow steep slopes or other areas where stability or traction is in doubt 3 Use extra care with crass catchers or other attachments these affect the handling and the stability of the machine PREPARATION 1 Read understand and follow instructions and warnings in this manual and on the mower engine and attachments Know the controls and the prop...

Страница 3: ...erate engine in enclosed areas Engine exhaust gases contain carbon monoxide a deadly poison MAINTENANCE AND STORAGE 1 DO NOT store mower or fuel container inside where fumes may reach an open flame spark or pilot light such as in a water heater furnace clothes dryer or other gas appliance Allow engine to cool before storing machine in an enclosure Store fuel container out of reach of children in a...

Страница 4: ... Adjustment 7 Cutting Height Adjustment 7 Recycling Operation 8 Installation of Grass Catcher 8 SECTION 3 MAINTENANCE INSTRUCTIONS 9 Change Engine Oil 9 Check Mower Blade 9 Service Annually 9 Engine 9 Air Filter 9 Engine Oil 9 Storage Procedure 9 SECTION 4 ADJUSTMENTS AND REPAIR 10 11 Mower Blade Replacement 10 Blade Sharpening 10 11 TROUBLESHOOTING 12 SERVICE SCHEDULE 13 Maintenance Replacement P...

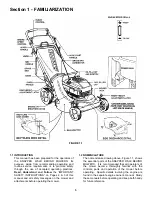
Страница 5: ...CTIONS on Pages 2 3 of this manual and all safety messages on the mower and attachments before operating the mower 1 2 NOMENCLATURE The nomenclature drawing above Figure 1 1 shows the essential parts of the SNAPPER WALK BEHIND MOWERS It is recommended that all operators of the mower become thoroughly familiar with the controls parts and operation of the mower before operating Specific details invo...

Страница 6: ...fueling Refer to Engine Owners Manual for specifications 2 1 6 Clean exterior surfaces of cutting deck and engine of any accumulation of spilled fuel dirt grass oil etc Keep engine air intake screen and cooling fins clear at all times 2 2 STARTING OPERATION 2 2 1 ENGINE BLADE Primer Models 1 Move engine speed control to the Fast Rabbit position See Figure 2 3 NOTE Stop the engine and blade by rele...

Страница 7: ...er nuts on each lower handle to maintain desired position WARNING Stop engine and mower blade by releasing the blade control before adjusting cutting height or handle height 2 5 CUTTING HEIGHT ADJUSTMENT 1 Pull the height adjusting latch outward and move to desired cutting height See Figure 2 5 FIGURE 2 5 2 Set all wheels at the same cutting height The highest cutting position is Notch 6 The lowes...

Страница 8: ...e ground speed control to slowest speed setting 4 Proceed mowing slowly If grass is very dense lower each rear wheel latch one notch lower than the front wheel latches to improve recycling performance WARNING DO NOT operate without entire Grass Catcher or guard in place Grass Catcher components are subject to deterioration during normal use Inspect frequently and replace worn or damaged components...

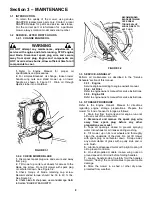
Страница 9: ...Section BLADE WEAR LIMITS FIGURE 3 2 3 3 SERVICE ANNUALLY Perform all maintenance as described in the Service Schedule section of this manual 3 3 1 Engine Service engine according to engine owner s manual 3 3 2 Air Filter Refer to engine owner s manual for service instructions 3 3 3 Engine Oil Refer to engine owner s manual for service instructions 3 4 STORAGE PROCEDURE Refer to the Engine Owner s...

Страница 10: ...tch in either tip See Figure 4 1 4 2 Replace with new blade WARNING DO NOT use a cutting blade that shows signs of excessive wear or damage Refer to Section MOWER BLADE REPLACEMENT for proper blade inspection and service procedures 4 1 2 BLADE SHARPENING 1 Disconnect spark plug wire and secure end away from plug IMPORTANT DO NOT tip machine with carburetor or spark plug down Oil from crankcase wil...

Страница 11: ...r working around cutting blades Blades are extremely sharp and can cause severe injury 4 Sharpen blade on a grinding wheel at an angle of 22 to 28 degrees DO NOT sharpen blade beyond original cutting edge See Figure 4 4 FIGURE 4 4 5 Check blade for balance If necessary correct balance by grinding heavy end of blade 6 Reinstall blade See Figure 4 3 Check torque of blade retaining cap screw Recommen...

Страница 12: ... Damaged out of balance or bent mower blade 1 Service mower blade 2 Loose blade components 2 Service and tighten loose parts 3 Loose or missing air lift if equipped 3 Replace air lifts Tighten to proper torque Cutting Grass 1 Cutting height too low or high 1 Adjust cutting height Improperly 2 Engine speed too slow 2 Move engine speed control to FAST position 3 Forward ground speed too fast 3 Move ...

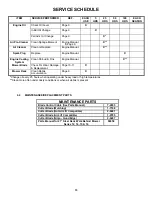
Страница 13: ...nual X Mower Blade Check For Wear Damage Replacement Page 10 11 X Mower Deck Clean Debris Accumulation Page 9 X Change oil every 25 hours when operating under heavy load or high temperatures Clean more often under dusty conditions or when air debris is present 4 2 MAINTENANCE REPLACEMENT PARTS MAINTENANCE PARTS Blade Control Cable See Parts Manual 7 2933 Cutter Blade Mulching 1 7168 Cutter Blade N...

Страница 14: ...iginal purchase date SNAPPER will not be responsible for any installation cost incurred The battery warranty only covers original equipment batteries and does not cover damage to the battery or machine caused by neglect or abuse destruction by fire explosion freezing overcharging improper maintenance or use of improper electrolyte There is no other express warranty DISCLAIMER OF WARRANTY Implied w...

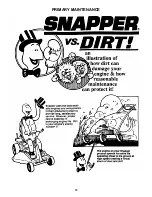
Страница 15: ...15 PRIMARY MAINTENANCE ...

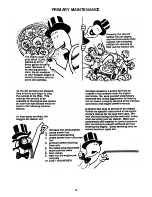
Страница 16: ...16 PRIMARY MAINTENANCE ...

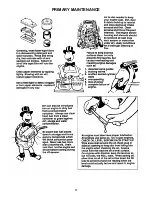
Страница 17: ...17 PRIMARY MAINTENANCE ...

Страница 18: ...18 PRIMARY MAINTENANCE ...

Страница 19: ..._____________________________________ ___________________________________________________________________ ___________________________________________________________________ ___________________________________________________________________ ___________________________________________________________________ ___________________________________________________________________ ______________________...

Страница 20: ...f you have any questions about your Snapper product contact your local authorized Snapper dealer or contact Snapper Customer Service at Snapper McDonough GA 30253 Phone 1 800 935 2967 COPYRIGHT 2000 SNAPPER INC ALL RIGHTS RESERVED MANUAL No 7 3689 I R 4 29 00 WARNING ENGINE EXHAUST SOME OF ITS CONSTITUENTS AND CERTAIN VEHICLE COMPONENTS CONTAIN OR EMIT CHEMICALS KNOWN TO THE STATE OF CALIFORNIA TO...

Отзывы: