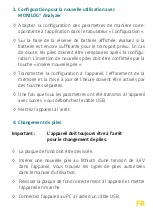
3. Configuration for the new application with
MONILOG® Analyzer
◊ Adjust the parameter configuration according to the applica-
tion in the “Configuration” tab.
◊ Use the displayed battery reserve to assess whether the
battery capacity would still be sufficient for the scheduled
transport. If in doubt, replace the batteries after configura-
tion. Confirm the insertion of new batteries by pressing the
„Insert new battery“ button.
◊ Activate transferring the configuration to the device, clearing
the memory and updating the time by pressing separate
buttons.
◊ After all parameters have been successfully transferred to the
device, disconnect the USB cable.
◊ Switch off the device.
4. Battery replacement
Important:
The device must always be switched off
before replacing the batteries.
◊ Unscrew the base plate.
◊ Insert a new lithium battery with a voltage of 3.6V into the
device. For approved battery types, please refer to the instruc-
tions for use.
◊ Screw the base plate properly back onto the device and switch
it on.
EN
Содержание monilog
Страница 1: ...MicroShockDetector plus Quick guide Kurzanleitung Guide rapide Gu a r pida Kisa Kilavuz...
Страница 22: ...RU MicroShockDetector plus RISK LOGGER MONILOG Connect MicroShockDetector plus Google Play Store...
Страница 23: ...RU 2 CONTROL STATUS ALARM CONTROL 2 STATUS CONTROL 5 STATUS ALARM RISK LOGGER MONILOG Analyzer LONGLIFE...
Страница 25: ...RU 3 MONILOG Analyzer USB 4 3 6 USB...
Страница 32: ...CN RISK LOGGER MicroShockDetector plus MONILOG Connect MicroShockDetector plus...


