

GoSpeak! Pro
Wireless Lapel & Handheld
Microphone User Guide
Congratulations on your purchase of the GoSpeak! Pro Ultra-Portable PA
System. This innovative public address system weighs less than 5 pounds
and carries in a laptop tote-bag (included). Set-up and break down of
the GoSpeak! Pro takes just minutes. Additional GoSpeak! Pro Wireless
Microphones may be purchased (Lapel VP3421 and Handheld VP3521)
for use with either model.
The GoSpeak! Pro (model #VP3320) cannot be used with additional
GoSpeak Wireless Microphones, but is compatible with third-party
wireless microphone systems such as the Audio-Technica PRO 88W-830.
Connecting your Wireless Lapel Microphone
Your GoSpeak! wireless lapel microphone is already
paired electronically with your GoSpeak! Pro speaker.
To enable the microphone, follow the six steps below:
1. Install the AA batteries (included) in your lapel microphone
transmitter box.
2. Turn your GoSpeak! Pro speaker Master Volume control all the
way counterclockwise (sound off).
3. Plug your lapel microphone into your transmitter box and turn
the box on.
4. Turn on your GoSpeak! Pro Speaker.
5.Match the A or B microphone channel to the GoSpeak! Pro
channel.*
6. Slowly increase the Master Volume on your GoSpeak! Pro until
the correct microphone volume is established.
*
GoSpeak! Pro can only connect to one wireless mic at a time.
VP3421
www.smklink.com (888
) 696-3500
VP3421
VP3521
Your GoSpeak! wireless handheld microphone is already
paired electronically with your GoSpeak! Pro speaker. To
enable the microphone, follow the six steps
below.
1. Install the two AA batteries (included) in your handheld
microphone.
2. Turn your GoSpeak! Pro speaker Master Volume control
all the way counterclockwise (sound off).
3. Turn on your GoSpeak! Pro Speaker.
4. Turn on your wireless microphone using the Power Button
on the microphone.
5.*Match the A or B microphone channel to the GoSpeak!
Pro channel.
6. Slowly increase the Master Volume on your GoSpeak! Pro
until the correct microphone volume is established.
*GoSpeak! Pro can only connect to one wireless mic at a time.
Connecting Your Handheld Wireless Microphone
VP352
1
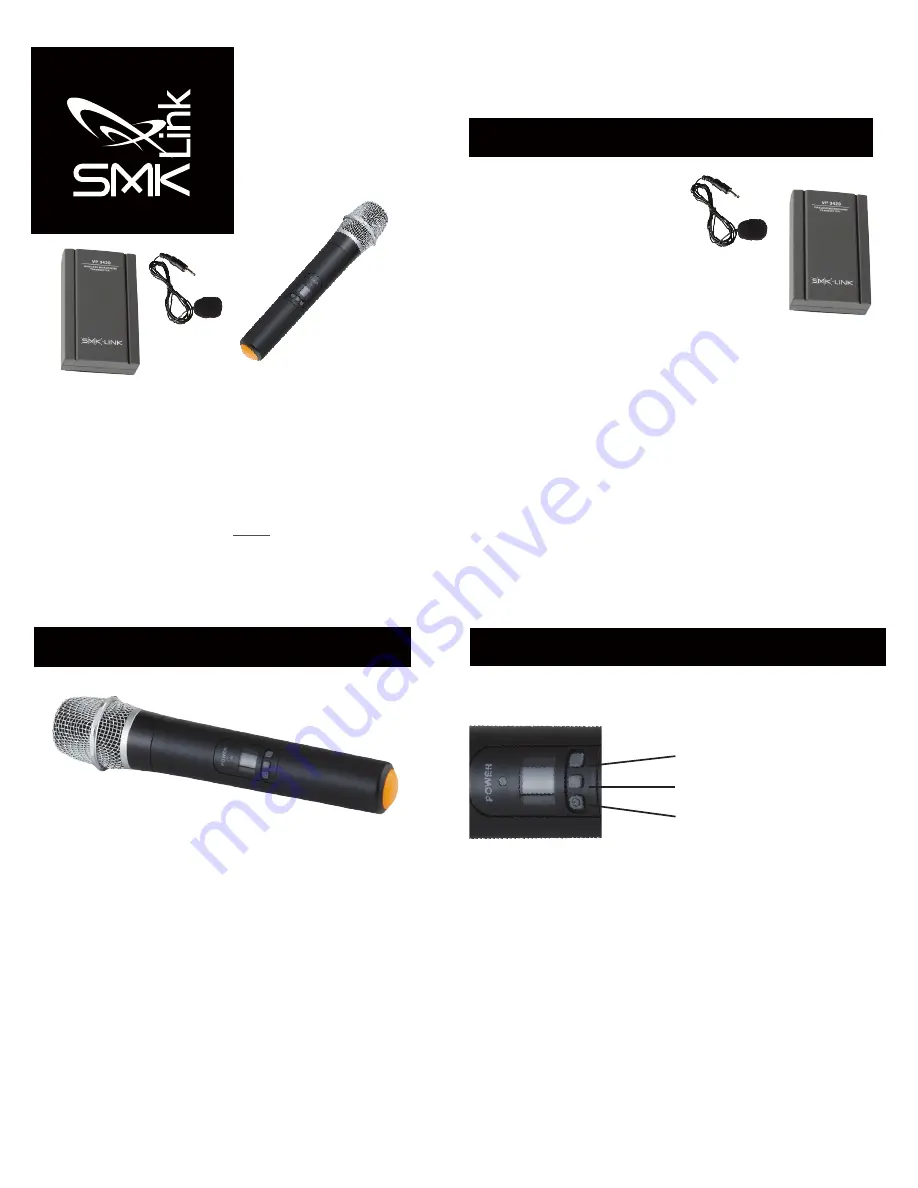
Microphone Controls and LED Status Indicator
Your GoSpeak! Pro Handheld Microphone has three control buttons
and an LED status indicator. See detail descriptions below.
1. Power Button (le
f
t button).
• Toggles power ON and OFF. When power is turned ON, the
LED
indicator will flash red and blue for 6 seconds and then
flash BLUE
when mic is on Channel A, or GREEN
when mic
is on channel B.
• The LED indicator will be dark when power is OFF.
2. Channel Select Button (right button)
• Pressing the Channel Select Button will switch the
microphone’s
wireless channel between channels A and B.
• Each time this button is pressed, the LED indicator will flash
red and blue for 6 seconds; and then, begin flashing BLUE
when
mic Channel A is selected, or GREEN when channel B is
selected.
Note: the middle button on the GoSpeak! Pro Handheld Microphone,
included for future development, is currently unassigned.
Channel A/B Switch Button
Unassigned
Button
(for future development)
Power ON/OFF Button


