background image


Instructions for the installer


2.2.1


Ovens with top controls 

In the ovens with top controls the 

power cable is not supplied

. Use a 

H05RR-F or H05RN-F rubber-sheathed cable making sure that it does 
not come into contact with any external metal parts of the oven when 
routing. Remove rear cover by loosening relevant screws to gain access 
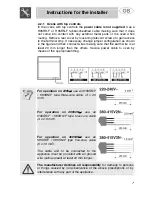
to the terminal strip. If necessary change jumper configuration as shown 
in the figure and then connect wires making sure that the earth wire is at 
least 20 mm longer than the others. Secure power cable to oven by 
means of the appropriate fitting. 


For operation on 230V

:

 use an H05RR-F 

/ H05RN-F type three-core cable (3 x 2.5 
mm

2

).


For operation on 400V2N

:

use an 

H05RR-F / H05RN-F type four-core cable 
(4 x 2.5 mm

2

).


For operation on 400V3N

:

 use an 

H05RRF / H05RN-F type five-core cable  
(5 x 1.5 mm

2

). 

 
The cable end to be connected to the 
appliance must be provided with an ground 
wire (yellow-green) at least 20 mm longer. 


The manufacturer declines all responsibility

 for damage to persons 

or things caused by non-observance of the above prescriptions or by 
interference with any part of the appliance. 


Содержание JRP30GIBB

Страница 1: ... oven These instructions will also make it easier for you to become acquainted with each single component or accessory Useful hints are provided on how to use pans and cooking utensils on correct guide positions and control settings Be sure to follow the cleaning instructions carefully That way your oven will give you many long years of reliable service The single paragraphs illustrate oven operat...

Страница 2: ...AL GARBAGE COLLECTION CENTRE BEFORE THROWING AWAY AN OLD APPLIANCE MAKE SURE THIS IS RENDERED HARMLESS AND DISPOSE OF IT THROUGH A PRE SORTED WASTE COLLECTION CENTRE IT IS OBLIGATORY FOR THE ELECTRICAL SYSTEM TO BE GROUNDED ACCORDING TO THE METHODS REQUIRED BY SAFETY RULES WHEN LINKING UP TO MAINS BY PLUG AND SOCKET MAKE SURE THAT BOTH ARE COMPATIBLE AND CONNECT BY MEANS OF A POWER CABLE COMPLYING...

Страница 3: ...OLYSIS THE OUTER DOOR WINDOW COULD BECOME HOTTER THAN NORMAL KEEP CHILDREN AT A DISTANCE THIS APPLIANCE IS MARKED ACCORDING TO THE EUROPEAN DIRECTIVE 2002 96 EC ON WASTE ELECTRICAL AND ELECTRONIC EQUIPMENT WEEE THIS GUIDELINE IS THE FRAME OF A EUROPEAN WIDE VALIDITY OF RETURN AND RECYCLING ON WASTE ELECTRICAL AND ELECTRONIC EQUIPMENT BEFORE THE APPLIANCE IS PUT INTO OPERATION ALL THE LABELS AND PR...

Страница 4: ...ad of this appliance may not correspond with the colour markings identifying the terminals in your plug proceed as follows The wire coloured Green and Yellow must be connected to the terminal marked with E or The wire coloured Blue must be connected to the terminal marked N or coloured Black The wire coloured Brown must be connected to the terminal marked L or coloured Red 2 2 Electrical connectio...

Страница 5: ...t the earth wire is at least 20 mm longer than the others Secure power cable to oven by means of the appropriate fitting For operation on 230V use an H05RR F H05RN F type three core cable 3 x 2 5 mm2 For operation on 400V2N use an H05RR F H05RN F type four core cable 4 x 2 5 mm 2 For operation on 400V3N use an H05RRF H05RN F type five core cable 5 x 1 5 mm 2 The cable end to be connected to the ap...

Страница 6: ...a work top with combined heating plates ensure a minimum clearance from any side walls of at least 110 mm as shown in Figure 1 For installing in a column follow the dimensions given in Figure 1 2 allowing for a clearance of 80 to 90 mm at the top and sides of the column Tighten the four screws A inside the frame to secure Fig 1 For installing beneath a non integrated top allow for a rear and botto...

Страница 7: ...green of the cook top to the earth terminal A of the oven see figure Fit the cook top connectors into the appropriate sockets in the top cover of the oven Make sure that the colours and symbols of the connectors match those of the oven sockets If the cook top is equipped with a connector for the residual heat indicator same must be fitted into the free socket on the right side The oven can now be ...

Страница 8: ...INDICATOR LIGHT When this light comes on the oven is heating up When this light goes out the preset heating temperature has been reached When the light flashes the temperature inside the oven is steady at the set temperature This light also comes on during the automatic cleaning cycle pyrolysis and goes out when the set time has passed THERMOSTAT KNOB Cooking temperature is selected by turning the...

Страница 9: ...IS COOK TOP CONTROL KNOB Permits to adjust cook top heating Rotate clockwise to set to desired value 2 to 12 COOK TOP CONTROL KNOB WITH DOUBLE HEATING Permits to select heating zone in plates with double heating zones Rotating the knob clockwise from between 2 to 12 heats the inner zone within the small diameter Turn the knob all the way around beyond 12 and release This causes the knob to return ...

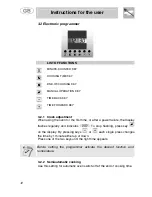
Страница 10: ...time or after a power failure the display flashes regularly and indicates To stop flashing press key on the display By pressing keys or each single press changes the time by 1 minute either up or down Press one of the two keys until the right time appears Before setting the programmer activate the desired function and temperature 3 2 2 Semiautomatic cooking Use this setting for automatic oven swit...

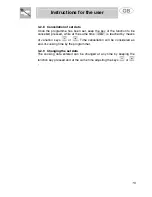
Страница 11: ...the key pressed and at the same time press keys or to set the cooking time By pressing key the sum of the right time cooking time will appear keep the key pressed and at the same time press keys or to regulate the end of cooking time Release key to start the programmed count and the display will show the right time together with symbols AUTO and After setting to see how much cooking time is left p...

Страница 12: ... by pressing key 3 2 7 Minute counter The programmer can also be used as a simple minute counter The use of the minute counter will not interrupt oven operation at the end of the set time By pressing key the display shows keep the key pressed and at the same time press keys or By releasing the key the programmed count starts and the symbols and appear on the monitor After programming the minute co...

Страница 13: ...e cancelled pressed while at the same time is reached by means of variation keys or Time cancellation will be considered as end of cooking time by the programmer 3 2 9 Changing the set data The cooking data entered can be changed at any time by keeping the function key pressed and at the same time adjusting the keys or 15 ...

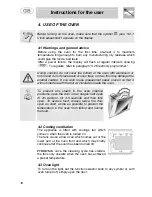
Страница 14: ...aper place it so that it will not interfere with the hot air circulation inside the oven To prevent any steam in the oven creating problems open the door in two stages half open 5 cm approx for 4 5 seconds and then fully open To access food always leave the door open as short a time as possible to prevent the temperature in the oven from falling and ruining the food 4 2 Cooling ventilation The app...

Страница 15: ...lling Oven plate useful for catching fat from foods on the grill above Pastry plate for baking cakes pizza and oven desserts Rotisserie frame to be mounted in the oven guides before fitting the spit Rotisserie suitable for cooking whole chickens sausages and any other food requiring even cooking on all surfaces Roof liner Grill guard removing this simplifies cleaning procedures inside the oven Chr...

Страница 16: ...ven until the set temperature is reached Place the food in the oven only after the thermostat indicator light has turned off very fatty meats may be put in when the oven is still cold Put frozen meat in immediately without waiting for it to thaw The only precaution you need to take is to set the temperature about 20 C lower and cooking time about 1 4 longer than you would for fresh meat 6 2 Hot ai...

Страница 17: ...lowest guide in accordance with the size of the pieces Keep the oven door closed during grilling Grilling with the door open could permanently damage the oven and affect safety of operation 6 4 Hot air grilling FUNCTION SWITCH THERMOSTAT SWITCH 280 C Ensures uniform heat distribution with greater heat penetration into the food Food will be lightly browned on the outside and remain soft inside Keep...

Страница 18: ...ting cooking at the bottom and with dishes requiring heat in the lower area in particular The plate is best inserted at bottom level 6 6 Defrosting FUNCTION SWITCH THERMOSTAT SWITCH IN POSITION 0 The flow of air produced by the fan ensures quicker defrosting The air circulating inside the oven is at room temperature The advantage of defrosting at room temperature is that it does not alter the tast...

Страница 19: ...second level from the bottom Remove handle D and position the spit rod so the pulley E remains guided on frame B Completely fit frame B until the tip of the spit rod fits into hole C on the back wall of the oven Place an oven dish F on the bottom guide and pour in a little water to prevent smoke from forming It is normal for the thermostat light to flash during cooking This indicates the temperatu...

Страница 20: ... 170 170 200 170 200 30 40 KG 30 40 KG 30 40 KG 45 60 45 60 45 60 50 60 40 50 FISH 1 2 170 200 ACCORDING TO DIMENSIONS PIZZA 1 2 210 240 40 45 DESSERTS SHORT PASTRY CIAMBELLA BRIOCHES FRUIT CAKE PARADISE CAKE APPLE CAKE RICE CAKE 1 2 1 2 1 2 1 2 1 2 1 2 1 2 170 200 165 170 200 170 200 170 190 180 15 20 35 45 40 45 20 30 60 60 60 WITH PREHEATED OVEN GRILLING LEVEL FROM BELOW TIME IN MINUTES FIRST S...

Страница 21: ...ROAST HARE ROAST PIGEON 2 2 2 2 2 2 2 2 2 2 2 2 150 170 150 160 160 170 160 180 130 150 170 180 170 160 170 150 160 150 160 160 170 140 170 65 90 70 100 65 90 35 45 100 130 40 45 70 90 100 160 160 240 80 100 30 50 15 25 FISH 2 3 150 170 ACCORDING TO DIMENSIONS PIZZA BREAD TOAST 2 3 2 3 1 2 210 240 190 210 220 240 30 50 40 7 DESSERTS CIAMBELLA FRUIT CAKE BRIOCHES SHORT PASTRY RICE CAKE APPLE CAKE P...

Страница 22: ... Use absorbent kitchen paper In the case of persistent dirt wash with damp sponge and regular detergent 7 3 Outer oven structure Wash with water and regular detergent 7 4 Enamelled parts Wait for the oven to cool take out all the removable parts and proceed to wash with water and regular detergent Dry and replace components For cleaning enamelled parts never use abrasive products metal wire sponge...

Страница 23: ...door and after a few hours wash the oven with hot water and liquid detergent Rinse and dry 7 6 Pyrolysis automatic oven cleaning Pyrolysis is an automatic high temperature cleaning method which causes dirt to dissolve BEFORE STARTING THE AUTOMATIC CLEANING CYCLE MAKE SURE THE OVEN IS EMPTY AND DOES NOT CONTAIN FOOD OR ANYTHING ELSE A DOOR LOCK DEVICE PREVENTS THE DOOR BEING OPENED IN CASE THE OVEN...

Страница 24: ...SED DURING MANUFACTURE THIS IS A QUITE NORMAL OCCURRENCE WHICH DISAPPEARS AFTER THE FIRST CLEANING CYCLE DURING THE AUTOMATIC CLEANING CYCLE THE FANS MAKE MORE NOISE DUE TO GREATER ROTATION SPEED THIS IS QUITE NORMAL AND IS INTENDED TO FAVOUR THE ELIMINATION OF HEAT AFTER PYROLYSIS VENTILATION CONTINUES AUTOMATICALLY FOR LONG ENOUGH TO PREVENT THE CABINET WALLS AND FRONT OF THE OVEN FROM OVERHEATI...

Страница 25: ... the symbol the thermostat indicator light will come on and the programmer will automatically set on a minimum pyrolysis time of To display or regulate this time press key and increase decrease keys or Pyrolysis time can be set to a maximum of 3 hours The cleaning cycle can be programmed so it starts at a specific time Press key and change the setting by means of setting variation keys or 27 ...

Страница 26: ...so on The following instructions describe how to carry out these minor maintenance operations Before any intervention disconnect the power supply of the device 8 1 Replacement of light bulb Remove the bulb protector A by turning anticlockwise and change bulb B with a similar one Re fit the bulb protector A Only use oven bulbs T 300 C If in doubt ask your dealer 28 ...

Страница 27: ...ully without brut forle When door removed be careful with the hinges being under pressure 8 3 Oven door seal mod JRS 30 JRS 31 To permit thorough cleaning of the oven the seal may be removed Before removing the seal take off the door as described above Once the door has been taken off lift the tabs at the corners as shown in the figure After cleaning refit the seal with the longer side horizontal ...

Страница 28: ......

Отзывы: