background image


2

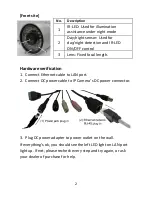
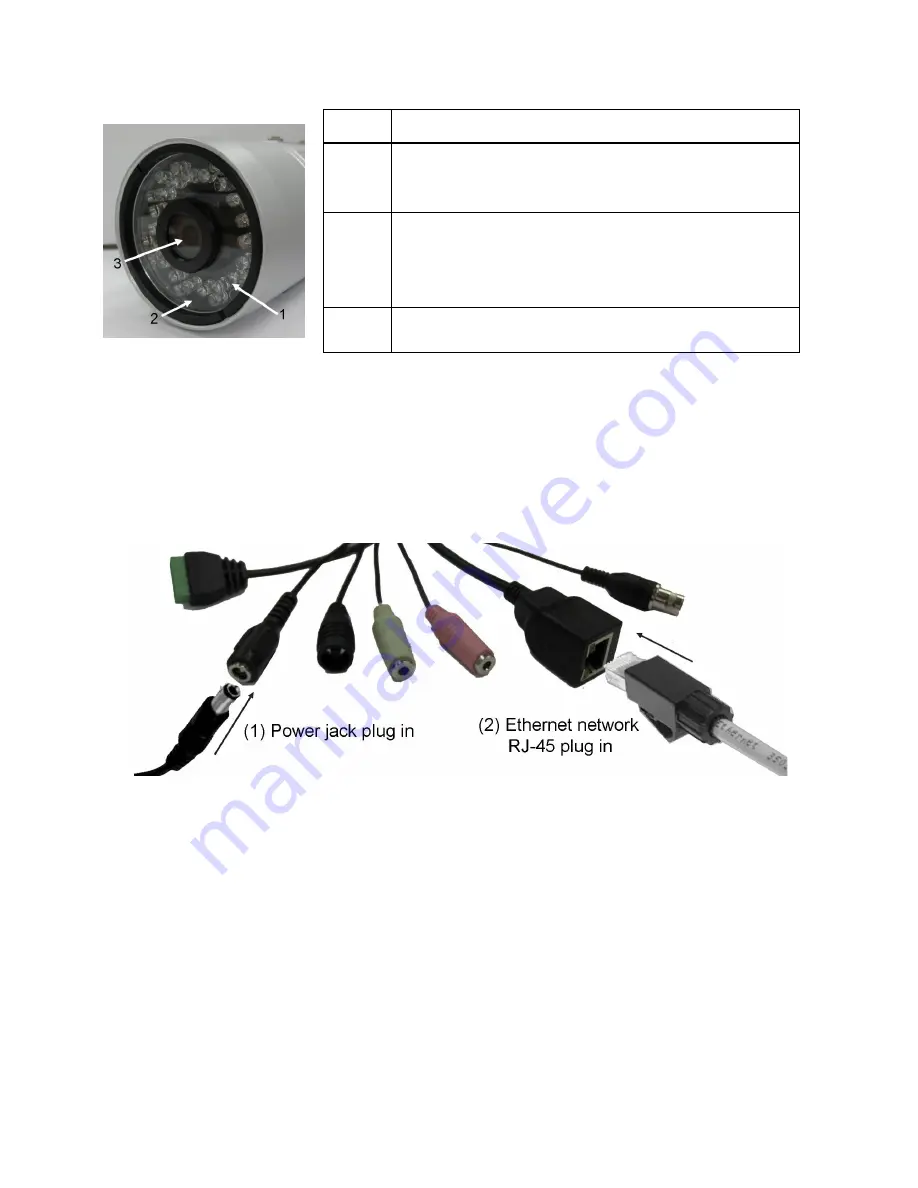
[Front site] 


No. 

Description 

IR-LED: Used for illumination 
assistance under night mode 

Day/night sensor: Used for 
day/night detection and IR-LED 
ON/OFF control 

Lens: Fixed focal length. 


Hardware verification 

1.


Connect Ethernet cable to LAN port.   

2.


Connect DC power cable to IP Camera’s DC power connector. 


3.


Plug DC power adapter to power outlet on the wall. 

If everything’s ok, you should see the left LED light on LAN port 
light up. If not, please recheck every step and try again, or ask 
your dealer of purchase for help. 


Содержание SIU7117

Страница 1: ... this product please check the package contents If any item is missing contact your dealer of purchase to claim for missing item s Package Contents No Description Q ty 1 Network IP Camera 1 2 DC power adapter 1 3 Sun Shield 1 4 Screw 2 5 Bracket 1 6 User manual CDROM 1 7 Quick installation guide 1 ...

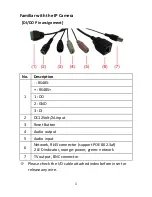
Страница 2: ...RS485 1 DO 2 GND 3 DI 2 DC12Volt 2A input 3 Reset Button 4 Audio output 5 Audio input 6 Network RJ45 connector support POE 802 3af 2 LED indicator orange power green network 7 TV output BNC connector Please check the I O cable attached index before insert or release any wire ...

Страница 3: ...ol 3 Lens Fixed focal length Hardware verification 1 Connect Ethernet cable to LAN port 2 Connect DC power cable to IP Camera s DC power connector 3 Plug DC power adapter to power outlet on the wall If everything s ok you should see the left LED light on LAN port light up If not please recheck every step and try again or ask your dealer of purchase for help ...

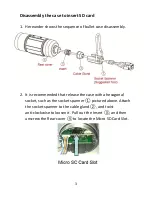
Страница 4: ... disassembly 2 It is recommended that release the case with a hexagonal socket such as the socket spanner pictured above Attach the socket spanner to the cable gland and twist anti clockwise to loosen it Pull out the Insert and then unscrew the Rear cover to locate the Micro SD Card Slot ...

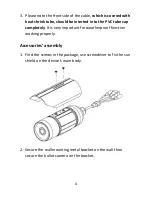
Страница 5: ... the PVC tube cap completely It is very important for weatherproof function working properly Accessories assembly 1 Find the screws in the package use screwdriver to fix the sun shield on the device s main body 2 Secure the wall mounting metal bracket on the wall then secure the bullet camera on the bracket ...

Страница 6: ...n and connect to local network first 2 Using the utility IPFinder exe on the CD ROM the IP camera can be searched without knowing the IP address 3 Press Discover button to search for all IP cameras on the local network If the IP camera was not resided in the same sub network of the managed PC click Change IP to assign an IP address of the same subnet of the PC Then the IP camera can be accessed by...

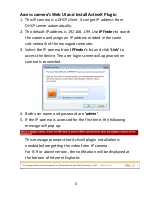
Страница 7: ...managed computer 3 Select the IP camera from IPFinder s list and click Link to access the device The user login screen will appear when camera is connected 4 Both user name and password are admin 5 If the IP camera is accessed for the first time the following message will pop up This message prompts that ActiveX plugin installation is needed before getting the video from IP camera For IE 9 or abov...

Страница 8: ... able to function properly 7 When Internet Explorer plugin is installed you may also be prompted that Do you want to allow changes to be made to your computer Click Yes to allow changes 8 After ActiveX plugin is installed the video stream from camera can be seen Please refer to user manual for more detailed instructions P N 5300 00000024 00Y ...

Отзывы: