background image

P 14

w w w . s m a x . c o m . t w

Chapter 3.

SMAX Network Camera connection

SMAX network camera supports multiple connections 

for accessing. Includes multiple browsers connection, 
video player connection that supports RTSP, SmaxViewer
APP connection, or SMAX VMS or CMS software to 
access. Each connection fulfill different surveillance 
application for different purpose.

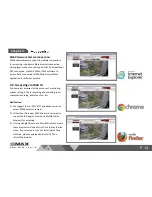
3.2. Accessing via Web UI

You can select browser for the purpose of monitoring, 

system setting, SD card recording and searching, local 
computer recording, audio function…etc.

Notification

1) We suggest to use IE 9/10/11 and above version to 

access SMAX network camera.

2) Other than IE browser, SMAX network camera also  

support both Google Chrome and Mozilla Firefox 

browsers for accessing.

3) If using Google Chrome and Mozilla Firefox to access, 

those browsers will need Quick Time to play the live 

video. If your computer has not install Quick Time 

software, please download and install it. Then 

refresh the browser.

Содержание GB1

Страница 1: ...w w w s m a x c o m t w Ver 1 2 GB1 2MP Box Camera 2 8 12mm Vari Focal Lens User Manual ...

Страница 2: ... 1 Hardware Installation 7 2 2 SMAX Finder Installation 8 2 3 Ready to Use 9 3 1 Network Deployment 10 3 2 Using Web Browsers 14 3 3 Using RTSP Players 15 Chapter 4 Chapter 5 3 4 Using Mobile APP 16 3 5 Using VMS 17 4 1 Main Page 22 4 2 Client Settings 23 5 1 System Setup 24 5 2 Network Setup 28 5 3 Video Audio Setup 38 5 4 SD Card Setup 51 5 5 Event Setup 55 5 6 Maintenance 61 5 7 Device info 64 ...

Страница 3: ...w w w s m a x c o m t w CONTENTS Chapter 6 6 1 URL Commands 66 6 2 Technical Specifications 81 6 3 Onvif Supports List 83 6 4 Liability 94 6 5 Copyright 95 ...

Страница 4: ...e For further use of project application it requests an advance level of knowledge in lens optics selection network structure design storage planning and software capability This product service may be different since the diversity of distributors We suggest to purchase SMAX product from SMAX direct distributors or system integrators to get the most complete after service Please first check the pa...

Страница 5: ...rovide a DC iris vari focal lens to connect with Its light sensor can detect and control the IR LED On Off It can also attach with other type of lens that meet the CS mount standard GB1 accepts both POE or DC 12V as power supply Please noted that the DC 12V adapter is an extra accessory which does not include in this package GB1 supports two ways audio function which can connect with an external s...

Страница 6: ...DO GND GND Power RL Digital Output Pin Notes Specifications DI is floating trigger is high DI is high trigger is low Max current input 30mA Trigger DI GND GND H L SW Power RL CAMERA Suggested Component Value Power VDC RL Ω 3 3V 100Ω 5V 200Ω 12V 510Ω Item Description 1 RS485 2 RS485 3 GND 4 DO 5 DI 1 6 DI 2 7 GND 1 2 Physical Description 1 2 2 Digital Input DI Digital Output D0 ...

Страница 7: ... when operate this network camera to prevent from any possibility that cause the device or components to invade your body Please do not disassemble the camera to prevent from any abnormal function or operation When place the camera in a high humidity or wet environment please select the IP66 67 level products Or else please pus the camera in a outer housing box to prevent from damage Please do not...

Страница 8: ...hapter I Description Qty Network Camera 1 Lens 1 Bracket 1 Tools package Screw Kit etc 1 CD A Software SMAX Finder x 1 SMAX VMS64 x 1 B Doc Datasheet User Manual Quick Installation Guide 1 Network Camera Lens CD 1 4 Package Contents ...

Страница 9: ... limits are designed to provide reasonable protection against harmful interference when the equipment is operated in a commercial environment This equipment generates uses and can radiate radio frequency energy and if not installed and used in accordance with the installation manual may cause harmful interference to radio communications Operation of this equipment in a residential area is likely t...

Страница 10: ...he network camera supports both PoE power or DC 12V power supply Please connect this network camera to a PoE switch PoE injector or DC 12V power supply Make sure all connection is stable Please connect the network cable to network Camera Setup 6 Please fix the camera on the wall or ceiling with the bracket Setup 7 Please make sure all setup procedures of this network camera is complete Then proces...

Страница 11: ...n a local LAN structure to meet the SMB surveillance requirement SMAX Finder Installation Please read the CD from the package content Then copy SMAX Finder exe file to your personal PC Run the program until the SMAX Finder windows display as shown on the right picture SMAX Finder procedure Press Discover button so the program will search all SMAX camera s IP within the local LAN Choose a specific ...

Страница 12: ...er default username and password ID admin PW admin for further access When first connect to a SMAX camera it needs to install some plugin to your computer Please follow instruction and press allowed to proceed installation process After installation of ActiveX plugin you should be able to see the video stream from camera as shown on the below picture ...

Страница 13: ...e contact your ISP vender for further static true IP address setting or service Internet and Intranet setting structure illustration Notification When you have the true IP address you may set your network camera in static IP mode Then you may use the internet browser by entering this static true IP address to access your network camera If your true IP address was set to your router you may use the...

Страница 14: ...ect the camera for internet setting and click Change IP button Select static mode and enter your true IP address Subnet mask Default gateway and the username and password of the camera Then press OK to finish setting It will prompt below pop out to show the success message Notification Please contact your ISP vender for further static true IP address setting or service ...

Страница 15: ...address of your local network And enter your gateway address and DNS numbers of your router Please select Enable UPnP Discovery and Enable UPnP Port Mapping Then press Apply button to finish setting Notification Network camera s UPnP function may have some compatible issue with router s UPnP function For your router s further setting please kindly refer to your router s instruction about Port Forw...

Страница 16: ...utton Select Network button Please select PPPoE and enter your username and password Then press Apply button to finish setting Notification When select PPPoE connection setting please make sure your network camera is equip with a true static IP address If so you can access to the camera by entering the IP address via internet If not please refer to our DDNS setting ...

Страница 17: ...b UI You can select browser for the purpose of monitoring system setting SD card recording and searching local computer recording audio function etc Notification 1 We suggest to use IE 9 10 11 and above version to access SMAX network camera 2 Other than IE browser SMAX network camera also support both Google Chrome and Mozilla Firefox browsers for accessing 3 If using Google Chrome and Mozilla Fir...

Страница 18: ...lect Media M button Then select Open network stream N It will pop out the setting window Please enter RTSP address and press Play button It should link to the camera for the live video as shown in below picture Notification SMAX network camera provide three RTSP stream Main stream address rtsp Camera s IP stream1 Second stream address rtsp Camera s IP stream2 Mobile stream address rtsp Camera s IP...

Страница 19: ...ction Please download SmaxViewer from the APP store to your iPhone or iPad device Please run the SmaxViewer APP and press button It will goes to the adding camera page Please enter your camera s IP address Username and password setting Then press Apply button to store the setting Please select the added camera from the Device List to access camera Notification SmaxViewer support horizontal display...

Страница 20: ... Setup 2 Setup 3 Setup 4 Setup 5 3 5 Accessing via SMAX VMS Please select Setup exe from the SMAX VMS folder of CD content Follow installation procedure and setting Then you can run the SMAX VMS software to use 3 5 1 SMAX VMS Installation procedure ...

Страница 21: ... software by clicking the shortcut from your desktop after installation is complete 3 5 1 SMAX VMS adding camera procedure Run the SMAX VMS software and enter the Username and Password Notification Default username is admin Password leave as blank Select System icon to your system setting page ...

Страница 22: ... camera within local LAN Press Search button so the VNS will automatically search all SMAX camera within local LAN Second way is to add camera over internet structure by entering IP address HTTP port Username Password and Name Then press Search Server button Notification When press Search Server button it will pop out below confirmation window Press Yes to continue process ...

Страница 23: ...hat you wish to enable such as Audio Recording PTZ and Operate camera Notification Different camera device has different function If one function does not work please first check whether your camera has the function Operate camera function can wait till all cameras have been add to VMS Then Operate all cameras at the same time Select Add button to finish setting You may see your added camera in th...

Страница 24: ...t last and it will pop out the confirmation windows Press Yes to store and finish your setting After above procedures you should be able to watch all live video from the live view page of VMS Notification For further SMAX VMS software setting or operation please kindly refer to its manual ...

Страница 25: ...age setting SD card recording etc There is a complete introduction procedure of all function in the following chapter four and five Homepage function list 1 Live view screen 2 Select stream format 3 Digital output on off switch 4 Select language 5 Client settings 6 System configuration 7 Live view operation control list Notification Function list of icons as shown on the picture to the right Main ...

Страница 26: ... then you can change to RTSP RTP over UDP If your network environment only allows to connect with web page then you can change to HTTP protocol 4 2 2 Storage Option This setting is to define your storage option When doing a recording action you can set where the recording file saves to Press Browse button to set your folder path name You can also name the Prefix of recording file and select to Add...

Страница 27: ...it includes all operating function for settings maintenance log and device information etc Configuration menu as shown below 1 System 2 Security 3 Network 4 IP Filter 5 Video 6 Audio 7 Motion Detection 8 Privacy Mask 9 PTZ Control 10 Event 11 Recording 12 SDHC 13 Log 14 Device Info 15 Maintenance ...

Страница 28: ...ght Saving if needs to There are four ways to synchronize camera s time Keep the current date and time Synchronize with computer time Synchronize with NTP Server and Set Manually For a small surveillance system we suggest to Synchronize with computer time Press Apply button to complete setting For a medium or above surveillance system we suggest to Synchronize with NTP Server Please enter your NTP...

Страница 29: ...is camera by setting Administrator and Account List Administrator Setting Procedure Please enter a new Password and Retype Password Notification Administrator password can be a composition of English letters and Arabic numerals But the length must kept between 4 8 characters No special character allow And please keep notice between capital and lowercase English letters Press Modify to complete set...

Страница 30: ... can be a composition of English letters and Arabic numerals But the length must kept between 4 8 characters No special character allow And please keep notice between capital and lowercase English letters Select Authority then press New to add an account Notification Authority has two types User or Guest The privilege of a guest is limited to watch the live view from the home page only Without any...

Страница 31: ...etwork Setting Argument When your surveillance system has lower than 4pcs of network camera we suggest to set DHCP IPv4 IPv6 You can search the camera s IP with Smax Finder software Please refer to chapter 3 1 for further description If the total pcs of network camera is greater than 4pcs We suggest to use Static IPv4 IPv6 Camera s port setting as shown below a HTTP Port 80 b RTSP Port 554 c RTP D...

Страница 32: ...lease enter IP Address IPv4 Subnet Mask Gateway Primary DNS and Secondary DNS information Press Apply to complete setting Notification For static IP setting please refer to the picture as shown on bottom right If the LAN IP segment is 192 168 1 xxx Please enter your router s IP address for the Gateway We suggest the camera to use from 192 168 1 99 192 168 1 200 ...

Страница 33: ...c IPv4 Setting Procedure Select Static IPv4 IPv6 under Network Type column Please enter IP Address IPv4 Subnet Mask Gateway Primary DNS and Secondary DNS information Press Apply to complete setting Notification Please contact your ISP service vender for further interne static IP setting ...

Страница 34: ...SL network connection Please contact your ISP service vender for the username and password For PPPoE connection network camera will get an IP Address for connection Some ISP vender may provide a static IP address So the user only needs to enter that IP on the IE browser then you will able connects to the network camera If you ISP vender does not supply PPPoE static IP please kindly refer to the DD...

Страница 35: ...k Setting Advanced network setting includes Multicast Bonjour Qos DDNS HTTPS function setting 5 2 2 1 HTTPS Setting HTTPS Setting Procedure Select Advanced page under Network page Select Enable HTTPS Default HTTPS Port set as 443 Press Apply to complete setting ...

Страница 36: ...e and let you do the setting on Username and Password Notification SMAX network camera provides three DDNS service website DynDNS org TZO com and No ip You can choose either one of the website to start you DDNS Host Name registration DDNS Setting Procedure Select Advanced page under Network page Select Enable DDNS Then enter Host Name Username and Password Press Apply to complete setting ...

Страница 37: ...er as this point recipient SMAX network camera is distinguished by the multicast group address Its IP address range is from 232 0 0 0 to 232 255 255 255 in a class D A class D is a group address which the network camera will send the stream packet to Then the recipient will inform the router to join this group Multicast Setting Procedure Select Advanced page under Network page Select Enable Multic...

Страница 38: ...r network transmit packets QoS Setting Procedure Select Advanced page under Network page Select Enable QoS And select whether enable Video Audio or Both then enter its DSCP value Press Apply to complete setting Notification DSCP Differentiated Services Code Point In Dec 1998 IETF published a QoS classification standard of Diff Sery Differentiated Service DSCP using six bits and its range from 0 63...

Страница 39: ...orking which it can automatically find the device within local LAN network Bonjour is a standardize protocol that allows for each device to find each other without a IP address or DNS server Bonjour Setting Procedure Select Advanced page under Network page Select Enable Bonjour Press Apply to complete setting ...

Страница 40: ... rule only to keep hte connecting performance Normally we use white list rule in a surveillance project IP Filter Setting Procedure Select IP Filter button under the Configuration menu Select Enable IP Filter Enter the IP List under Accepted IP list column then press New button to add into white list Press Apply to complete setting Notification Setting black list for Deny IP list is same as above ...

Страница 41: ...ng Main Stream Setting Procedure Select Video button under the Configuration menu Then goes to Video Setting page Select your desire format under the Main Stream column Default set as H 264 format It can be changed to MPEG 4 format Define your Resolution Frame Rate fps Default set as 1920x1080 1080P 30fps Define your Rate control type You can choose between Video quality or Bitrate comes first Def...

Страница 42: ... a constant Bitrate numbers Below is a suggestion chart for the video quality setting depends on your environment Notification When changing resolution setting it will erase your privacy mask setting Resolution Fps Bitrate suggestion 1920 x 1080 30 4000 6000 kbps 1920 x 1080 15 2000 3000 kbps 1920 x 1080 10 1000 2000 kbps 1280 x 960 30 2000 3500 kbps 1280 x 960 15 1000 2500 kbps 1280 x 720 15 800 ...

Страница 43: ...lation of storage space as below for each network camera records for one hour Bitrate kbps 8 x 60 sec x 60 min 1000 1000 The storage space for each hour GB Example Question If a camera set as 1920x1080 1080P 10fps 1000kbps as Bitrate setting how many space does a storage need to hold at least a monthly 30days recording files Answer 1000 kbps 8 x 60 x 60 1000 1000 x 24 hrs x 30 days 324 GB 1000 0 3...

Страница 44: ...ps and Video Quality There are five segment of video quality from lowest to highest that you can choose from Then press Apply to complete setting We suggest to adjust this setting along side with the actual image Notification MJPEG compression rate is lower than H 264 and MPEG 4 But is best format for computer CPU performance when handling the image Mostly applies to auto recognition application T...

Страница 45: ... on your setting Press Apply button to complete setting Notification Mobile stream is set as H 264 format for better compression rate So it can improves the transmit performance under the mobile network Default resolution is set as 320x240 30fps But the actual transfer speed is depends on your regional environment The actual test result under Taiwan s 3G network is only up to 15 20fps Resolution f...

Страница 46: ...Focus Setting Procedure Please connect your camera Adjust your focus to an appropriate point T is for tilt angle W is for wide angle Set your browser to the main page and double click on the screen to the full screen mode It is easier to set focus point Adjust the focus to get your desire clean view of your target by gently rotate the lens Then place back your camera without touching the lens ...

Страница 47: ...o adjust image setting Please kindly follow below instructions about image setting and exposure setting to get your ideally image quality 5 3 3 1 Exposure Setting SMAX network camera supply two Exposure Mode Default set as Auto mode User can change to Manual mode for further exposure setting of day and night mode ...

Страница 48: ...ion menu Then goes to Image setting page and change the Exposure Mode from Auto to Manual As an example picture on the right the image is too dark during the night mode So we can manually adjust the maximum Exposure Time to 1 15 Seconds Press Apply button to complete setting and get a better image quality as shown in below picture ...

Страница 49: ... the adjusting When above four numbers has changed you can check the difference on the image If reach to your ideally result Then press Apply button to complete image settings Notification The range of Brightness Contrast Saturation and Sharpness numbers are from 0 255 Press Default button if you wish to go back to the original factory setting Then press Apply button to complete image settings The...

Страница 50: ...rocedure Select Motion Detection button under the Configuration menu Select Enable Privacy Mask then select Enable under Windows 1 column and define a Title to this windows Move and resize the Windows 1 windows and drag to the place on the screen that you wish to detect Adjust Percentage and Sensitivity numbers to get a best motion detecting trigger Press Apply button to complete Windows 1 setting...

Страница 51: ...he live view screen will no longer display those selected area Privacy Mask Setting Procedure Select Privacy Mask button under the Configuration menu Select Enable Privacy Mask then select Enable under Mask 1 column Move and resize the Mask 1 windows and drag to the place on the screen that you wish to cover Select mask 1 Filled Color Press Apply button to complete Mask 1 setting If wish to set up...

Страница 52: ...e Select PTZ Control button under the Configuration menu Select Enable RS 485 Enter Baud Rate Date Bits Parity and Stop Bit numbers under the Port Setting column Select Communication Type Suggest to choose Pelco D Then press Apply button to complete setting Notification For further detail setting please refer to the pan tilt cradle that you select We suggest to get one which supports Pelco D stand...

Страница 53: ...g function Or you may enable speaker function for brow casting function Two ways audio setting procedure Select Audio button under the Configuration menu Select Enable Microphone Then select Audio Type and Microphone Gain settings Select Enable Speaker Then select Audio Type Press Apply button to complete setting Notification SMAX network camera s audio might be differ from a different model For c...

Страница 54: ...onfiguration menu Select the Status page If cannot see any SD card status please make sure the SD card is properly insert Then press Refresh button to make sure you can see the storage capacity status of the SD card When first use a newly insert SD card please first press the Format button to run the format procedure by SMAX network camera It will pop out a confirmation windows Press Yes to contin...

Страница 55: ...he maximum Arrange your recoding schedule of day and time under the Recording Schedule column Select save to Memory card under the Storage Option column Then press Apply button to finish setting Notification Under the Enable External storage Recording column You can also choose to save your recoding file to a Samba Server For the limitation of each recording file size is from 1 50MB Each recording...

Страница 56: ...ss All file button to see all recoding files from the SD memory card Or you can search a specific period of recoding file by define your desire Start Time and End Time Then press Search button to sort the recording files within this period For all searched recording files you can choose to download to your computer or to delete file from memory card ...

Страница 57: ...cedure Select Event button under the SDHC page Press All file button to see all event recoding files from the SD memory card Or you can search a specific period of event recoding file by define your desire Start Time and End Time Then press Search button to sort the event recording files within this period For all searched event recording files you can choose to download to your computer or to del...

Страница 58: ...roceed an action base on this setting You can set multiple event setting base on different needs of different applications SMAX network camera has two was of event trigger settings 1 Motion Detection 2 Digital Input signal Proceed actions includes 1 Send to FTP 2 Send to Email 3 Apply to Samba 4 Apply to SD Card 5 Trigger Digital Output ...

Страница 59: ... e mail or recording files 5 5 1 1 FTP Server FTP Server setting procedure Select Even button under the Configuration menu Then select Event server page Select Enable FTP server Then enter your FTP server s IP address Port Username Password and File path Name You may select Enable Passive Mode depends on your FTP server type Notification Default FTP Port is set as 21 Press Test FTP button to check...

Страница 60: ...erver s IP address Port Sender e mail address Receiver 1 and 2 e mail address and Subject Also need to select whether there is an authentication where the Username and Password need to be set You may select Require SSL Encryption and Start TLS depends on your desire Notification Default SMTP Port is set as 25 Suggest to name your e mail subject as your device name for easy reference Press Test SMT...

Страница 61: ... Event button under the Configuration menu Then select Event server page Select Enable Samba server Then enter your Samba server s IP address Storage Path Username and Password Press Test SMB button to check if the Samba connection is successfully established Press Apply button to complete setting ...

Страница 62: ... button under the Configuration menu Then select Media page Select Snapshot or Video as your desire You can set the pre and post event time when select video The length of Pre Even and Post Event are both 0 5 seconds Notification The maximum event recording file size is 3MB Please do not set the pre and post event time as 0 seconds to prevent error We suggest to set the pre event as 2 seconds and ...

Страница 63: ...m Example of adding new event procedure Select Event button under the Configuration menu Select New button to the Setting page Select Enable Setting and define your event title Select Motion Detection as a trigger Select Enable Schedule Time and select all days from Sunday to Saturday Then set the time as Always Select Enable SD Card and Enable Digital Output as your action Also set your digital o...

Страница 64: ...Reboot Reboot procedure When press Reboot button it can remotely reboot the camera 5 6 2 Factory reset There are two ways of factory reset procedure One is completely reset back to factory default setting The other one is reset back to default setting except IP address and time setting Reset procedure When press Reset button it can remotely reset the camera ...

Страница 65: ...ng to your computer When press Backup to SD card device button SMAX camera will back up setting to your SD card 5 6 4 Restore SMAX camera can also restore your back up setting from above procedure Restore procedure When restore your setting from the computer press Browse button and select the backup file that you saved Then press Restore button When restore your setting from the SD card press Rest...

Страница 66: ... in the computer that connects to the network camera Select the exact firmware once you click on Browse button Then click Upgrade button to performs upgrade procedure After upgrade procedure is complete we suggest to perform a factory rest procedure for the system to check its completion Notification If above procedure cause abnormal to the camera please press the reset button for 30 seconds after...

Страница 67: ...des the fundamental of network setting and basic function of the camera The other one is system log it records all the operation or event history 5 7 1 Device information Device info display procedure To access device info click Configuration from the menu then click Device Info button You can check the this camera information as shown in the picture from the right ...

Страница 68: ... w P 65 Chapter 5 5 7 2 System Log System log display procedure To access system log click Configuration from the menu then click Log button You can check the usage log of this camera as shown in the picture from the right ...

Страница 69: ... the word Syntax shown in bold face followed by a box with the referred syntax as shown below General CGI URL syntax and parameters CGI URLs are written in lower case CGI parameters are written in lower case and as one word When the CGI request includes internal camera or video server parameters the internal parameters must be written exactly as named in the camera or video server For the POST met...

Страница 70: ...roduct Number XXXXX H W Version XXXXXX OK F W Version XXXXXX PT Support Yes IO Trigger Support Yes r n FAIL HTTP 1 1 200 OK r n Content Type text plain r n Content Length content length r n r n Request failed error message r n 6 1 1 2 Add modify and delete users Syntax http camera_ip port cgi admin pwdgrp cgi parameter value parameter value with the following parameters and values for reference pa...

Страница 71: ... a Create a new administrator account http camera_ip port cgi admin pwdgrp cgi action add user paul pwd foo grp admin OK HTTP 1 1 200 OK r n Content Type text plain r n Content Length content length r n r n OK r n FAIL HTTP 1 1 200 OK r n Content Type text plain r n Content Length content length r n r n Request failed error message r n Return Example b List groups and users http camera_ip port cgi...

Страница 72: ...ing string Current hour minute string string Current minute second string string Current second parameter value Value Description timezone string 0 56 Specify the time zone for the new date and or time The device will translate the time into local time using whichever the time zone has been specified through the web configuration If omitted the new date and or time is assumed to be for local time ...

Страница 73: ...n set year 2005 month 4 day 3 Return OK HTTP 1 1 200 OK r n Content Type text plain r n Content Length content length r n r n ok r n FAIL HTTP 1 1 200 OK r n Content Type text plain r n Content Length content length r n r n Request failed error message r n 6 1 2 Maintenance 6 1 2 1 Factory Default Syntax http camera_ip port cgi admin factorydefault cgi mode value Example http camera_ip port cgi ad...

Страница 74: ... 2 2 Factory Default Return OK HTTP 1 1 200 OK r n Content Type text plain r n Content Length content length r n r n OK r n FAIL HTTP 1 1 200 OK r n Content Type text plain r n Content Length content length r n r n Request failed error message r n 6 1 2 2 Firmware upgrade Method POST Syntax http camera_ip port cgi admin firmwareupgrade cgi OK HTTP 1 1 200 OK r n Content Type text plain r n Content...

Страница 75: ...1 200 OK r n Content Type text plain r n Content Length content length r n r n Request failed error message r n 6 1 3 Video 6 1 3 1 MJPEG Syntax http camera_ip port cgi mjpg mjpeg cgi Example http camera_ip port cgi mjpg mjpeg cgi Return OK HTTP 1 1 200 OK r n Content Type multipart mixed boundary myboundary r n r n myboundary r n Content Length content length r n r n Payload Header Payload Data m...

Страница 76: ... I frame 1 30 for P frame 0x0c Second 4 Time stamp 0x10 Microsecond 4 Time stamp 0x14 Format 4 for audio Bit0 3 type 2 PCM 3 uLaw 4 AMR Bit4 5 sample size 0 8bits 1 16bits Offset Parameter Size Byte Description 0x14 Format 4 Bit6 8 sample rate 0 8K 1 11K 2 24K 3 44K 4 48K Bit9 10 channel 1 1 channel 2 2 channels Bit11 31 packet length in minisecs For Video Bit0 3 type 0 JPEG 1 MPEG4 5 H 264 Bit4 7...

Страница 77: ...el 0 255 Bits 16 23 window3 motion level 0 255 Bit 24 trigger input 1 status 1 high 0 low Bit 25 trigger input 2 status 1 high 0 low Bit 26 trigger output 1 status 1 high 0 low Bits 27 31 reserved 6 1 3 2 MPEG4 H 264 Syntax http camera_ip port cgi mpeg stream1 cgi Example http camera_ip port cgi mpeg stream1 cgi Return The same as MJPEG except payload data is MPEG4 H264 OK HTTP 1 1 200 OK r n Cont...

Страница 78: ...jpg image cgi Return OK HTTP 1 1 200 OK r n Content Type text plain r n Content Length content length r n r n image data r n FAIL HTTP 1 1 200 OK r n Content Type text plain r n Content Length content length r n r n Request failed error message r n parameter value Value Description listen 0 2 Query the listening status Server to PC 0 free to connect 1 microphone not available 2 device is disable 6...

Страница 79: ...r n Content Length content length r n r n Payload Header Payload Data FAIL HTTP 1 1 503 Service Not Available r n Content Length 0 r n r n 6 1 5 3 Audio Talk PC to IP video device Returns a multipart audio stream Open a IPPROTO_UDP socket and assign this socket to port 5432 Audio support u Law Data only Payload Format Byte0 Byte1 Byte2 Byte3 Byte4 Byte5 0x80 0x80 0x10 0x8c 0x00 0x30 Header 12Bytes...

Страница 80: ...zoom control command to IP Camera which with Motor Lens Syntax http camera_ip port cgi fz focuszoomctl cgi param eter value with the following parameters and values for reference Parameter Value Description focusminus Focus motor lens backward 1 step focusplus Focus motor lens forward 1 step movezoom 0 6 Move zoom motor lens to index 0 6 smartfocusscan Do auto focus quickly fzisbusy Check the moto...

Страница 81: ...orcurpos Return Current Zoom Index Of Position Current Focus Index Of Position Ex 6 55 6 1 7 SD Card Management Get SD Card Status and search result list Syntax http camera_ip port sdcard cgi action action_para meter parmameter value with the following parameters and values for reference action_Parameter Value Description status Get SD Card Status space Get SD Card Space format Format SD Card list...

Страница 82: ...ntent Type text plain r n Content Length content length r n r n Result r n FAIL HTTP 1 1 200 OK r n Content Type text plain r n Content Length content length r n r n Status 1 SD Card is available 0 SD Card is not available Ex 1 Example Get SD Card Status Get SD Card Space http 192 168 101 102 80 sdcard cgi action space Return Total Space KB Used Space KB Free Space KB Ex 30729552 30179056 550496 E...

Страница 83: ...me order ascend dir record ch 1 page 1 sTime 2010 02 22 00 00 00 eTime 2020 03 21 00 00 00 Return Path Total File Total Page List Page File name File Time File Size KB Ex tmp mmc_dir Backup 2 1 1 SICPT501U 01082014 200248 avi Thu Jan 9 12 02 48 2014 10808 SICPT501U 01082014 201533 avi Thu Jan 9 12 15 33 2014 10815 Example Delete File Delete File http 192 168 101 102 80 sdcard cgi action delete d i...

Страница 84: ... 20fps 1920 x 1080 Max 1080P MJPEG 30fps 720 x 480 Max D1 Codec Quality H 264 5 Levels Max 1080P Bit Rate Max 6Mbps 1080P MPEG 4 5Levels Max 1080P Interface Local Storage SD Slot x 1 Supported SD SDHC Max 32GB Digital In Digital Out Digital Input x 2 Digital Output x 1 RS 485 RS 485 x 1 Support Pelco D Custom Video Out Yes Supports NTSC PAL Audio in out Two way Supports G 711μ Law RCA In x 1 RCA O...

Страница 85: ... Filter QoS DSCP Time Management Manual Time Setting Time Server NTP Support Real Time Clock User Access Control Multi Level User Access Up to 5 Clients Multiple Streaming Max 3 Streams Configuration File Backup to PC Backup to SD card Web Browser Internet Explorer 9 x above Operating System Suggest Windows 7 8 8 1 above Language Supports multiple languages Event and Alarm Operation Alarm Trigger ...

Страница 86: ...ing PTZ SMAX VR1 V1 1 AC1 V1 03 20x AD1 V1 03 20x OK OK OK OK OK OK AV1 V1 03 20x OK OK OK OK OK OK AU1 V1 03 20x OK OK OK OK OK OK AP1 V1 03 20x OK OK OK OK OK OK GD1 V1 03 20x OK OK OK OK OK OK GV1 V1 03 20x OK OK OK OK OK OK GU1 V1 03 20x OK OK OK OK OK OK GB1 V1 03 20x OK OK OK OK OK OK GP1 V1 03 20x OK OK OK OK OK OK GP2 V1 03 20x OK OK OK OK OK OK SU1 V1 03 20x OK OK OK OK OK OK P 83 ...

Страница 87: ...tection DIDO SD Card recording PTZ QNAP VioStor VS xxxxx Products QVR V5 0 0 V4 3 x AC1 V1 03 20x AD1 V1 03 20x Yes OK OK AV1 V1 03 20x Yes OK OK AU1 V1 03 20x Yes OK OK AP1 V1 03 20x Yes OK OK GD1 V1 03 20x Yes OK OK GV1 V1 03 20x Yes OK OK GU1 V1 03 20x Yes OK OK GB1 V1 03 20x Yes OK OK GP1 V1 03 20x Yes OK OK GP2 V1 03 20x Yes OK OK SU1 V1 03 20x Yes OK OK P 84 ...

Страница 88: ... Detection DIDO SD Card Recording PTZ Synology RSxxxx DSxxxx Products DSM V5 0xx AC1 V1 03 20x AD1 V1 03 20x Yes OK OK AV1 V1 03 20x Yes OK OK AU1 V1 03 20x Yes OK OK AP1 V1 03 20x Yes OK OK GD1 V1 03 20x Yes OK OK GV1 V1 03 20x Yes OK OK GU1 V1 03 20x Yes OK OK GB1 V1 03 20x Yes OK OK GP1 V1 03 20x Yes OK OK GP2 V1 03 20x Yes OK OK SU1 V1 03 20x Yes OK OK P 85 ...

Страница 89: ...etection DIDO SD Card Recording PTZ HIKVISION DS7600 DS7700 DS8600 DS9600 Products AC1 V1 03 20x AD1 V1 03 20x Yes OK OK AV1 V1 03 20x Yes OK OK AU1 V1 03 20x Yes OK OK AP1 V1 03 20x Yes OK OK GD1 V1 03 20x Yes OK OK GV1 V1 03 20x Yes OK OK GU1 V1 03 20x Yes OK OK GB1 V1 03 20x Yes OK OK GP1 V1 03 20x Yes OK OK GP2 V1 03 20x Yes OK OK SU1 V1 03 20x Yes OK OK P 86 ...

Страница 90: ... PTZ SMAX SMAX VMS V1 1x AC1 V1 03 20x AD1 V1 03 20x OK OK OK OK OK OK AV1 V1 03 20x OK OK OK OK OK OK AU1 V1 03 20x OK OK OK OK OK OK AP1 V1 03 20x OK OK OK OK OK OK GD1 V1 03 20x OK OK OK OK OK OK GV1 V1 03 20x OK OK OK OK OK OK GU1 V1 03 20x OK OK OK OK OK OK GB1 V1 03 20x OK OK OK OK OK OK GP1 V1 03 20x OK OK OK OK OK OK GP2 V1 03 20x OK OK OK OK OK OK SU1 V1 03 20x OK OK OK OK OK OK P 87 ...

Страница 91: ...Detection DIDO SD Card Recording PTZ axxonsoft NEXT Intellect Enterprise Products AC1 V1 03 20x AD1 V1 03 20x Yes OK OK AV1 V1 03 20x Yes OK OK AU1 V1 03 20x Yes OK OK AP1 V1 03 20x Yes OK OK GD1 V1 03 20x Yes OK OK GV1 V1 03 20x Yes OK OK GU1 V1 03 20x Yes OK OK GB1 V1 03 20x Yes OK OK GP1 V1 03 20x Yes OK OK GP2 V1 03 20x Yes OK OK SU1 V1 03 20x Yes OK OK P 88 ...

Страница 92: ...Detection DIDO SD Card Recording PTZ axxonsoft NEXT Intellect Enterprise Products AC1 V1 03 20x AD1 V1 03 20x Yes OK OK AV1 V1 03 20x Yes OK OK AU1 V1 03 20x Yes OK OK AP1 V1 03 20x Yes OK OK GD1 V1 03 20x Yes OK OK GV1 V1 03 20x Yes OK OK GU1 V1 03 20x Yes OK OK GB1 V1 03 20x Yes OK OK GP1 V1 03 20x Yes OK OK GP2 V1 03 20x Yes OK OK SU1 V1 03 20x Yes OK OK P 89 ...

Страница 93: ...on Detection DIDO SD Card Recording PTZ Aimetis Symphony Products V6 11 V6 12 AC1 V1 03 20x AD1 V1 03 20x Yes OK OK AV1 V1 03 20x Yes OK OK AU1 V1 03 20x Yes OK OK AP1 V1 03 20x Yes OK OK GD1 V1 03 20x Yes OK OK GV1 V1 03 20x Yes OK OK GU1 V1 03 20x Yes OK OK GB1 V1 03 20x Yes OK OK GP1 V1 03 20x Yes OK OK GP2 V1 03 20x Yes OK OK SU1 V1 03 20x Yes OK OK P 90 ...

Страница 94: ...ack Motion Detection DIDO SD Card Recording PTZ NUUO Crystal Products AC1 V1 03 20x AD1 V1 03 20x Yes OK OK AV1 V1 03 20x Yes OK OK AU1 V1 03 20x Yes OK OK AP1 V1 03 20x Yes OK OK GD1 V1 03 20x Yes OK OK GV1 V1 03 20x Yes OK OK GU1 V1 03 20x Yes OK OK GB1 V1 03 20x Yes OK OK GP1 V1 03 20x Yes OK OK GP2 V1 03 20x Yes OK OK SU1 V1 03 20x Yes OK OK P 91 ...

Страница 95: ... Motion Detection DIDO SD Card Recording PTZ VIVOTEK VAST Products v1 8 x AC1 V1 03 20x AD1 V1 03 20x Yes OK OK AV1 V1 03 20x Yes OK OK AU1 V1 03 20x Yes OK OK AP1 V1 03 20x Yes OK OK GD1 V1 03 20x Yes OK OK GV1 V1 03 20x Yes OK OK GU1 V1 03 20x Yes OK OK GB1 V1 03 20x Yes OK OK GP1 V1 03 20x Yes OK OK GP2 V1 03 20x Yes OK OK SU1 V1 03 20x Yes OK OK P 92 ...

Страница 96: ...PTZ SMAX SAMX CMS512 V1 1x AC1 V1 03 20x AD1 V1 03 20x OK OK OK OK OK OK AV1 V1 03 20x OK OK OK OK OK OK AU1 V1 03 20x OK OK OK OK OK OK AP1 V1 03 20x OK OK OK OK OK OK GD1 V1 03 20x OK OK OK OK OK OK GV1 V1 03 20x OK OK OK OK OK OK GU1 V1 03 20x OK OK OK OK OK OK GB1 V1 03 20x OK OK OK OK OK OK GP1 V1 03 20x OK OK OK OK OK OK GP2 V1 03 20x OK OK OK OK OK OK SU1 V1 03 20x OK OK OK OK OK OK P 93 ...

Страница 97: ... statement of guarantee by SMAX Technology Co Ltd are listed within this manual But it does not apply to any other particular purpose with those implied statement P 94 WEEE Directive Product Disposal At the end of its serviceable life this product should not be treated as household or general waste It should be handed over to the applicable collection point for the recycling of electrical and elec...

Страница 98: ...his QIG For more information about this product please refer to the user manual on the CD ROM The software and specifications are subject to change without notice Please visit our website www smax com tw for updates All brand and product names mentioned in this manual are trademarks and or registered trademarks of their respective holders Notice According to GNU General Public License Version 2 Th...

Отзывы: