Page
14
11/30/2006
Chapter 3 Power settings and connections
3.1 Power
management
SmartCompact works on DC power.
A standard lithium ion battery pack (3.7V, 2000 mAH) is provided for Dc power input to
SmartCompact. Charging time is 5 hours with 10 operation and 100 standby hours.
Battery low (below 10%) condition is indicated with Blue power LED.
In order to support SmartCompact in low battery state, there is an inbuilt 110 mAH rechargeable
backup battery provided, it has backup time of 2.7 hours without main battery (in sleep mode).
For charging both main and backup batteries an AC adapter 100-240 V 50/60 Hz and 5 V/ 3A DC
output is provided with power cord.
Note: Never use SmartCompact unit without main battery.
3.2
Install batteries in SmartCompact
Detach the hand strap end on rear side of SmartCompact. Unlock the Battery lock switch.
Slid the battery latch upwards and insert the battery pack given with the correct polarity.
Note: Only use the batteries which are provided for SmartCompact units.
3.3
Battery charging using power adapter
Connect power cord from AC power supply to AC adapter/charger.
Connect Ac adapter to SmartCompact through DC input jack present on bottom side.
While charging power LED will be red, after fully charged it will be green.
Backup battery also gets charged during this time.
Charging time is 5 hours.
3.4
Backup Battery on/off switch
Backup battery on/off switch is provided to turn backup battery on/off. When the SmartCompact
unit is dispatched from the factory, the switch is turned off for backup battery power saving.
To turn the switch on/off use stylus pen pointed top.
On position – Up
Off position – down
3.5
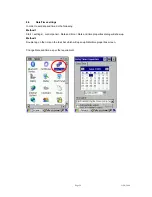
Power settings on WIN CE
To check the battery status
Start > Settings > Control panel > Power > Power properties > battery > power (main battery /
backup battery)
It shows the charged status of both main and back batteries.
Содержание SmartCompact 1D
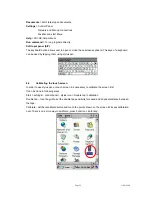
Страница 15: ...Page 15 11 30 2006 Awake mode while charging ...
Страница 20: ...Page 20 11 30 2006 Priority Always try warm reset first Only if warm reset fails then try cold reset ...
Страница 50: ...Page 50 11 30 2006 Add To scan the device to connect Remove To remove the paired device Close To exit ...
Страница 59: ...Page 59 11 30 2006 5 If there s no OS file to update move to No 9 Ver 0 01 Ver 0 01 ...
Страница 62: ...Page 62 11 30 2006 10 Check the OS version in Control Panel System 11 double click System to check OS Version ...
Страница 66: ...Page 66 11 30 2006 Detect the directory for installation and select Next Select Install Installing ...
Страница 75: ...Page 75 11 30 2006 ...
Страница 79: ...Page 79 11 30 2006 Appendix B Version Table Version 1 Release Date 11 30 2006 ...


