5
Figure
5
‐
1
HARDWARE INSTALLATION
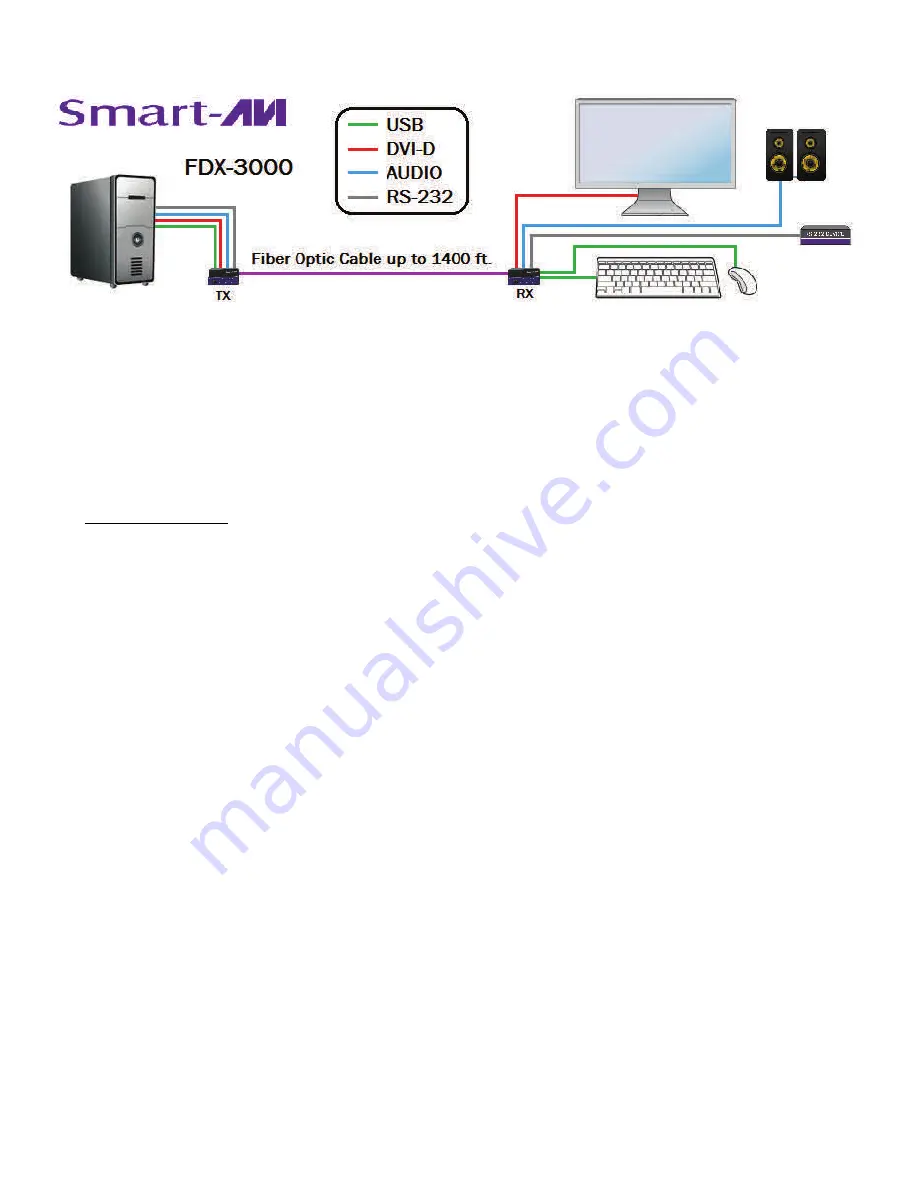
1. Turn off the computer, display, and speakers.
2. Connect the display to the DVI connector on the FDX-3000-RX.
3. Connect USB mouse and keyboard ONLY to the USB connectors on the FDX-3000-RX.
4. Optionally connect speakers and an RS-232 device to the FDX-3000-RX.
5. Connect a USB cable to the computer and to the USB port on the FDX-3000-TX.
6. Optionally connect audio and RS-232 cables to the computer and to the ports on the FDX-3000-TX.
7. DO NOT CONNECT the computer’s DVI output to the FDX-3000-TX.
8. Connect the FDX-3000-TX to the FDX-3000-RX with a multimode fiber-optic cable.
9. Connect the power cords and power on the FDX-3000-TX and the FDX-3000-RX. Color Bars should ap-
pear on the monitor.
10. Type “Ctrl Ctrl o” and using the arrow keys select “EDID LEARN” on the menu and hit “Enter” key.
11. After the menu displays “DONE” connect the computer’s DVI output to the FDX-3000-TX.
NOTE: If the display does not appear correctly, repeat steps 7– 11 and try the other 2 resolution selec-
tions.


