22
Configuring the SMART Hub SE240
Connecting Computers to the SMART Hub SE240
You can connect two computers to the SMART Hub SE240.
NOTE:
You can connect additional computers to the SMART Hub SE240 through LinQ software
(see page 33).
After connecting a computer to the SMART Hub SE240, you can view its input on your SMART
product’s display and do the following:
•
Draw digital ink notes.
•
Freeze the display.
•
Take screen captures.
•
Use the on-screen keyboard and right-click features of the SMART Hub SE240 firmware.
For more information, see page 71.
Connect the computer to the SMART Hub SE240 using the appropriate cables and connectors.
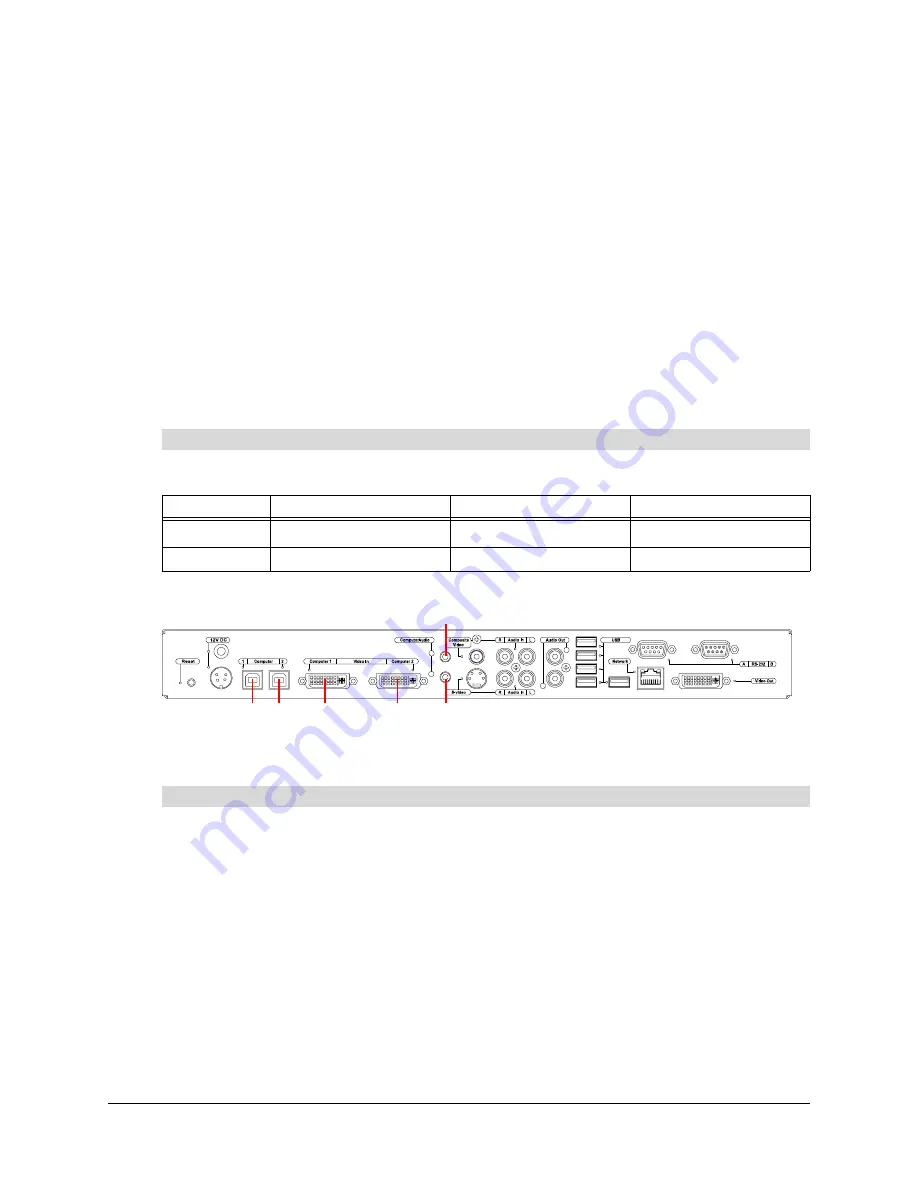
The following diagram shows the location of the connectors on the SMART Hub SE240.
NOTE:
The SMART product and audio connections are optional.
1.
Press
Menu
.
The Welcome Center appears.
2.
Press
Settings
.
The
Settings
dialog box appears.
To connect a computer
Computer
SMART Product (A)
Video (B)
Audio (C)
1
USB B receptacle 1
DVI connector 1
Stereo mini connector 1
2
USB B receptacle 2
DVI connector 2
Stereo mini connector 2
To configure the SMART Hub SE240 for the computer
1A 2A
1B
2B
2C
1C
Содержание SE240
Страница 1: ...Installation and User s Guide SMART Hub SE240 ...
Страница 4: ...ii Important Information ...
Страница 10: ...4 About the SMART Hub SE240 ...
Страница 20: ...14 Installing the SMART Hub SE240 ...
Страница 50: ...44 Configuring the SMART Hub SE240 ...
Страница 90: ...84 Troubleshooting the SMART Hub SE240 ...
Страница 92: ...86 Regulatory Compliance ...
Страница 99: ......


