background image


PLEASE THINK BEFORE YOU PRINT

Knowledge base

Maintaining your SMART 

UF75 or UF75w projector

Cleaning the projector

WARNING

Cleaning a wall-mounted projector can result in a fall or injury. Use caution when 
climbing a ladder, and consider removing the projector from its wall-mounting 
bracket to clean it or to replace the projector lamp.

CAUTION

Never touch the mirror with your hands or a brush, and do not scrub the 
surface of the mirror with the supplied cleaning cloth. Instead, use the 
supplied cleaning cloth to clean the mirror gently, and do not put any cleaning 
solvents on the cloth or the mirror. 

Before you clean the projector, press the Power button twice on the Extended 
Control Panel (ECP) or remote control to put the system into Standby mode, 
and then allow the lamp to cool for at least 30 minutes.

Do not spray cleaners, solvents or compressed air directly on the projector. 
Do not use spray cleaners or solvents near any part of the projector because 
they can damage or stain the unit. Spraying the system could spread a 
chemical mist on some of the projector’s components and lamp, resulting in 
poor image quality and damage to the product which may not be covered by 
your warranty.

Do not allow liquids or commercial solvents of any kind to flow into the 
projector base or head.

IMPORTANT

When cleaning the interactive whiteboard system:

Wipe the exterior of the projector with a lint-free cloth.

Содержание SMART UF75

Страница 1: ...Before you clean the projector press the Power button twice on the Extended Control Panel ECP or remote control to put the system into Standby mode and then allow the lamp to cool for at least 30 min...

Страница 2: ...avoidable wear protective gloves and gather the supplied cleaning cloth into a ball Gently run the cleaning cloth across the lens from the center to the edge using the cleaning cloth like you would a...

Страница 3: ...nt premature lamp failure or exposure to mercury Use gloves when touching the lamp Do not touch the lamp with your fingers Recycle or dispose of the lamp as hazardous waste in accordance with local re...

Страница 4: ...crewdriver to loosen the two captive screws from the bottom of the lamp module NOTE Loosen the captive screws Don t remove them 6 Use the handle on the bottom of the lamp module to slide out the lamp...

Страница 5: ...r to ensure the power plug makes contact with the projector s power receptacle NOTE You should be able to place the lamp module into the projector easily without applying much force 4 Use the Phillips...

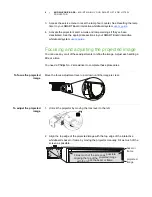
Страница 6: ...of these adjustments to refine the image Adjust each setting a little at a time You need a Phillips No 2 screwdriver to complete these procedures To focus the projected image Move the focus adjustment...

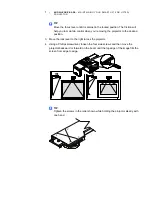
Страница 7: ...e moving the projector to the desired position 3 Move the lock lever to the right to lock the projector 4 Using a Phillips screwdriver loosen the four side screws and then move the projector backward...

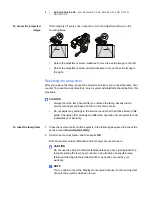
Страница 8: ...e and move the bottom edge of the image up NOTE The top edge of the image moves very little from its position To adjust the horizontal keystone of the projected image Turn the projector to the left or...

Страница 9: ...e reminders are based on the current hours of use Do not adjust any settings in the service menu other than those listed in this guide Changing other settings can affect the operation of your projecto...

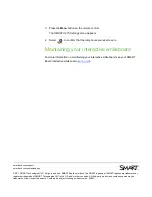
Страница 10: ...untries All third party product and company names may be trademarks of their respective owners Contents are subject to change without notice 08 2011 3 Press the Menu button on the remote control The S...

Отзывы: