


5
FRONT PANEL FUNCTIONS
EDID Mode
EDID Description
EDID Mode EDID Description
1
1080i, 2CH AUDIO
13
4Kx2K@60Hz,2CH AUDIO
2
1080i, DOLBY/DTS 5.1
14
4Kx2K@ 60Hz,DOLBY/DTS 5.1
3
1080i, HD AUDIO 7.1
15
4Kx2K@60Hz,HD AUDIO 7.1
4
1080p, 2CH AUDIO
16
Copy from HDMI OUTPUT A
5
1080p, DOLBY/DTS 5.1
17
Copy from HDMI OUTPUT B
6
1080p, HD AUDIO 7.1
18
Copy from HDMI OUTPUT C
7
3D,1080p, 2CH AUDIO
19
Copy from HDMI OUTPUT D
8
3D, 1080p,DOLBY/DTS 5.1
20
Copy from HDMI OUTPUT A
9
3D,1080p, HD AUDIO 7.1
21
Copy from HDMI OUTPUT B
10
4Kx2K@30Hz,2CH AUDIO
22
Copy from HDMI OUTPUT C
11
4Kx2K@30Hz,DOLBY/DTS 5.1
23
Copy from HDMI OUTPUT D
12
4Kx2K@30Hz,HD AUDIO 7.1
Table 5-2 EDID MODES
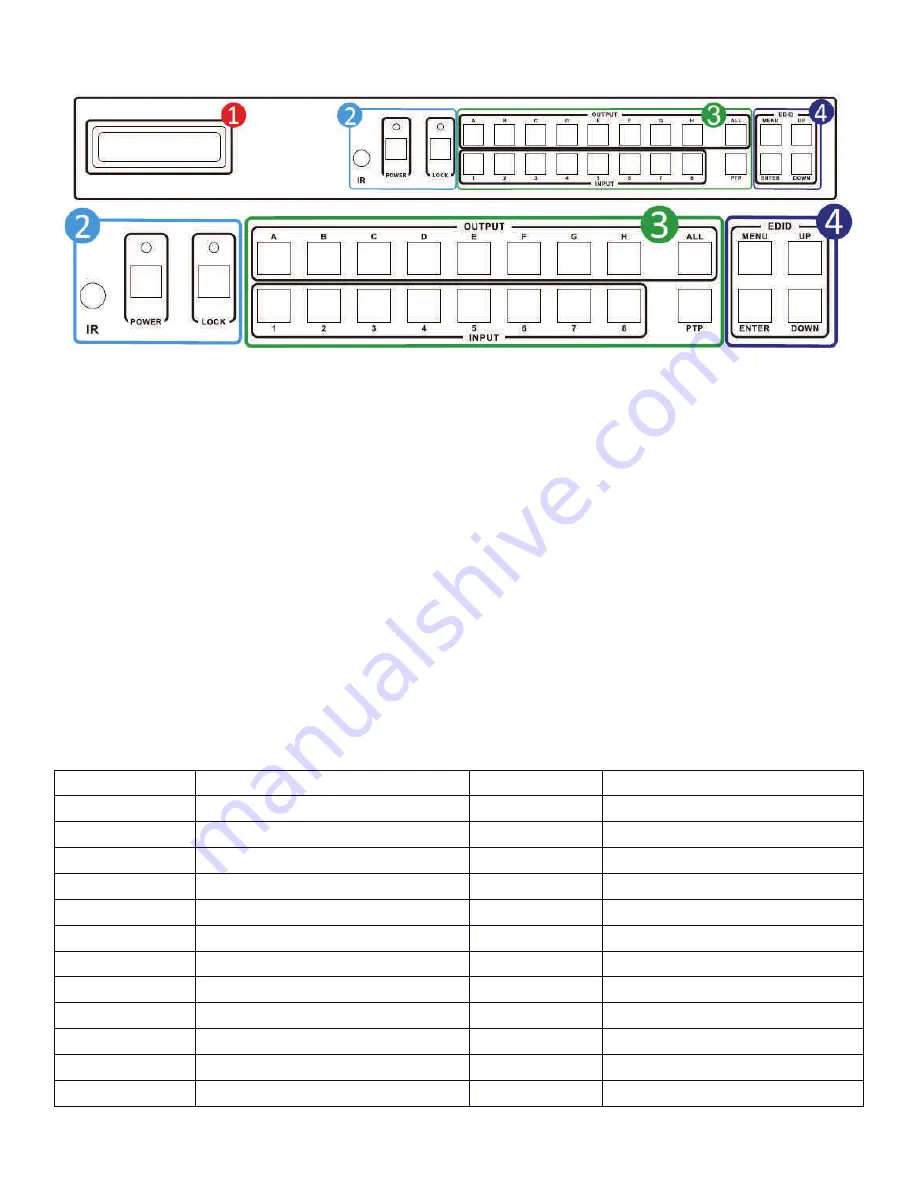
Figure 5-1
1. LCM: Displays all information regarding individual input settings/output settings and EDID manage-
ment
2. IR: IR Receiver window (accepts only the HDR 8x8 -XT remote control signal ).
POWER: Press this button to power the device on/off. The LED will illuminate green when the power is on,
red when it is in 'Standby' mode.
LOCK: Press this button to lock all the buttons on the panel, press again to unlock.
3. OUTPUT/INPUT: To assign an output to an input using the front panel buttons, press the desired out-
put button followed corresponding input.
Example: Press OUTPUT ALL, then INPUT 1 and OUTPUTs A/B/C/D/E/F/G/H will be set to INPUT 1. Press
PTP, then OUTPUTs A/B/C/D/E/F/G/H will "point to point" map to INPUTs 1/2/3/4/5/6/7/8.
4. EDID: Smart EDID management, the LCM will display the EDID operation.
Press the MENU button will enter the EDID management window, press UP or DOWN button to select the
needed EDID setting, press ENTER button to select the download input source. It can easy download any
EDID mode to any input source.


