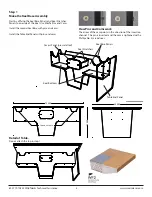
Step 1
Make the Keel Base Assembly
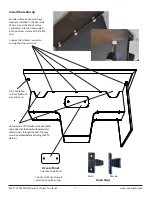
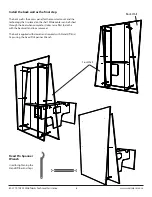
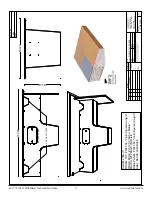
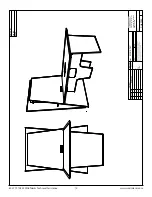
Start by affixing the Keel Base Panels and Keel Stretcher
Panels to one side of the Keel. Use Minifix Pins and Cams.
Install the second Keel Base with pins and cams.
Install the Table End Panel with pins and cams.
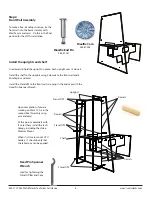
How Pins and Cams work
The arrow of the cam points in the direction of the insertion
channel. The pin is inserted, and the cam is tightened with a
Phillips No. 2 screwdriver.
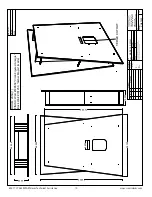
Keel Base Panels
Table End Panel
Keel Bottoms
Keel Stretchers
Access Panel (pre-installed)
MATERIAL:
FINISH:
EDGE:
REVISIONS
TOLERANCES
SYM DATE BY
UNLESS SPECIFIED
OTHERWISE
DESCRIPTION
DATE:
SCALE:
CHK'D BY:
CNC NO.
CAD NO.
DRWN BY:
PART
NAME
NOTICE: This drawing is the property of CBT Supply, Inc. dba SMARTdesks
and contains proprietary information that is not to be usedexcept in
the consideration of bids or proposals tendered herewith. Reproductions
or copying of the drawing, in whole or in part, is prohibited.
PRODUCT
GROUP
DRAWING NO.
REV.
DECIMALS
.X :_____
.XX :_____
.XXX :_____
ANGLE :_____
514F Progress Drive
Linthicum, MD 21090
800.770.7042
www.Smartdesks.com
PO# 7292
MARK 16C TABLE
ROOM: 205A (1)
FINISH: TOP: #7285 58, "Violin Figured Annigre"
WOOD EDGE: #7012 58 "Amber Maple"
MATCH WF2 EDGE PROFILE
BASE PANEL: #7285 58, "Violin Figured Annigre"
KEEL: BLACK LAMINATE
50.000
30
.0
00
72.000
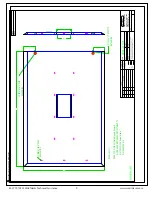
ACCESS PANEL
T-EDGE CUTOUTS
Detail of Table.
Do not attach the top in step 1.
800 770 7042 SMARTdesks Technical Assistance
5
www.smartdesks.com


