Placing Your Camera
Placement
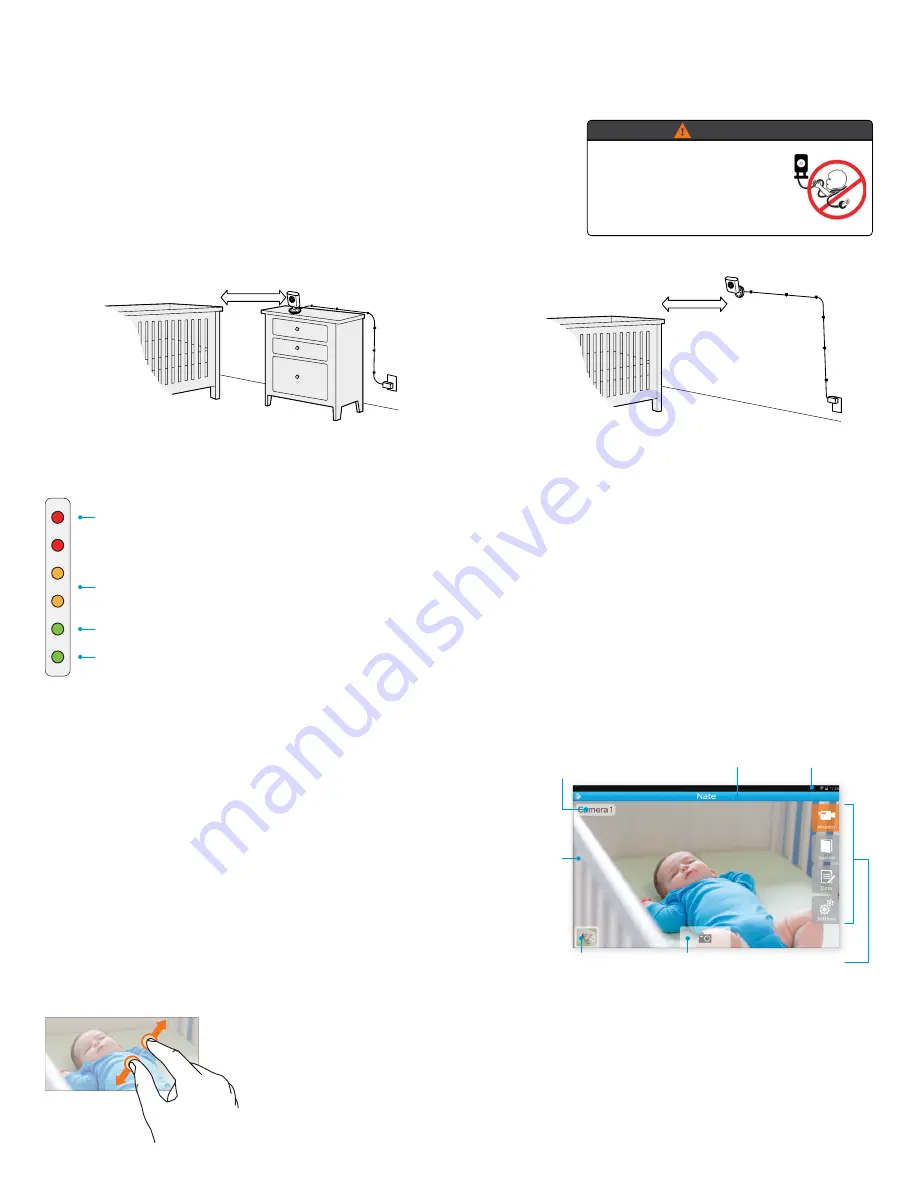
After you have successfully paired the camera with your monitor, place the
camera on a flat surface or on a wall using the screw and wall anchor provided.
Be conscious of the ambient light and noise where you place the camera. Test the
video and sound quality from a few locations before deciding on the final spot.
To prevent entanglement, always secure the cord using the cord clips provided.
The cord must be more than
3 feet away
from the reach of children.
WARNING!
Strangulation Hazard: Children
have STRANGLED in cords.
Keep this cord out of the
reach of children
(more than 3 ft. (0.9 m) away).
3 ft.
Sound Level Indicators
3 ft.
The Sound Level Indicators on the monitor serve two purposes:
Loudest Sound
1.
To show the level of sound coming into the monitor from the camera.
A quiet baby = green light.
A medium loud baby = orange lights.
Medium Sound
A very loud baby = red lights.
2.
To show that the monitor is on. When the Power LED glows green, the monitor is on.
Quietest Sound
The Power LED will remain on even when the screen is turned off using the Screen
On/Off button, or when the screen turns off automatically in battery mode.
Power LED
Monitor
Navigation
The status bar icons display Wi-Fi signal strength, battery,
and time. Use the main menu on the right side of the screen to
select Monitor, Journal and Data modes, or Settings. To return
to Monitor mode from Journal, Data, or Settings, simply save any
input or changes, then tap the Monitor icon in the Main Menu.
Important! Please note that the audio function is only available
when you are viewing the live video feed.
Digital Pan, Scan, and Zoom
Select Camera
Video
Feed
View Photo
Photo Capture
Main Menu
Header
Status Bar
1.
Pinch the video feed to use digital zoom.
2.
When zoomed in, swipe the screen to pan and scan.
3.
Pinch again to zoom out and return to normal view.


