Slinex Sonik 7 Скачать руководство пользователя страница 13

SONIK


7

23

24

8.4 Custom user images playback

Create «FRAME» folder in the root of microSD card, if it isn’t already created by the monitor. Paste JPG 
images you would like to view into this folder. File name should have only English letters and figures in its 
name and its length should not exceed 8 symbols to be visible on the monitor .
Insert microSD card into the monitor and press «Files» icon in the main menu. Then press «Frame» icon to 
enter to the «Frame» folder and press             icon on the right side of the file to start viewing.
Note that JPG images resolution should not exceed 2560×1440 pixels. Other image formats and 
resolutions are not supprted.
You can go to previous or next photo, delete current photo or get back to the list of photos using the 
buttons on the bottom of the screen in the same way as in photo playback mode.

Home screen

Video

0001 2019/09/22  12:30:35

0002 2019/09/22  13:45:01

0003 2019/09/23  01:21:44

0004 2019/09/24  14:52:17

0005 2019/09/25  09:36:11

001/005

Delete all

files

Previous

page

Next

page

Delete

current file

View

current file

2019/09/18  15:40:42

Delete

Pause

Press            icon on the right side of the file to start current file playback. Also you can stop playback, 
delete current file, set up volume or get back to the list of video files using the buttons on the bottom of 
the screen:

8.2. Photo playback

Press «Files» icon in the main menu then press «Photo» folder icon.   
Press            icon on the right side of the file to start its viewing. Also you can go to previous or next photo, 
delete current photo or get back to the list of photos using the buttons on the bottom of the screen:

−  start/stop playback;


delete current file;


increase playback volume;


decrease playback volume;


get back to the files list.

+

Delete

−  previous file viewing;
−  next file viewing;


delete current file;


get back to the files list.

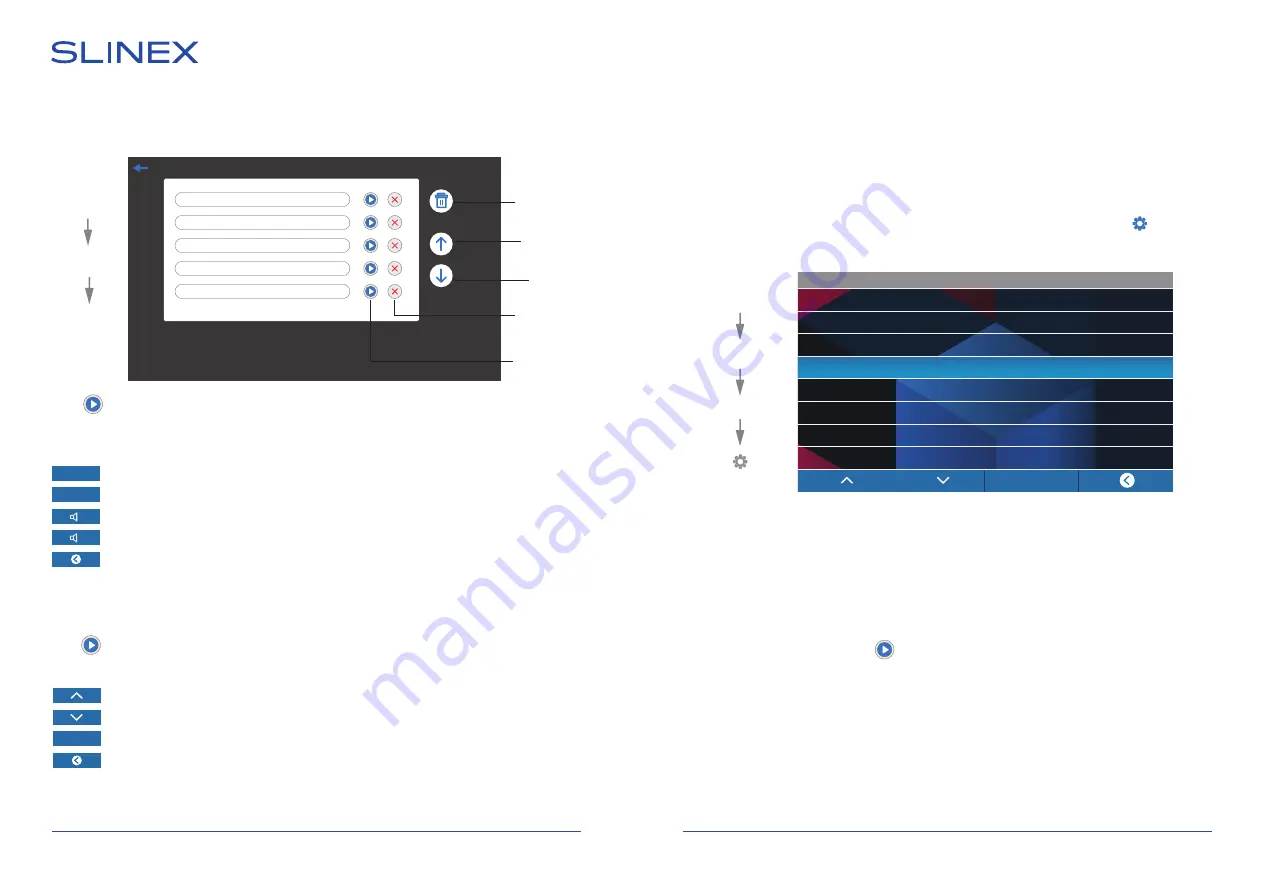
8.3. Custom MP3 ringtone

Create «RING» folder in the root of microSD card, if it isn’t already created by the monitor. Paste MP3 files 
you would like to use as a ringtone into this folder. File names should have only English letters and figures 
in its names and its quantity should not exceed 8 symbols to be visible on the monitor. 
Insert microSD card into the monitor and press «Files» icon in the main menu. Then press «MP3» icon                    
to enter to the «MP3» folder, choose the file you would like to use as a ringtone and press            icon near 
its name. In a new window choose the number of the outdoor panel to apply current melody:

8.1. Video playback

Press «Files» icon in the main menu then press «Video» folder icon.   

Ring select

Disable

Door 1 ring

Door 2 ring

Door1 & Door 2 ring

Modify

MP3

Main

menu

Files

Video

Photo

Frame

Main

menu

Files

Содержание Sonik 7

Страница 1: ...Design Uniqueness Innovations Design Uniqueness Innovations User manual Technicalsupport Thank you for choosing our equipment 7 video intercom with touch screen SONIK 7 Usermanual download...

Страница 2: ...se fire or electric shock Nature protection Don t throw away the device with other industrial or nutritive trash if you see that symbol Some regions have separation and recycling systems for the elect...

Страница 3: ...1 pc 2 Specification 1 SONIK 7 3 4 1 2 3 5 4 4 6 SCREEN 7 color IPS with touch screen RESOLUTION 1024 600 px VIDEO SYSTEM PAL NTSC AHD TVI CVI 720p 1080p AUDIO TYPE Half duplex CALL DURATION 70 secon...

Страница 4: ...etween 80 and 100 meters 262 328 ft then use a 3 wire cable with 0 75 mm2 AWG 18 square of one wire and RG 59 or RG 6 coaxial cable for the video signal c Shielded or non shielded twisted pair not rec...

Страница 5: ...m the kit and hammer them into the drilled halls 4 Fix surface mount bracket on the wall with four screws from the kit 5 Connect all communication wires and fix the monitor on the surface mount bracke...

Страница 6: ...ody is ringing on the monitor and outdoor panel image from the outdoor panel appears on the monitor screen Press Answer button to start conversation with the visitor Press Answer button to start conve...

Страница 7: ...Notes 1 If several monitors are connected into one system the user can view the image from outdoor panels and cameras on any monitor inside this system The image will be transferred from the Master m...

Страница 8: ...lay unlocking time from 1 to 10 sec Door 2 unlock time door 2 relay unlocking time from 1 to 10 sec Touch sound enable disable screen touch sound Door panel backlight enable disable door panel call bu...

Страница 9: ...sable calling melody on the outdoor panel Settings Video Here you can manually define type of the video signal for every outdoor panel and camera Monitor maintains such kind of videostandards CVBS PAL...

Страница 10: ...detect motion without any external sensors using any camera image changes with the time Camera power that is used for motion detection should be constantly on to let the monitor observe image changes...

Страница 11: ...ype NO motion sensor with normally disconnected contacts are used NC motion sensor with normally connected contacts are used Off motion sensor is not used CAM1 alarm time alarm melody ringing time fro...

Страница 12: ...0 3 2019 09 03 15 25 Factory reset Warning All parameters will be reseted to the factory defaults In this bookmark you can find model name version and date of software release 7 9 Factory reset Press...

Страница 13: ...up volume or get back to the list of video files using the buttons on the bottom of the screen 8 2 Photo playback Press Files icon in the main menu then press Photo folder icon Press icon on the righ...

Страница 14: ...rantees product normal functioning during the warranty period if the user keeps all safety instructions described in that manual Warranty period is 12 months from the moment of the product purchasing...

Отзывы: