background image

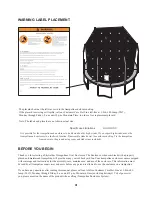
WARNING LABEL PLACEMENT

4

BEFORE YOU BEGIN

Thank you for selecting a Skywalker Trampolines Oval Enclosure. The Enclosure, when combined with a properly 

placed and maintained trampoline, will provide many years of backyard fun. Your trampoline enclosure comes equipped

with warnings and instructions for the assembly, care, maintenance, and use of the enclosure. This information must

be read by all trampoline supervisors and users before any person is allowed to use the enclosure on a trampoline. 

If you have any questions after reading this manual, please call our toll-free Customer Care Hot Line at 1-866-603-

Jump (5867), Monday through Friday, 8 a.m. until 5 p.m. Mountain Time (excluding holidays). To help us assist

you, please mention the name of the product when calling (Trampoline Enclosure System).

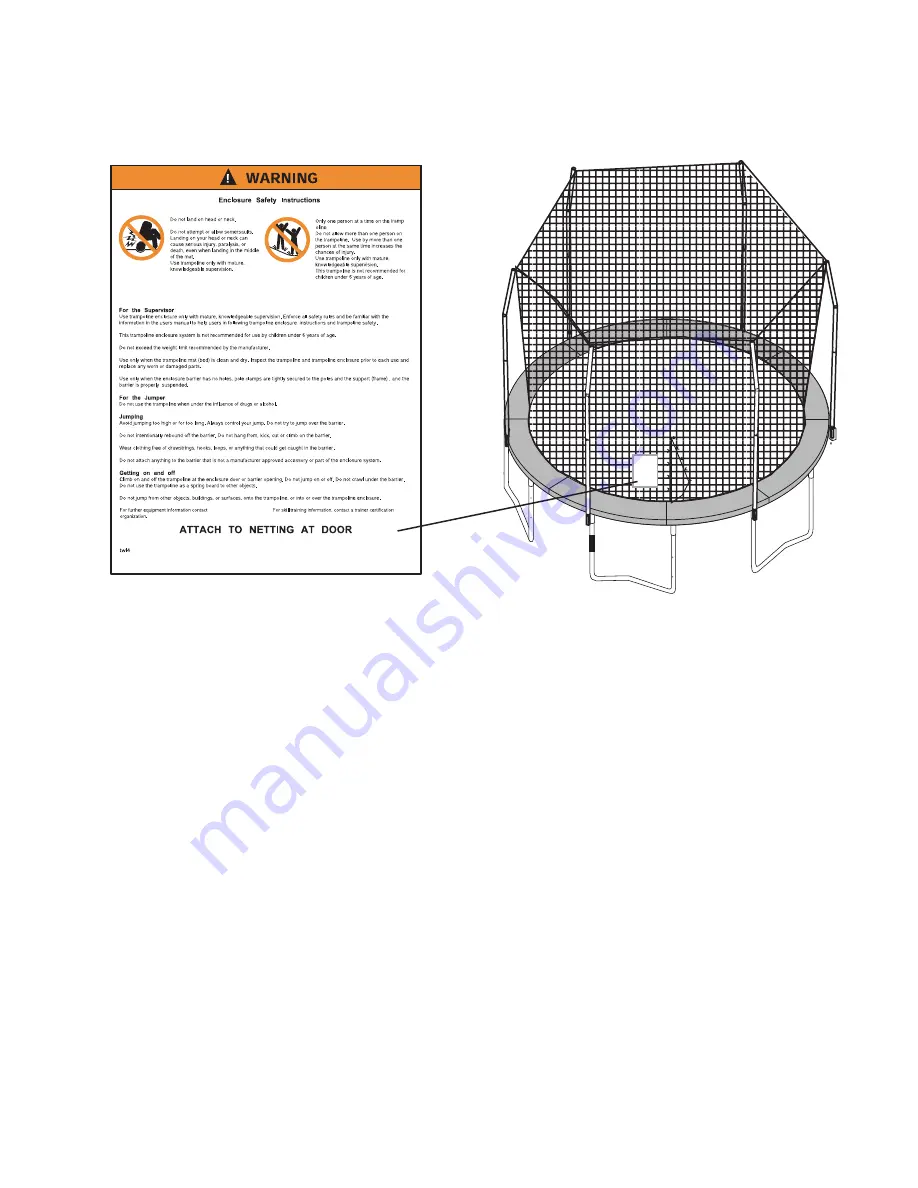
The placard shown at the left was sewn to the trampoline enclosure netting.   

If the placard is missing or illegible, call our Customer Care Hot Line toll-free at 1-866-603-Jump (5867),

Monday through Friday, 8 a.m. until 5 p.m. Mountain Time, to order a free replacement placard. 

Note: The labels and placard are not shown actual size.

, or in the trampoline enclosure.

-

SKYWALKER TRAMPOLINES.


Specific use Limitations             

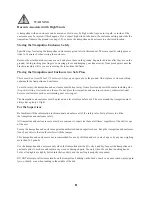
HIGH WIND 

It is possible for the trampoline and enclosure to be blown about by high winds. If you expect high winds, move the 

trampoline and enclosure to a sheltered location. Disassemble (take down) the enclosure netting. Tie the trampoline 

                                                            frame down to the ground using ropes and stakes (not included).

Содержание SWTC1711 Series

Страница 1: ...ons and instructions in this manual before using this equipment Save this manual for future reference Maximum user weight lbs IMPORTANT Trampoline Enclosure s are susceptible to winds Be sure to your Trampoline Enclo secure Wind Damage is not covered sure warranty of your trampo in the line 200 ...

Страница 2: ...t Parts 13 Limited Warranty Back QUESTIONS If you have questions after reading this manual please call our toll free Customer Care Hot Line The trained tech nicians on our Customer Care Hot Line will provide immediate assistance Customer Care Hot Line 1 866 603 Jump 5867 Monday Friday 8 a m 5 p m Mountain Time REPLACEMENT PARTS www skywalkertrampolines com WARNING Read the assembly installation ca...

Страница 3: ...ther play areas Always keep a clear space on all sides of the trampoline and enclosure 6 Use the trampoline and enclosure in an area with lots of light If the trampoline and enclosure are indoors or in shady areas you may need to use artificial electrical lighting in the area 7 Be sure the trampoline and enclosure are only used with your permission Always have someone there to supervise when they ...

Страница 4: ...until 5 p m Mountain Time excluding holidays To help us assist you please mention the name of the product when calling Trampoline Enclosure System The placard shown at the left was sewn to the trampoline enclosure netting If the placard is missing or illegible call our Customer Care Hot Line toll free at 1 866 603 Jump 5867 Monday through Friday 8 a m until 5 p m Mountain Time to order a free repl...

Страница 5: ...ists No lights electric heaters extension cords or household electrical appli ances are to be permitted in or on the trampoline or enclosure at any time Hazards Associated with Entering and Leaving the Trampoline Enclosure A trampoline enclosure installed on a trampoline is raised off the ground The height of the enclosure increases the risk of a fall when a jumper is entering or leaving the enclo...

Страница 6: ...ring tree limbs and fences Do not place the trampoline and enclosure near any other recreational devices or structures such as a swimming pool or swing set The trampoline and enclosure must be placed on a level surface before use The area around the trampoline must always have plenty of light For the Supervisor Be familiar with the information in this manual and enforce all of the safety rules Hel...

Страница 7: ...nything to the netting that is not a Skywalker Trampolinesapproved accessory or part of the of the trampoline enclosure How to Enter and Exit the Trampoline Enclosure Enter and exit the trampoline enclosure only through the door in the netting To enter the enclosure first unfasten the plastic clips on the door and unzip the zippers Place one knee on the frame pad and climb head first through the d...

Страница 8: ...ecommended Provide clear ance from wires tree limbs and other possible hazards Lateral sideways clearance is also essential Place the trampoline and enclosure away from walls structures fences and other play areas Maintain a clear space on all sides of the trampoline and enclosure 3 Use the trampoline in an area with lots of light If the trampoline is indoors or in a shady areas you may need to us...

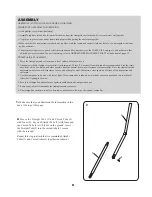
Страница 9: ...p is against the mesh and the holes on both the strap ring and the caps are aligned Hold the pole cap close to a curved tube 6 with foam as shown in Inset Drawing C Insert the curved tube 6 into the pole cap Make sure the holes on the curved tube pole cap and strap ring are aligned Insert the M5x50mm bolt 2 until it touches the nut in the Hexagon hole of the pole cap securing them together Repeat ...

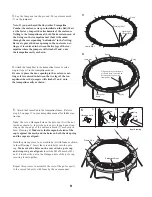
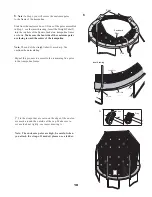
Страница 10: ...e Start from the enclosure door lift one of the poles assembled in Step 1 see the insert drawing Insert the Straight Tube 5 into the top hole of the Square Socket on trampoline frame as shown Make sure the bent side of the enclosure poles are facing toward the center of the trampoline Note The end of the straight tubes 5 are sharp Use caution when assembling Repeat this process to assemble the rem...

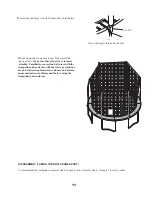
Страница 11: ...mbled put together Make sure that all parts are securely attached Familiarize yourself and all users with the trampoline and enclosure with the safety precautions use and instructional materials and care and mainte nance instructions in this manual before using the trampoline and enclosure 8 Insert the end cap 3 into the bottom hole of the Socket Insert end cap 3 into end of Socket 3 socket ...

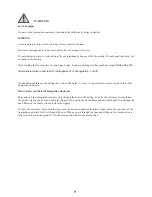
Страница 12: ...of the netting bent or broken enclosure tubes sagging netting sharp protrusions on enclosure tubes If any of these conditions exist the trampoline enclosure should be disassembled taken apart or otherwise protected from being used until the condition is fixed SPECIAL CONSIDERATIONS High Wind It is possible for the trampoline and enclosure to be blown about by high winds If you expect high winds mo...

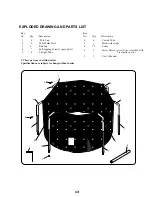
Страница 13: ...olt 6 2 m a o F 12 8 w 1 spare parts e r c S g n i p p a t f l e S 7 4 e b u T t h g i a r t S 6 5 l a u n a M s r e s U 1 1 6 Mesh with straps 1 6 Pole Cap 3 6 End Cap 2 6 6 6 6 6 6 5 5 5 5 7 1 4 8 3 These parts are not illustrated Specifications are subject to change without notice 9 9 1 Screw Driver screw driver included with Trampoline parts ...

Страница 14: ...r or to products used for commercial or rental purpose No other Warranty beyond that specifically set forth above is authorized by Skywalker Holdings LLC SKYWALKER HOLDINGS LLC IS NOT RESPONSIBLE OR LIABLE FOR INDIRECT SPECIAL OR CONSEQUE NTIAL DAMAGES ARISING OUT OF OR IN CONNECTION WITH THE USE OR PERFORMANCE OF THE PRODUCT OR OTHER DAMAGES WITH RESPECT TO ANY ECONOMIC LOSS LOSS OF PROPERTY LOSS...

Отзывы: