background image

2

POWER CONFIGURATIONS

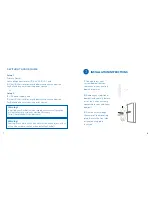
Prior to installing your SkyBell, make sure your home is 
compatible with one of the power configurations listed.
Power configuration diagrams are available at 

www.skybell.com/support/power

.

Unless otherwise indicated, all power configurations require 
primary power (110/120 VAC in the US and 220/230/240 VAC, 
in Europe) and a low-voltage
transformer (10-36V 10 VA).

1. A MECHANICAL DOOR CHIME AND LOW VOLTAGE 
TRANSFORMER 

(Recommended)

.

2. A DIGITAL DOOR CHIME WITH ADAPTER AND A LOW 
VOLTAGE TRANSFORMER.

4. Router Band -

 SkyBell will only connect to the 2.4 GHz 

band. If you have a dual-band router, you must create unique 
SSIDs for the 2.4 and 5 GHz bands. Prior to initiating the 
syncing process, make sure your mobile device is connected to 
the 2.4GHz SSID.  

5. Router b/g/n - 

SkyBell works on the b/g network. If you 

have an “N-Only” router, please activate the b/g setting.

6. Router Channel Bandwidth -

 Make sure your router is 

configured to 20 MHz bandwidth.

7. Transformer  -

 If your SkyBell is being powered by your 

home’s transformer, the transformer’s output must be between 
10 and 36 VAC 10 VA.

8. Accessories  -

 For more information on installing an 

accessory, please visit section 4 before starting the installation.

5

6

Содержание 2.0

Страница 1: ...Installation Guide ...

Страница 2: ...ophone Motion Sensor Contents SkyBell Doorbell Device Mounting Plate Special Locking Tool Screw Anchors 2 Wall Screws 2 Wire Connectors 4 2 extra Tools You May Need for Installation Pliers or Crimpers Power Drill or Screw Driver Outdoor Adhesive Wire Strippers SkyBell Components S K YBE L L 1 2 ...

Страница 3: ...ell Chime SkyBell is compatible with mechanical and digital door chimes Wireless door chimes are not supported Digital door chimes require an adapter which may be sold separately 2 Wi Fi Speed Be sure you have at least 1 5 mbps consistent upload speed at your front door For more details on how to check your Wi Fi speed visit www skybell com support wi fi speed test 3 Router Quality Your SkyBell ex...

Страница 4: ...SFORMER 4 Router Band SkyBell will only connect to the 2 4 GHz band If you have a dual band router you must create unique SSIDs for the 2 4 and 5 GHz bands Prior to initiating the syncing process make sure your mobile device is connected to the 2 4GHz SSID 5 Router b g n SkyBell works on the b g network If you have an N Only router please activate the b g setting 6 Router Channel Bandwidth Make su...

Страница 5: ...wer configuration will automatically void your Limited Warranty http www skybell com warranty Warning Coming into contact with a transformer can cause injury or loss of life Use extreme caution when installing SkyBell OR 3 INSTALLATIONINSTRUCTIONS 1 To begin press your current doorbell button to make sure your existing door chime works 2 Remove your traditional doorbell and carefully detach or cut...

Страница 6: ...nd will automatically void your limited warranty For more details www skybell com support power and www skybell com legal Instead of drilling into your wall you may use an outdoor adhesive to glue the mounting plate to your wall or door frame 5 Gently twist together the ends of a SkyBell wire and a home doorbell wire as shown 6 Next insert the joined wires into a blue wire connector and push until...

Страница 7: ...crew is already in place in the bottom center hole of the mounting plate Place the SkyBell completely over the mounting plate and insert the locking tool into the middle hole at the bottom center of the device Turn the tool counter clockwise right to left 3 full rotations This will draw the set screw down and lock the SkyBell into place Be sure that the screw is not exposed beyond the bottom of th...

Страница 8: ...gh the center hole in the wedge mount 3 Position the wedge mount so that the camera will be angled in the direction of your visitor 4 Place the wall mount on top of the wedge mount and position so that the bottom of the wall mount the end with the set screw is at the center of the thinnest part of the wedge mount Be sure that the wires pass through the center hole in the wall mount 5 Place two scr...

Страница 9: ...e sure that the lip around the center hole faces you 3 Place the wall mount directly on top of the door frame adapter and position so that the bottom part of the wall mount is the end with the set screw Be sure to pass the wires through the center hole of the wall mount 4 Secure the wall mount and the door frame adapter to the door frame with the screws Be sure that the adapter is flush and tight ...

Страница 10: ...Your Wi Fi network password if necessary 4 The SkyBell Activation Code device ID Register 1 Download the app from the iTunes App Store or the Google Play Store Search SkyBell and select our free app 2 On the home screen of the app tap Register and create an account by entering your information and completing the account creation process 3 Then log out of the app by tapping the settings wheel tappi...

Страница 11: ... process You will need your SkyBell device ID and Wi Fi password Your device ID can be found on the back of your device or on the back of this installation booklet If the setup is successful 1 You will see a screen asking you to name your SkyBell Name your SkyBell and continue through the remaining screens or 2 The LED light will turn from a blinking red to a blinking green or solid green This mea...

Страница 12: ...appear in the home screen You can tap that device to adjust its individual settings Red Light After Successful Sync If the LED light is a solid red at any time after a successful sync this means the device does not have Wi Fi connection and or internet connection Please visit www SkyBell com support to troubleshoot LED LIGHT KEY Red Solid Device has power but no Wi Fi or internet connection Red Bl...

Страница 13: ...STATE LAW DO NOT ATTEMPT TO POWER YOUR SKYBELL WITH AN IMPROPER POWER CONFIGURATION INFORMATION REGARDING ALL SUPPORTED POWER CONFIGURA TIONS CAN BE FOUND AT WWW SKYBELL COM SUPPORT POWER CONFIGURATION DIAGRAMS FAILURE TO STRICTLY ADHERE TO OUR POWER CONFIGURATION GUIDELINES WILL AUTOMATICALLY VOID THIS LIMITED WARRANTY SkyBell Limited Warranty Subject to the terms and conditions of this Limited W...

Страница 14: ...luding sales promotions or other discounts In addition to any other remedies available to us if we have shipped a new device to you and we have not received your original device within 30 days from the initiation of the return process we shall have the right to terminate your original device and or your replacement No Other Warranties THE WARRANTIES AND REMEDIES CONTAINED HEREIN ARE EXCLUSIVE AND ...

Страница 15: ... TO REPAIR ANY PRODUCT UNDER THIS LIMITED WARRANTY OR MAKE A PRODUCT EXCHANGE WITHOUT RISK TO OR LOSS OF PROGRAMS OR DATA ALL CLAIMS BY YOU WHETHER IN TORT CONTRACT STRICT LIABILITY OR OTHERWISE MUST BE BROUGHT WITHIN TWO YEARS FROM THE DATE THE CAUSE OF ACTION ACCRUES THIS LIMITATION OF LIABILITY CONSTITUTES AN ESSENTIAL PART OF THIS AGREEMENT THE FOREGOING APPLIES EVEN IF SBT OR ANY SUPPLIER OR ...

Страница 16: ...try or some other action or event outside SBT s control Return of devices from outside the US and Canada is at your own risk SBT is not responsible for providing a replacement device if in SBT s sole discretion it cannot successfully or legally ship a product to an international destination Reseller Limitations This Warranty only applies to devices purchased from SkyBell or an Authorized Reseller ...

Страница 17: ...W W W S K Y B E L L C O M ...

Отзывы: