9
Installing the field flattener and a CCD camera - continued
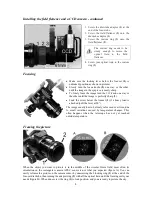
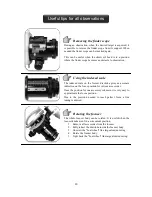
1.
Screw the drawtube adaptor
(1)
at the
end of the focus tube.
2.
Screw the field flattener
(2)
onto the
drawtube adaptor
(1)
.
3.
Screw the custom ring
(3)
onto the
field flattener (
2)
.
The custom ring needs to be
sturdy enough to secure the
optical train to the field
flattener.
4.
Screw your optical train to the custom
ring
(3)
.
Focusing
•
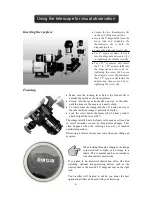
Make sure the locking lever below the focuser
(1)
is
unlocked (position as shown in picture).
•
Slowly turn the focus knobs
(2)
one way or the other,
until the image in the eyepiece is nearly sharp.
•
To finely focus the image turn the 1:11 knob one way or
the other until the image is perfectly sharp
(3)
.
•
Lock the screw below the focuser
(1)
if a heavy load is
attached (pull the lever at 90°).
The image usually has to be finely refocused over time, due
to small variations caused by temperature changes. This
often happens when the telescope has not yet reached
outside temperature.
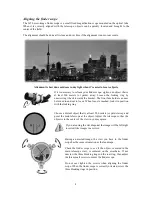
Framing the picture
When the object you want to picture is in the middle of the circular 33mm field, most often its
orientation on the rectangular camera APS-C sensor is not what you expected (figure A). You can
easily reframe the picture on the camera sensor by unscrewing the blocking ring
(1)
at the end of the
focuser drawtube, then turning the adapter ring
(2)
with all the optical train until the framing suits your
needs (figure B). When done screw the ring
(1)
to lock position, and you are ready to picture the sky.


