8
I
nitial Setup
This section provides a step-by-step procedure on how to operate your SynScan
TM
AZ hand control.
The hand control's red light will become dimmer and the backlight of the key pads will
turn off if idle for 30 seconds. Pressing any key turns it back on.
If the hand control is not properly connected to the mount, the screen will display “No
link to M.C. Stand-alone mode”. If you wish to use the hand control to control the
mount, unplug the connection cable and try again.
Make sure the mount is level to the ground.
Point the telescope roughly to one or a group of visible bright stars in the sky.
Connect the hand control to the mount with the provided cable. For AutoTracking
telescopes, plug the DC 12 volt power into the outlet of the mount to turn on the power.
For Multi-function telescopes, simply flip the power switch to the “on” position.
The initial screen displayed on the hand control is the Version Screen. You will hear a
long beep indicating that the hand control is properly connected to the mount. The
directional keys are now activated. You can now move the telescope using the directional
keys on the hand control. The default speed rate at this point is Rate 9. Press
ENTER
to
proceed to the next Initial Setup step.
1.
2.
3.
4.
6.
7.
8.
9.
10.
Enter the telescope's current latitudinal and longitudinal position using the numeric keypad.
First enter the longitudinal coordinate, followed by the latitudinal coordinate. Use the scroll
keys to choose between W or E, and N or S. Pressing the left or right directional keys will
move the cursor to the previous or next number. Press
ENTER
to confirm. The format you
enter should look like this: 123 04’ W 49 09’N.
Enter your current time zone in hours and minutes (see Appendix C), using the scroll keys
and numeric key pad (+ for East, - for West). Press
ENTER
to confirm. The format you
enter should look like this if you are in Pacific Standard Time (PST): -08:00.
Enter the date in the following format mm/dd/yyyy using the numeric keypad. Press
ENTER
to confirm.
Enter your current local time using the 24 hr time mode (e.g. 2:00PM=14:00). Press
ENTER
to view the time you just entered. If it is incorrect, press
ESC
to go back to the
previous screen. If correct, press
ENTER
again to proceed to the daylight saving setting.
After entering the current time, the SynScan
TM
AZ will prompt "DAYLIGHT SAVING?". Use
the scroll keys to make the selection and press
ENTER
to confirm.
After setting the daylight saving, SynScan
TM
will display "Begin alignment?". Press "1" or
ENTER
to start the alignment procedure. Press "2" or
ESC
to skip the alignment and exit
to the Main Menu.
If a mistake was entered into the
SynScan
TM
AZ hand control, press the
ESC
key to go
back to the previous menu, and press
ENTER
to start again.
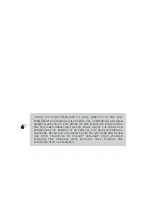
The hand control will display a warning concerning pointing the telescope at the sun without
proper equipment. If you have read the message already, pressing
ENTER
will bypass the
message and skip to the next step.
5.


