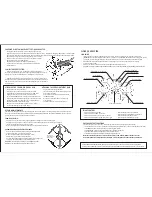
FLYING QUADCOPTER
LAUNCHING
-
Install LiPo battery and place Quadcopter on flat smooth surface. Turn remote control power switch to ON.
-
IMPORTANT: Quadcopter calibrates when remote is turned on, so SURFACE MUST BE LEVEL. Launching from uneven
surfaces may affect flying performance. Ensure surrounding area is free of obstacles and suitable for flying.
-
HELPFUL TIP:
Stand behind Quadcopter when launching so you are facing what Quadcopter is facing.
This makes flying easier.
-
Slowly push remote control Throttle stick UP until Quadcopter lifts into the air.
-
CAUTION: DO NOT FLY NEAR SPECTATORS OR ANIMALS. READ ALL WARNINGS IN THIS MANUAL BEFORE FLYING.
Throttle/Spin(Yaw) Stick
Stunt Button
Direction Stick
Power On/Off Switch
4-Ring Body On/Off Switch
Flight Sensitivity Dial
Spin (Yaw) Trim
Left/Right Trim
Power indicator LED
Forward/Backward Trim
ONE-TOUCH STUNT FUNCTIONS
(For use with stunt body or no body at all—Do not perform stunts with 4-ring foam body attached)
- Tap the Direction stick in one of 4 directions while pressing the Stunt Button to do amazing flips and barrel rolls!
- FLIP FORWARD: Tap Direction stick UP while pressing Stunt Button.
- FLIP BACKWARD: Tap Direction stick DOWN while pressing Stunt Button.
- FLIP LEFT: Tap Direction stick LEFT while pressing Stunt Button.
- FLIP RIGHT: Tap Direction stick RIGHT while pressing Stunt Button.
IMPORTANT: QUADCOPTER SHOULD BE FLYING AT LEAST 6 FEET IN THE AIR WITH A MINIMUM CLEARANCE OF 6 FEET
IN ALL DIRECTIONS BEFORE ATTEMPTING STUNT FUNCTIONS. STUNT FUNCTIONS SHOULD BE PERFORMED OUTSIDE ONLY.
FLIGHT CONTROL
- Press Throttle stick UP to climb
- Press Throttle stick DOWN to descend
- Press Throttle stick LEFT to spin (yaw) to the left
- Press Throttle stick RIGHT to spin (yaw) to the right
CHARGING & INSTALLING LiPo BATTERY IN QUADCOPTER
- Unplug and remove LiPo Battery from underside of Quadcopter.
- Plug LiPo battery into AC power adaptor and charge for 30-50 minutes. (RED light = Charging / GREEN light = Fully Charged)
- Once charged, disconnect LiPo battery from AC power adaptor and reassemble back into underside of Quadcopter for flying.
- NOTE: Always unplug LiPo battery when Quadcopter is not in use.
- After use, allow LiPo battery 15 minutes to cool before charging.
- Charge LiPo battery in an isolated area
- Never leave LiPo battery unattended while charging.
- If LiPo battery swells, unplug it immediately and permanently
discontinue use.
LOW VOLTAGE PROTECTION:
- If battery voltage drops to an extremely low level, Quadcopter will
severe battery electrical supply preventing any possible damage to battery or
Quadcopter. Lipo battery will need to be recharged to restore function.
- If Quadcopter’s blades become jammed and users continue to throttle up
causing a high current, Quadcopter will severe battery connection protecting it
from over current. Lipo battery will need to be unplugged then reconnected to
restore function.
ATTACHING THE FOAM 4-RING BODY HULL
- Unplug LiPo battery on Quadcopter.
- Turn foam body upside down and rest on level surface.
- Turn Quadcopter upside down and place it over foam body,
aligning 4 rotor arms with foam body’s 4 plastic clips.
Ensure that GREEN blades are facing forward with foam body.
- Insert Quadcopter into plastic clips. Snap clips closed to secure
Quadcopter to foam body then flip back to upright position.
- Flip Body Switch on remote control to ON.
- NOTE: Do not carry Quadcopter by foam rings as this may
cause unnecessary damage to foam body.
ATTACHING THE ULTRA-LIGHT STUNT BODY
- Unplug LiPo battery on Quadcopter.
- Place stunt body over Quadcopter, aligning 4 side
holes with 4 rotor arms.
Ensure that stunt body points forward between
the GREEN blades.
- Gently press stunt body down until holes clip
over rotor arms.
- Flip Body Switch on remote control to OFF.
CHANGING DAMAGED PROPELLER BLADES
- Remove the small retaining screw holding the damaged blade
in place using the mini screwdriver provided.
- Make note of the blade color and letter (A,B,C or D)
before removing the blade from Quadcopter.
- Replace the damaged blade with a new blade with matching color
and letter. Secure the blade with the retaining screw.
WARNING: Do not fly with broken or damaged propeller
blades as it may cause damage or lead to injury.
REPAIR & MAINTAINENCE
The foam body is designed to protect Quadcopter from impact and improve your flying experience. Overtime however the
foam body will become damaged and break. DO NOT RETURN QUADCOPTER TO YOUR LOCAL RETAILER. You can repair or
replace the foam body and propeller blades as follows:
FOAM BODY REPAIR
- Repair a break in the foam body by applying adhesive binding strips to the damaged area.
- Applying 2 binding strips in a criss-cross pattern across a damaged area will increase repair strength.
- Inspect foam body regularly for signs of damage.
- Cracks in progress can be reinforced with repair strips before full breaks occur.
GREEN
BLACK
Flip quadcopter
upside down to see
blade markings
FLIGHT SENSITIVITY ADJUSTMENT: Quadcopter responsiveness may be adjusted to match your flying skills.
Rotate knob CLOCKWISE to increase responsiveness. Rotate COUNTER-CLOCKWISE to decrease responsiveness.
- Press Direction stick UP to fly forward
- Press Direction stick DOWN to fly backward
- Press Direction stick LEFT to fly left
- Press Direction stick RIGHT to fly right


