background image

27

SKF TKSA 31 & TKSA 41

4.4 Recheck – remeasure

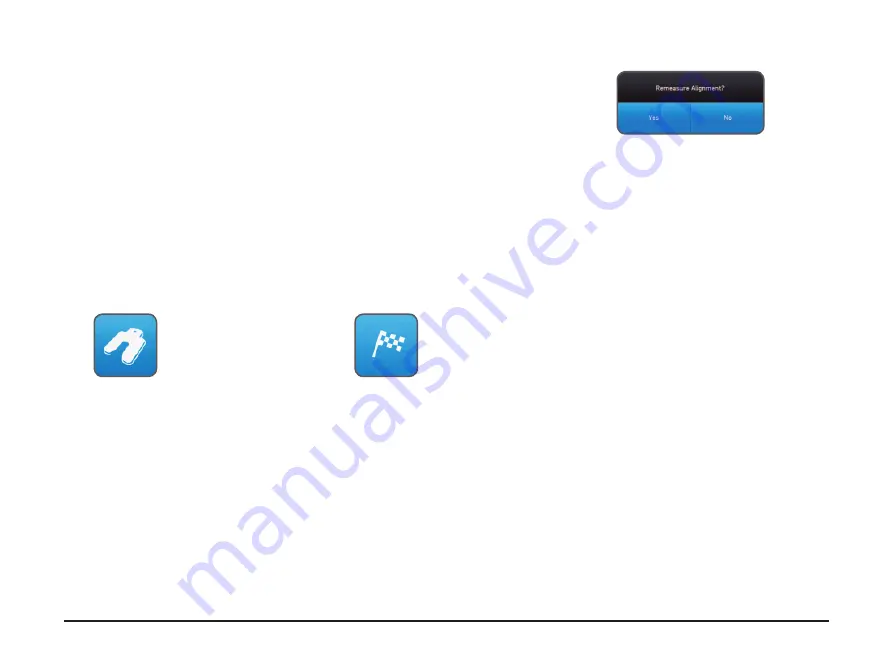
After the horizontal correction, it is recommended to measure again the 
alignment.
• Answer 

Yes

 to the Recheck Popup to 

measure again.

• Answer 

No

 to 

create a report.

• 

Perform the three measurements.

• 

Check the result screen:

1.  Click the shim button to correct  
 

the alignment.

2.  Click the flag button to end the  
 

alignment and create a report.


Содержание TKSA 31

Страница 1: ...SKF TKSA 31 TKSA 41 Instructions for use ...

Страница 2: ......

Страница 3: ...matic measurements 19 3 5 Free measurement TKSA 41 only 20 3 6 Backlash 21 4 Correct the alignment 22 4 1 Results page 22 4 2 Vertical correction Side view Shimming 23 4 3 Horizontal correction Top view 25 4 4 Recheck remeasure 27 5 Create a report 28 5 1 Reporting 28 5 2 Report creation page 29 5 3 Report content and browser 30 6 QR codes machine library soft foot 32 6 1 QR code TKSA 41 only 32 6...

Страница 4: ...2009 EN 61000 4 3 2006 A1 2008 A2 2010 EN 61000 4 4 2004 A1 2010 EN 61000 4 5 2006 EN 61000 4 6 2009 EN 61000 4 11 2004 EUROPEAN ROHS DIRECTIVE 2011 65 EU The laser is classified in accordance with the EN 60825 1 2007 The laser complies with 21 CFR 1040 10 and 1040 11 except for deviations pursuant to Laser Notice No 50 dated June 24 2007 TKSA 41 only The enclosed device complies with Part 15 of t...

Страница 5: ...ach Keep proper footing and balance at all times to enable better control of the device during unexpected situations Use safety equipment Non skid safety shoes hard hat or hearing protection must be used for appropriate conditions Never work on energized equipment unless authorized by a responsible authority Always turn off the power of the machine before you start Do not expose the equipment to r...

Страница 6: ...er coupling wear rates Increased unplanned downtime Proper alignment is achieved when the centrelines of each shaft are co linear when the machine is under load and at normal operating temperatures This is often referred to as shaft to shaft alignment If the shafts of a machine train are not co linear when the machine is in operation they are misaligned In essence the objective is to have a straig...

Страница 7: ...e used to automatically calculate the misalignment and guide the user through the vertical shimming and horizontal correction steps The measurements can be taken according to the 9 12 3 method or with a free measurement method on the TKSA 41 Measurements can also be taken automatically without action from the user on the Display Unit The TKSA 41 can be used with the display flat on the floor or ve...

Страница 8: ...apters US UK EU AUS 3 1 TKSA 31 41 M Measuring unit 10 2 Micro USB to USB cables 4 2 Shaft V Brackets with chains 11 Printed Quick Start Guide EN 5 90 mm Extension rods TKSA 41 only 12 Printed certificate of Calibration and conformance 6 1 Chain tightening rod 13 1 Page of QR code stickers TKSA 41 only 7 5 m 16 ft metric and imperial measuring tape not shown ...

Страница 9: ...arge 29 mm CCD detector Electronic inclinometers Bluetooth 4 0 LE TKSA 41 Red Line laser 2 threaded 150 mm rods per V bracket Multiple positions for chain nut Large Resistive colour touchscreen Rugged Design Screen orientation flip function TKSA 41 ...

Страница 10: ...ached to the coupling For shafts with diameter 40 mm 1 5 hook the chain to the anchor in the V bracket from the inside The tightening knob should use the space closer to the rod For larger diameters hook the chain from the outside Remove the slack of the chain and tighten it firmly with the tensioning knobs with the rod tensioning bar Make sure the rods are firmly tightened to the brackets before ...

Страница 11: ...On Off button on the display unit to Start the DU Put the DU in stand by Wake up the DU from stand by Note To restart reset the unit keep the On Off button pressed until the display unit switches off 6 seconds The DU will enter deep sleep after 2 hours of inactivity The DU will never turn off during an alignment job The Display Unit does NOT need to be switched off Short press for stand by only ...

Страница 12: ... The LED will start blinking in a blue colour to indicate the MU is trying to connect to the DU The Bluetooth symbol appears in the top right corner of the display next to the S and M letters The MU will connect automatically to the DU When connected the battery level of the MU is shown S M Note Click on the top right corner red zone on the right of the display to open the MU settings Once connect...

Страница 13: ...ds Connect the Micro USB cables to the Measuring Units The locking pins on the connector should be directed towards the front laser part of the MU The MU will automatically connect to the DU A USB symbol will be shown next to the S and M letters Note Switch Off the MU before disconnecting the USB cables See section Troubleshooting for any connection issue The micro USB ports on the MU are sealed f...

Страница 14: ...suring unit MU in position Adjust the height of the S unit so that its laser line hits the M MU in the centre of the detector on the red mark Lock firmly the S unit in position Use the knob on top of the M unit to vertically adjust the laser position on the S unit ...

Страница 15: ...6 Home screen Start a new alignment job Open the machine library check previous alignments and start new ones SKF Menu Open Reports Open Settings Scan a QR code to recognize an existing machine or create a new machine Open Help ...

Страница 16: ...ndicator appears on the top right of the screen to indicate charging of the DU and MU Note The display unit will charge in standby mode The display unit will wake up when connected to power 2 8 Charging the measuring units Connect the MU to the display unit with the micro USB cables The charging symbol will be shown on the screen ...

Страница 17: ...15 SKF TKSA 31 TKSA 41 3 Take a measurement 3 1 3 Ways to start an alignment From the Home screen Click on New alignment Click on QR code Click on Machine library 2 1 3 ...

Страница 18: ... Two custom tolerances can be setup set 1 and set 2 Fill in the angular and parallel misalignment and click on the corresponding blue button The units English or Metric can be selected from the settings menu before the alignment is started Go to the measurement screen by clicking on the next arrow 1 2 3 4 5 6 ...

Страница 19: ... of the measuring units during each step 1 Turn the shafts to the blue wedge at the 9 o clock position 90 2 When positioned within blue wedge the wedge becomes green 3 Click on the next arrow to take a measurement 4 Turn the shafts to the blue wedge at the 12 o clock position 0 5 Click on the next arrow to take a measurement 6 Turn the shafts to the blue wedge at the 3 o clock position 90 7 Click ...

Страница 20: ... TKSA 31 TKSA 41 9 12 3 Measurements 1 4 2 5 3 6 The raw S and M reading in the bottom left of the screen can be enabled from Settings General The angle difference between the S and M MU should be less than 2 ...

Страница 21: ... display unit The symbol AUTO appears in the bottom right instead of the arrow A measurement is taken automatically after the countdown Turn the MU in the right position and the measurement will be taken automatically Once the first measurement is taken move on with the other measurements Should the MU move during countdown the measurement will be interrupted ...

Страница 22: ...hin a minimum of 90 Free measurement is useful when the ability to rotate the shafts is limited Example Free measurement can be enabled from Settings Measurement Settings Automatic measurement cannot be used together with free measurements Better results are achieved when the total measurement angle is close to 180 Measurement 1 Measurement 2 Measurement 3 ...

Страница 23: ...e than 2 from each other When the MUs are more than 2 apart this condition is called backlash Example MUs are 3 apart in the above example Backlash warnings are enabled only when the MU are within a blue wedge It is always possible to take a measurement with backlash ie MU angle 2 Accept the warning message to take the measurement anyway ...

Страница 24: ...he motors movement graphically represents the results The black line being where the motor should be the blue line being where the motor currently is Graphical view Symbol Horizontal Correction Within tolerance Close to tolerance Out of tolerance Change tolerance Take measurements again Finish and Create report 1 The black shafts icons are fixed and do not represent the alignment state ...

Страница 25: ...otor has to go up Down arrow means the motor has to go down Coupling values are a direct measurement Feet values are calculated using the distances previously entered Coupling and feet values are updated live on the screen Use the Pause button to freeze the live update This can be useful to remember the correction values STOP when the coupling values are within tolerance and both Green marks are s...

Страница 26: ...24 SKF TKSA 31 TKSA 41 Vertical correction Side view Shimming Target line 1 Angular misalignment Parallel offset Feet values This motor has to go down ...

Страница 27: ...ow means the motor has to go to the right Down arrow means the motor has to go to the left Coupling values are a direct measurement Feet values are calculated with the distances previously entered Coupling and feet values are updated live on the screen Use the Pause button to freeze the live update This can be useful to remember the correction values STOP when the coupling values are within tolera...

Страница 28: ...26 SKF TKSA 31 TKSA 41 Horizontal correction Top view Perfect target line 1 Angular misalignment Parallel offset Feet values ...

Страница 29: ...commended to measure again the alignment Answer Yes to the Recheck Popup to measure again Answer No to create a report Perform the three measurements Check the result screen 1 Click the shim button to correct the alignment 2 Click the flag button to end the alignment and create a report ...

Страница 30: ... to export Insert a USB stick into any USB port of the display unit Select the USB icon in the bottom right The icon becomes blue once a USB stick is inserted The report will be generated as PDF and exported on the stick Note Reports can be found on the folder Alignment reports on the USB stick PDF reports files are named using the report name and the date If the USB icon does not become active us...

Страница 31: ...om an existing machine Report Name Mandatory field Operator Filled automatically with user data Photo Up to 3x photos can be added to the report TKSA 41 only Photos can also be taken during the alignment via SKF Photo notes Comments Comments can be added Click Next to create and visualize the report A minimum of 7 000 reports with pictures can be stored in the unit the internal memory is 8 GB 1 ...

Страница 32: ... Click on the top or bottom part of the screen to navigate through the pages Click on the back button to go back The report additionally contains User name address and logo when filled in Dimensions alignment and correction results soft foot results Instrument information Machine name QR code Space for date and signature ...

Страница 33: ...31 SKF TKSA 31 TKSA 41 ...

Страница 34: ...Select New measurement to start a new measurement All future alignment jobs can be found in the machine library by scanning the QR code again Aligning an existing machine Click on the QR code icon from the home screen Scan the QR code it will be recognized automatically The machine page opens in the machine library Select New measurement to start a new measurement The machine can also be selected ...

Страница 35: ... The Machine library allows Seeing the alignment jobs performed on a machine including dates Checking whether the machine has been aligned within tolerance Attribute a QR code and a picture to a machine Start a new alignment for a given machine ...

Страница 36: ...KSA 41 Machine library browsing and gestures Swiping with one finger and clicking can be used in the machine library Columns can be sorted by machine name operator or alignment date Green Clicking area Red Swiping area ...

Страница 37: ...t Settings Soft Foot Check Place the MU at 12 o clock 0 position Soft foot must be checked on all feet Chose the tolerance by clicking on the tolerance button Measuring soft foot 1 Loosen the bolt of the foot and click OK 2 Tighten the bolt of the foot and click OK 3 Repeat for all 4 feet ...

Страница 38: ...orrect the soft foot if any by adding shims 5 Click on check or click the next button to leave the soft foot function 6 Remeasure soft foot and click next to leave the function Note SKF high precision machinery shims search for TMAS on SKF com ...

Страница 39: ...s menu Screen Brightness Adjust the screen brightness by clicking the left or right sun icon or by sliding the brightness bar with a swiping gesture All default All default will reset all settings to their default values including the user preferences ...

Страница 40: ...nk Company logo will be used for the alignment report Loading your company logo The image file must be named logo jpg and be less than 256KB in size Load the file on the root of a USB stick When the USB stick is plugged to the display unit the plus button becomes blue Click plus to import the company logo Click minus to delete the logo ...

Страница 41: ...an alignment is started The ask option means a popup window will give the choice to the user Auto measurement is available when Free measurement is off Note We recommend always verifying the alignment correction previously made See chapter 3 for more details on the measurement options ...

Страница 42: ...t Update the unit firmware Measuring units information menu allows to Find the firmware version serial number of the S and M measuring units Check the battery level of the S and M measuring units Visualize the live internal temperature live angles and live detector reading position of the S and M measuring units Update the measuring units firmware Find existing or pair new measuring units Find mea...

Страница 43: ...41 SKF TKSA 31 TKSA 41 7 5 Languages The following languages are available English French German Spanish Italian Portuguese Russian and Simplified Chinese ...

Страница 44: ...and date clock Units allows the user to choose between imperial inches and metric units meters Note Units cannot be changed when an alignment job is started Date clock allows setting the date and time These will be shown on the reports ...

Страница 45: ...his function to hear an audible beep when a button is pressed Confirm delete Ask confirmation when a report or machine is being deleted S and M readings S and M measuring units live detector readings are displayed during the measurements when this option is enabled ...

Страница 46: ... Units do not have a reset function 8 2 Power modes The DU will enter deep sleep after 2 hours of inactivity The DU will never turn off during an alignment job Measuring units keep charging when the DU is in deep sleep mode 8 3 Charging If the unit does not appear to charge turn on the display unit and check the charging logo appears If the problem remains measure the output voltage of the power a...

Страница 47: ...popup when finished Measuring units firmware update Load the file heads hex on a USB stick at the root folder Plug the USB stick to the display unit while DU is switched on Select Settings Measuring units info Import firmware Remove the USB stick from the display unit Make sure the measuring units are switched off Connect the MU to the display unit with the USB cables supplied Select Settings Meas...

Страница 48: ...he instrument can be used while the MU are connected in USB and charging OR When the MU are switched on a blue LED should be blinking after the original LED which indicates the battery status If the blue LED blinks but the MU do not connect to DU Settings Measuring units info Find measuring units Wait until both S and M MU appear ex TKSA41 S 1433 0001 Click on both MU to make them appears in grey ...

Страница 49: ...CD with red line laser Class 2 inclinometer 0 5 Bluetooth 4 0 LE and wired USB cables System measuring distance 0 07 m to 4 m 0 23 ft to 13 1 ft up to 2 m 6 6 ft with cables supplied 0 07 m to 4 m 0 23 ft to 13 1 ft Measuring errors 0 5 5 µm 0 5 5 µm Housing material 20 Glass filled Polycarbonate 20 Glass filled Polycarbonate Operating time N A Up to 16 hours of continuous use 2 000 mAh rechargeab...

Страница 50: ...ns 205 140 60 mm 8 1 5 5 2 4 in 205 140 60 mm 8 1 5 5 2 4 in Weight 420 g 0 9 lb 640 g 1 4 lb Complete system TKSA 31 TKSA 41 Alignment method Alignment of horizontal shafts 3 position measurement 9 12 3 3 position automatic measurement 9 12 3 3 position free measurement with min 140 rotation Alignment of horizontal shafts 3 position measurement 9 12 3 3 position automatic measurement 9 12 3 3 pos...

Страница 51: ...eter 0 8 to 5 9 in 300 mm 11 8 in with extension chains 20 to 150 mm diameter 0 8 to 5 9 in 300 mm 11 8 in with extension chains supplied Max recom coupling height 105 mm 4 2 in with standard rods 195 mm 7 7 in with ext rods not supplied 105 mm 4 2 in with standard rods 195 mm 7 7 in with ext rods Power adapter Input 100V 240V 50 60Hz AC power supplier Output DC 12V 3A with EU US UK AUS adapters I...

Страница 52: ...ing unit 1 TKSA 31 display unit 1 TKSA 41 display unit 2 Shaft brackets with chains 2 Shaft brackets with chains 1 Chain tightening rod 1 Chain tightening rod 4 90 mm extension rods 1 Power supply with country adapters 1 Power supply with country adapters 2 Micro USB to USB cables 2 Micro USB to USB cables 1 5 m 16 ft metric imperial measuring tape 1 5 m 16 ft metric imperial measuring tape 1 Prin...

Страница 53: ...XTCH 2 500 mm 19 7 in extension chains for TKSA 31 41 TKSA VBK 2 Standard V brackets No rods no chain supplied for TKSA 31 41 60 80 TKSA MAGVBK 2 Magnetic V brackets No rods no chain supplied for TKSA 31 41 60 80 TKSA SLDBK 2 Sliding wheels for non rotating shafts to be mounted on standard V bracket No bracket supplied for TKSA 31 41 60 80 TKSA MAGBASE 2 Magnetic bases for use with offset brackets...

Страница 54: ...52 SKF TKSA 31 TKSA 41 ...

Страница 55: ......

Страница 56: ...re the copyright of the publisher and may not be reproduced even extracts unless prior written permission is granted Every care has been taken to ensure the accuracy of the information contained in this publication but no liability can be accepted for any loss or damage whether direct indirect or consequential arising out of the use of the information contained herein ...

Отзывы: