


4
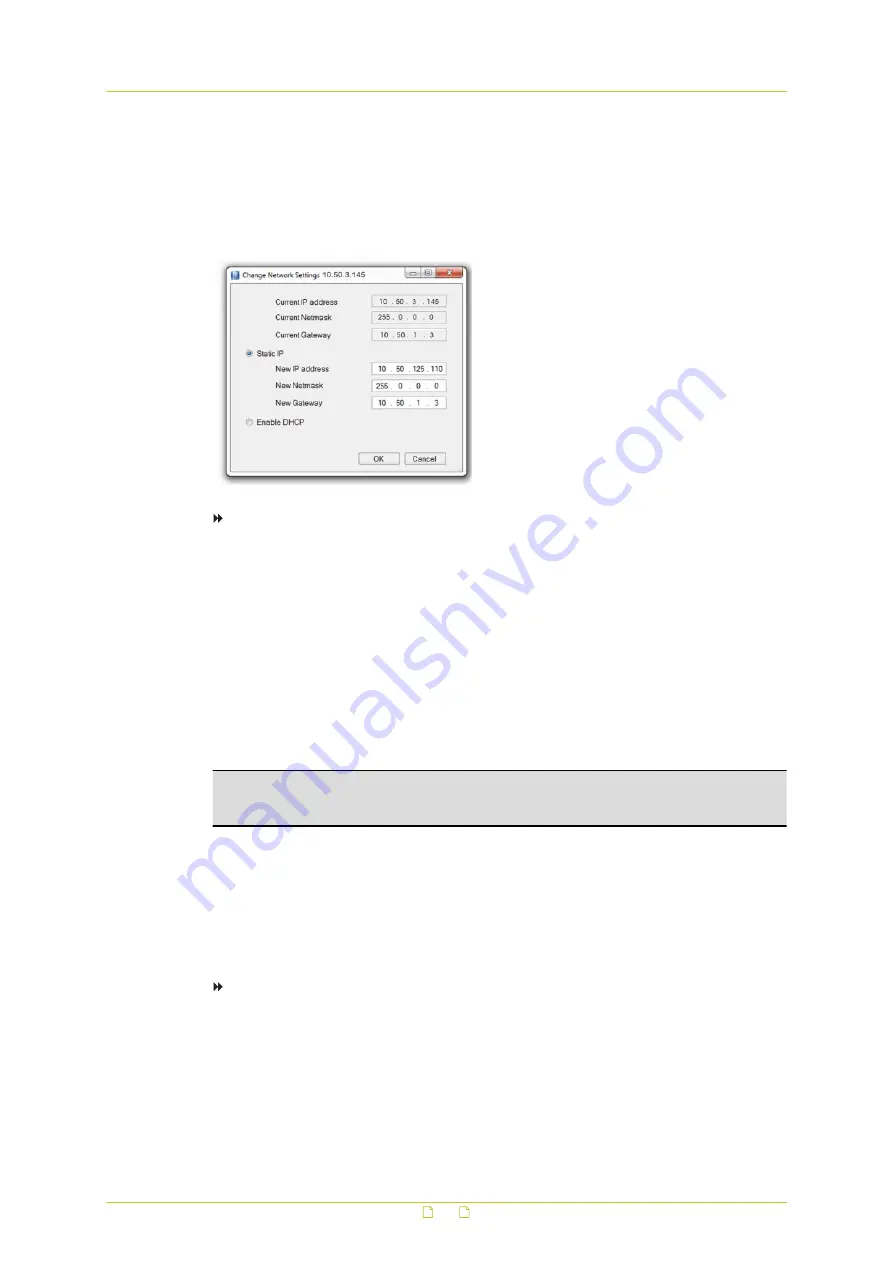
Provide the camera with an appropriate IP address, netmask, and gateway address for
the desired network configuration, and then click OK.
5
In the pop-up window indicating that you have successfully changed the settings, click
OK.
6
Wait one minute, and then rescan the network.
7
To access the webpages of the camera, double-click its entry in the list of found devices.
To assign a DHCP server
1
Record the MAC address of the camera (see the Serial no. column in Siqura Device
Manager) for future identification
2
In the list of detected devices, right-click the device with the network property that you
would like to change.
3
Click Change Network Settings.
4
In Change Network Settings, click Enable DHCP, and then click OK.
5
In the pop-up window indicating that you have successfully changed the settings, click
OK.
6
Wait one minute, and then rescan the network.
You can identify the camera by its MAC address.
7
To access the webpages of the camera, double-click its entry in the list of found devices.
Note: A DHCP server must be installed on the network in order to provide DHCP network
support. If no DHCP server is found on the network, the camera is initially assigned the IP
address 0.0.0.0. After 30 seconds, the IP address 192.168.1.64 is adopted.
5.3
Get access via UPnP
Universal Plug and Play (UPnP) support is enabled by default on the camera. With the UPnP
service enabled in Windows, you can get access to the camera from Windows Explorer.
To connect to the camera via UPnP
1
In Windows Explorer, open the Network folder.
Detected devices in the same subnet as the computer are displayed, including Siqura
codecs and cameras with UPnP support.
2
Double-click the camera that you want to connect to.
The Live View page is opened.
- or -
Get access to the camera
19


