

Step 2: Determine installation location
Determine where you are going to install your BC820H1-SFP.
Use the Siqura WM04 Wall Bracket sold separately for BC series cameras
(figure 2).
Make sure that the provided surface has sufficient strength to support the
camera.
Figure 2 The BC820H1-SFP camera
screws onto a mounted wall bracket
Step 1: Check package contents
Figure 1 BC820H1-SFP package contents
Before you proceed, make sure that the BC820H1-SFP package
contains the following items.
Siqura BC820H1-SFP Network Camera
High Definition (HD) Box Style
Quick Start Guide
Step 3: Connect to network / Power up
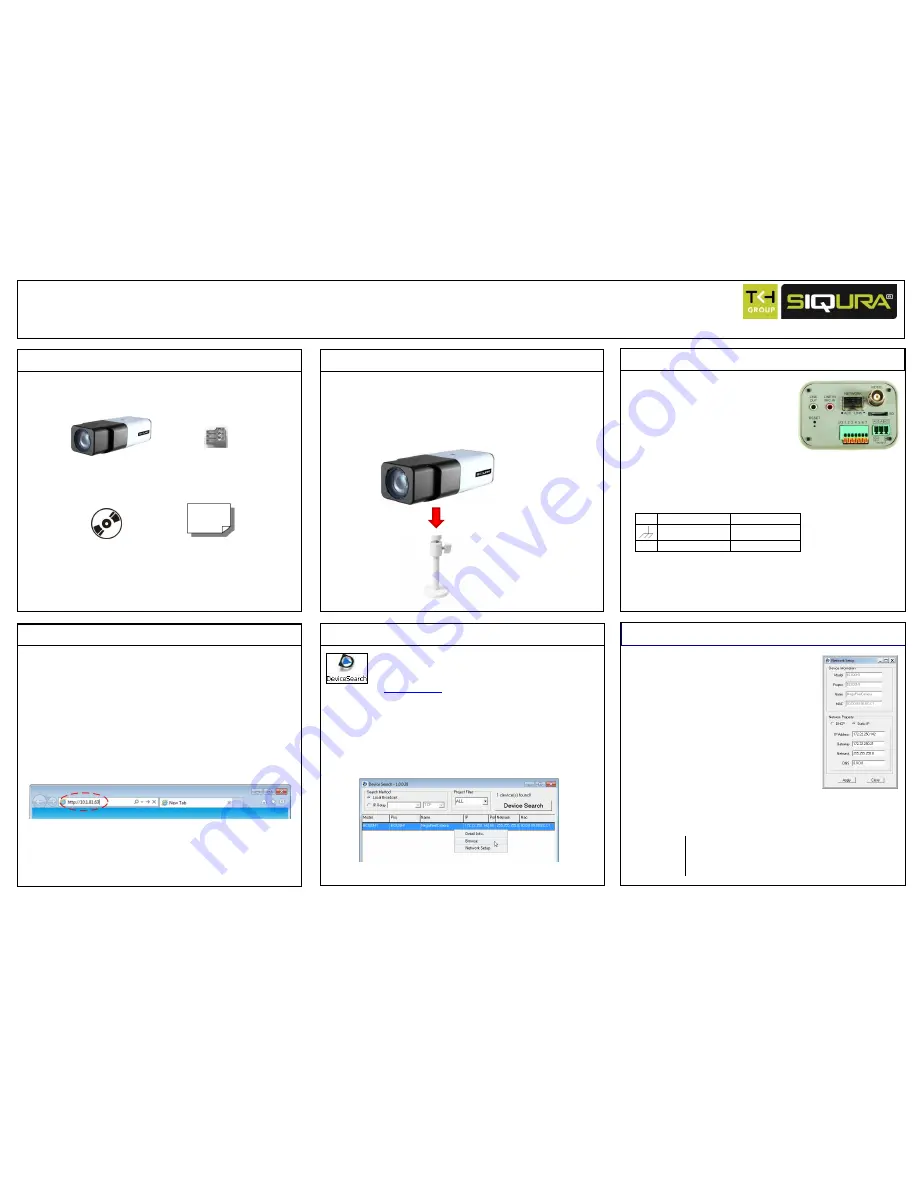
Indicator LEDs
Green power LED signifies a good power connection.
To power the BC820H1-SFP with AC 24 V / DC 12 V
Connect to the DC/AC power source as
indicated by the labelling of the terminal block.
+
AC 24 V: Power-1
DC 12 V Power
AC 24 V: Earth GND
DC 12 V Reserved
-
AC 24 V: Power-2
DC 12 V GND
Table 1 AC 24 V / DC 12 V connection assignments
Figure 3 BC820H1-SFP rear
board connectors
The internal settings of the BC820H1-SFP can be accessed directly
via a web interface.
Use Internet Explorer (6.x or up), Chrome, Firefox, or Safari.
The IP camera’s default IP address is printed on a label located on the
bottom of the camera.
The default logon user name and password (both case sensitive) are:
Admin / 1234
To access the internal settings of the camera
Type the IP address of the camera in the address bar of your web
browser.
To view the webpages of the camera properly
Install the add-on, Siqura Viewer.
Enable Active X controls.
Step 4: Access the camera
Figure 4 Enter the IP address of the camera into the address bar of the browser
Step 5: Search the camera on the network
Use the Device Search application to discover and
change the IP address of the camera.
DeviceSearch.exe
can be found either on the supplied CD or
at
www.siqura.com
. This application detects and lists all the
Siqura IP cameras found on the network.
To explore your network for installed devices
1.
Start the Device Search application.
2.
Click the
Device Search
button.
If a security alert window displays, click
Unblock
to continue.
3.
Right-click a device and select
Browse
to access the internal
settings of the camera via a web interface.
Figure 5 Click Browse to open the webpages of the camera
Step 6: Configure network settings
To change the network property of the camera
1.
In the Device Search application, right-click
the camera and select
Network Setup
.
2.
Click to select either the:
DHCP
check box, and record the MAC
address of the camera for future
identification.
- OR -
Static IP
check box, and enter the
IP
address of the camera, the subnet
mask, the default gateway, and the
DNS server in the appropriate boxes.
3.
Click
Apply
to confirm the new settings and
wait for one minute before searching for
the camera using Device Search.
Figure 6 Assign a static
IP address through
Network Setup
please note
A DHCP server must be installed on the network in order
to apply DHCP network support.
© Siqura 2013
Version 1.0 (130605-1)
BC820H1-SFP QSG (MW10)
www.siqura.com
www.tkhsecurity.com
CD containing manuals
and the Device Search
application
Terminal block
BC820H1-SFP
Quick Start Guide
To connect the BC820H1-SFP to the network
Slide the XSNet™ SFP modular optical
transceiver into the SFP connector
(labelled NETWORK) on the rear board
of the camera.


