


Sinterit LISA PRO User Manual | 8
3. Removing and cleaning the printout
1. Once the screen displays a message saying
FINISHED
the printing process is over. Choose
REMOVE PRINTOUT
to
retrieve it from the print chamber.
2.
After the print is finished, the screen may show a message saying
MAINTENANCE TIME
. It contains information on
required maintenance to certain components of the printer in the near future. For more information consult the full
instruction manual, section
13. Maintenance
. Press
GOT IT
. If the message hasn’t appeared, it means that at present
no components require any maintenance.
3. Press the
UNLOCK LID
button to release the electrolock and allow the print chamber to be opened
IMPORTANT!
After 10 seconds the lock will re-engage and it will no longer be possible to lift the lid. If you still
want to open the printer lid, press the
UNLOCK LID
button again on the screen.
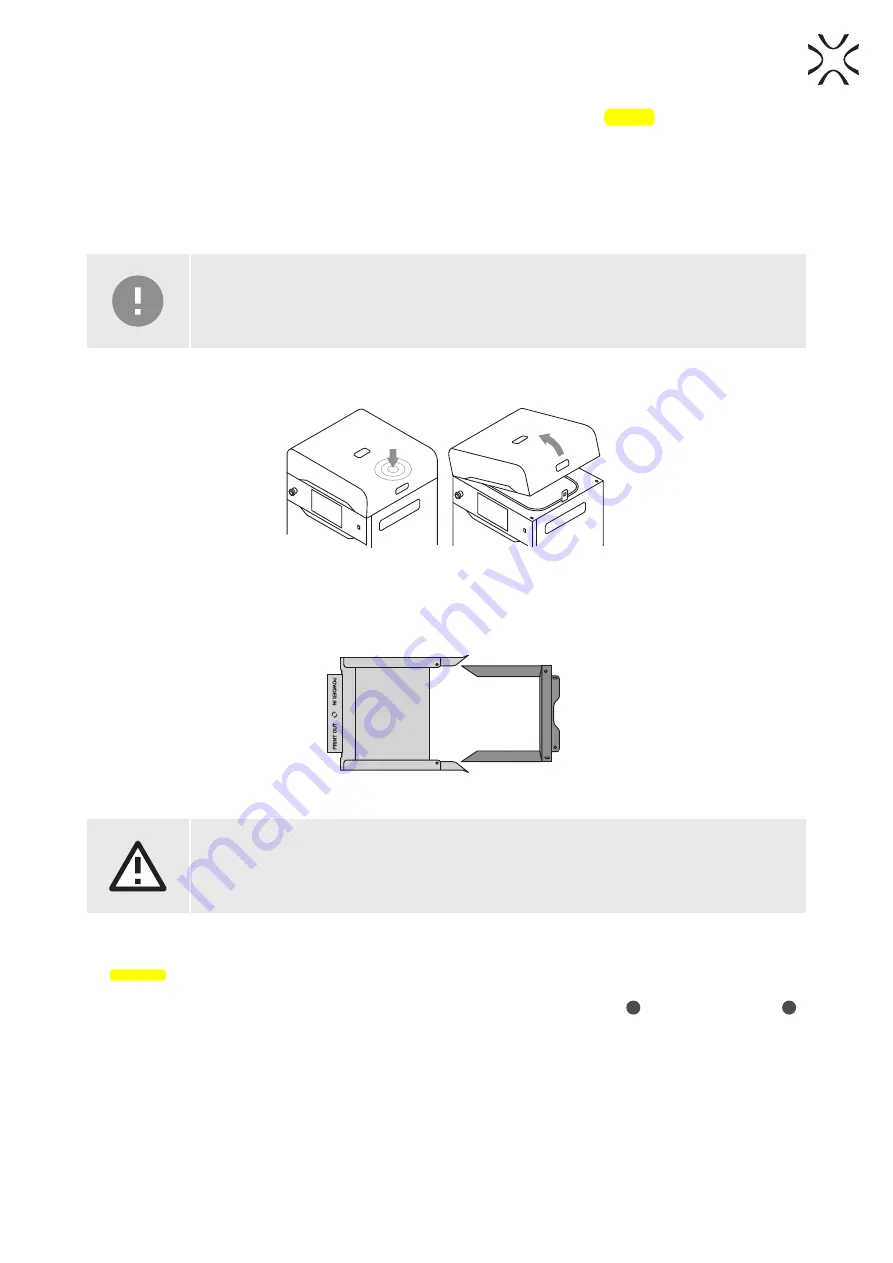
4.
Push on the lid and pull it up using the handle (fig. 3.1).
Fig. 3.1 Lifting the printer lid
5.
Place the folded IO BOX inside the print chamber. Make sure its elements are arranged like in the picture (fig. 3.2.)
FEED BED
PRINT BED
Fig. 3.2 The proper arrangement of the IO BOX, allowing the user to remove the finished printout.
ATTENTION!
While placing the IO BOX in the chamber, make sure you do not accidentally damage its components.
6. Unfold the IO BOX elements as much as possible. Inside the IO BOX you should see a covered Feed Bed and an
uncovered Print Bed.
7. Choose
REMOVE PRINTOUT
and wait until the contents of the Print Bed (the cake) are ejected.
8. Join the IO BOX elements together.
9. Carry the IO BOX and its contents onto the foldable tray from Dedicated Powder Tools
1
or on the PHS worktop
2
then press
DONE
on the screen.


