


Chapter 4. Error Handling
4-1
Printer Status lamps are displayed in red
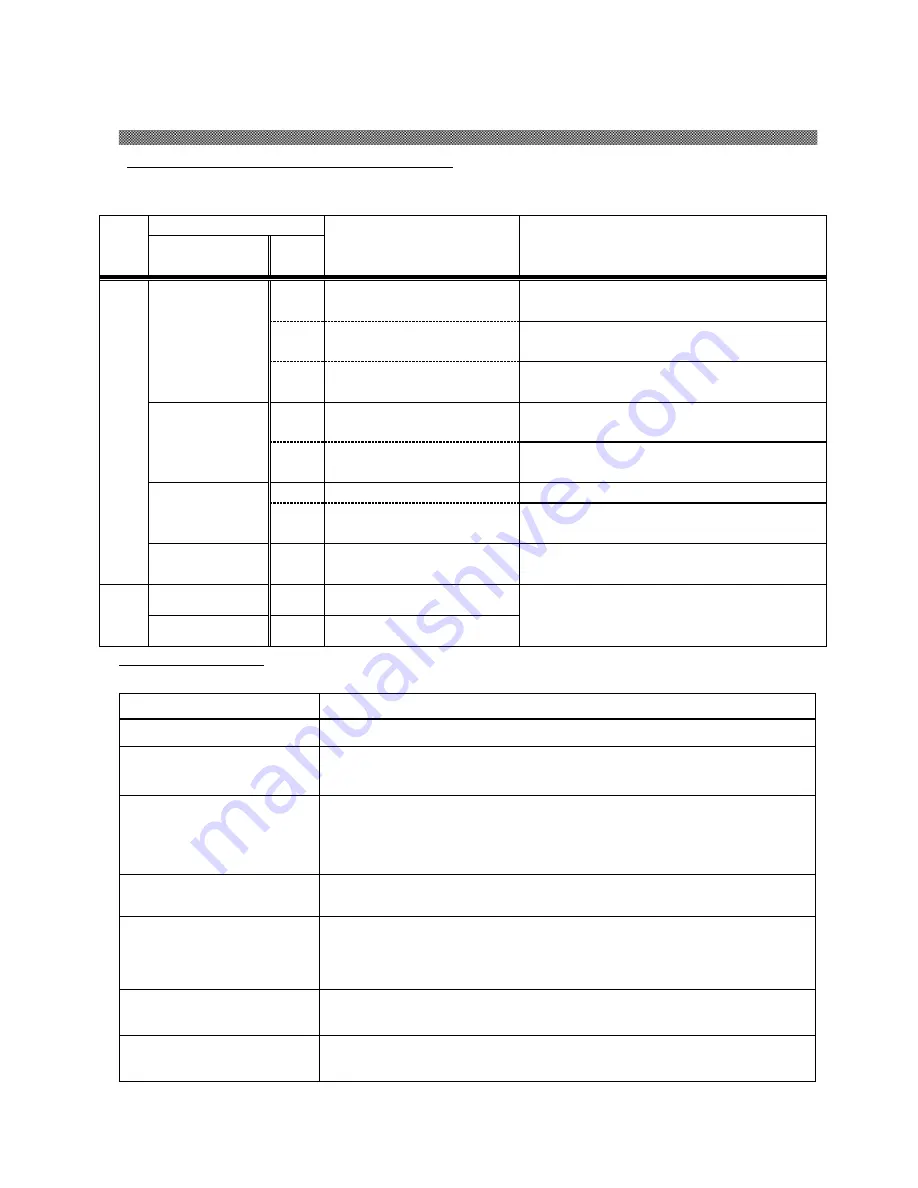
When the error happens, the details of the error can be confirmed with the printer status lamps.
●:
ON
○:
OFF
*
:
Blink (Slow)
x:
Blink (Flashing)
Group
LED Display
Status
Corrective Action
POWER
ERROR
Paper
Set
2
●
*
○
The paper is empty, or the
paper is not loaded.
Set paper.
Replace paper.
●
Yellow
The ink ribbon is empty, or
the ink ribbon is not installed.
Set the ink ribbon.
Replace the ink ribbon.
●
Purple
The ink ribbon loaded is not
supported.
Ink ribbon or printer abnormality is assumed.
Consult with the Service Department.
●
X
X
Yellow
The printer could not take up
the ink ribbon.
Confirm to the ink ribbon. If it occurs frequently,
consult with the service center.
X
Red
Paper jam is occurred.
Remove the paper. If it occurs frequently, consult
with the service center.
*
*
N/A
The front cover is open.
Close the Front Cover.
(Concurrently)
●
Blue
The paper has been installed.
Set the ink ribbon.
Close the Front Cover.
*
*
N/A
The front cover is not closed
correctly.
Close the Front Cover again.
(Alternately)
3
●
●
N/A
Trouble of printer control
board.
If it occurs frequently, consult with the service
center.
*
●
N/A
The printer mechanical
section is faulty.
Failure Symptoms
When detecting a failure symptom, check the printer using the following table.
Symptom
Action
Power is not turned on.
Check if the power cable is connected to the plug socket or the printer.
The personal computer does
not recognize the printer.
Check if the USB cable is connected to the personal computer or printer.
The printer does not become
ready.
Check if the drawer unit is closed.
Check if paper is jammed in the printer.
When the paper setting lamp is blinking, remove the edge of the paper until
the paper setting lamp goes off.
The Front Cover does not open.
Check if the printer is installed in a flat location.
Check if any object is placed in front of the Front Cover.
A straight stripe area is not
printed.
The thermal head may be dirty. Clean the thermal head as described in
Chapter 3, "Routine Maintenance".
If the blank area remains after cleaning the thermal head, the head may have
been disconnected. Consult with the Service Department.
Dotted areas are not printed.
The cleaning roller may be dirty. Clean the cleaning roller as described in
Chapter 3, "Routine Maintenance".
Periodic scratches and
indentations are occurred.
The main pinch roller may be dirty. Clean the main pinch roller as described in
Chapter 3, "Routine Maintenance".


