background image

ASSEMBLY

STEP 6

1. Attach Bottom Shelf Cabinet G to Side Panels F

  using four Allen Key Bolts  2  .

2. Use Allen Key 6 to tighten Bolts. Do not over-tighten.

1

1

/18

2

6

F

F

G

MODEL # 3AXCSAW-06

Содержание WyndenHall brooklyn+max 3AXCSAW-06

Страница 1: ...1 18 SAWHORSE HAWKINS SPOKANE LADDER STORAGE SHELF MODEL 3AXCSAW 06...

Страница 2: ...HELP WITH ASSEMBLY PLEASE CONTACT US AT simpli home com customer support PLEASE ENSURE TO HAVE THE MODEL INSTRUCTION BOOKLET FROM THE PACKAGING OR TO RETURN THE PRODUCT PLEASE CONTACT THE RETAILER WHE...

Страница 3: ...3 18 Upload an image of our furniture in your home with a short review to our facebook page for a chance to ENTER TO WIN Win up to 3000 of Simpli Home furniture www facebook com simplihomefurnishings...

Страница 4: ...id danger of suffocation always keep plastic bags away from children and pets We recommend that you assemble this unit on a carpeted floor to avoid scratches If using power tools set the tool to low t...

Страница 5: ...o 4 pm EST PRE ASSEMBLY INFORMATION 5 18 MODEL 3AXCSAW 06 A PARTS DESCRIPTION SIDE QTY 1 PAIR D E SIDE PANEL QTY 1 PAIR G H DRAWER FRONT QTY 2 BOTTOM SHELF CABINET QTY 1 SHELF QTY 1 B F I C SHELF QTY...

Страница 6: ...mm QTY 4 ALLEN KEY SCREW M6 x 30 mm QTY 8 6 7 8 9 10 HANDDLE QTY 2 SET PHILLIPS SCREW ROUND HEAD M4 x 15 mm CAM LOCK PIN QTY 12 CAM LOCK QTY 8 SET 5 NEED HELP For help with assembly or if you are mis...

Страница 7: ...COMPONENTS KEY DIAGRAM 7 18 A A B C D E G F H F I K K L J MODEL 3AXCSAW 06...

Страница 8: ...Drawer Front I 1 Attach four Cam Lock Pins 9 to back of Drawer Front I 2 Align Cam Lock Pins with pre drilled holes and attach Drawer Sides K 3 Insert two Cam Locks 9 into pre drilled holes on each D...

Страница 9: ...or the second drawer STEP 4 NOTE The screwdriver is not included in the hardware pack 1 Align Drawer Back J with Drawer Sides K 2 Attach back using two Allen Key Screws 4 through pre drilled holes on...

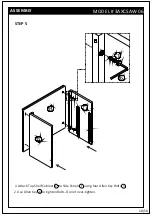
Страница 10: ...10 18 ASSEMBLY STEP 5 1 Attach Top Shelf Cabinet E to Side Panels F 2 Use Allen Key 6 to tighten Bolts using four Allen Key Bolts 1 Do not over tighten E F F 1 6 MODEL 3AXCSAW 06...

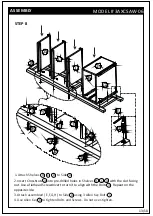
Страница 11: ...ASSEMBLY STEP 6 1 Attach Bottom Shelf Cabinet G to Side Panels F using four Allen Key Bolts 2 2 Use Allen Key 6 to tighten Bolts Do not over tighten 11 18 2 6 F F G MODEL 3AXCSAW 06...

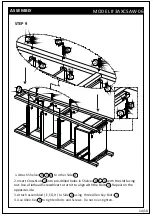
Страница 12: ...EP 7 1 Attach Back Panels H to back of using Phillips Screws Round Head 7 into pre drilled guide holes 2 Use Phillips screwdriver to tighten screws Do not over tighten assembled E F G 12 18 H 7 MODEL...

Страница 13: ...6 to tighten Bolts and Screws Insert Cross Nuts 3 into pre drilled holes in with the slot facing out Use a flathead Screwdriver to turn it to align with the Bolts 3 Repeat on the opposite side 3 Atta...

Страница 14: ...Allen Key 6 to tighten Bolts and Screws Insert Cross Nuts 3 into pre drilled holes in with the slot facing out Use a flathead Screwdriver to turn it to align with the Bolts 3 Repeat on the opposite si...

Страница 15: ...ASSEMBLY STEP 10 1 Insert twelve Wood Bolt Caps 5 into exposed bolt holes on Sides A 15 18 5 5 5 MODEL 3AXCSAW 06...

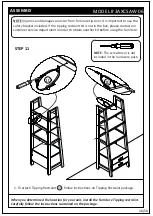
Страница 16: ...Tipping restraint Carefully follow the instructions contained on the package NOTE The screwdriver is not included in the hardware pack NOTE Injuries and damage can occur from furniture tip over It is...

Страница 17: ...vice line at 1 866 518 0120 ext 262 from 9 am to 4 pm Monday to Friday Eastern Standard Time or by email at simpli home com customer support We reserve the right to repair or replace the defective pro...

Страница 18: ...email Customer Support at simpli home com customer support or call Customer Support at 1 866 518 0120 ext 262 Monday to Friday between 9 am 4 pm EST For more information visit us on our website www s...

Отзывы: