background image

Page 28

4.1. Using PhotoReader with Windows 98

Copying Files

Formatting Cards

Start Windows 98, double-click the 

My Computer

 icon to open the 

My

Computer

 window. There, you will see a 

Removable Disk

 icon. (The

specific drive letter assigned to the PhotoReader  will vary (D, E, and so
on), depending on your particular system configuration).
You may now copy files from your card reader to the hard disk as you
would from a floppy disk. Drag the icons for the data to be copied and
release the mouse button over the destination disk.

Most cards are factory formatted. Formatting cards for Windows 98 may
result in your digital camera being unable to recognize a card. 

Do Not

format cards in this way

, if you intend to use the cards in your digital

camera. Format cards when you intend to use them to exchange data
between USB Series readers or between readers and notebook computers.
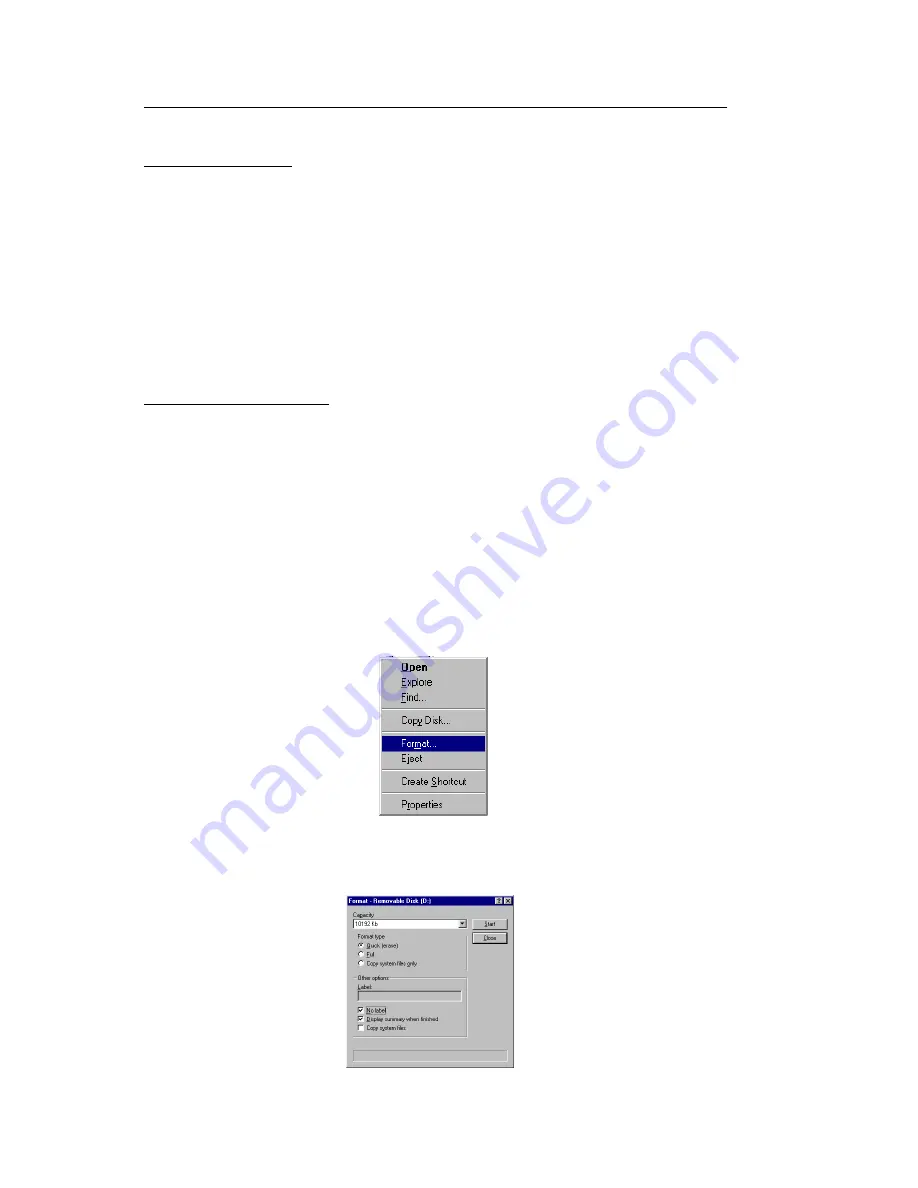
To format cards, follow the steps below:

1. Right click on the 

Removable Disk

 icon. Choose the desired format

from the display menu.

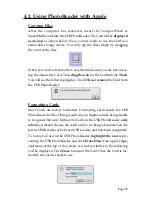
2. The dialog box shown below appears. Select 

Ordinary Format

 and press

the 

Start

 button.

3. Once format is complete, the card is ready for use.

Содержание STI-CFRDR/USB

Страница 1: ...USB PhotoReader for CompactFlash SmartMedia Cards STI CFRDR USB STI SMRDR USB USB CompactFlashTM Reader USB SmartMediaTM Reader User Manual for Windows 98 Apple Computers ...

Страница 2: ...beled Type I is compatible with Type I CompactFlash Cards The USB CompactFlash PhotoReader Labeled Type I II is compatible with Type I Type II CompactFlash Cards The USB SmartMedia PhotoReader is compatible with SmartMedia Cards 1 Changes may be made to this product or manual without notification 2 This manual may not be copied in part or in whole without express permission 3 While Simple Technolo...

Страница 3: ...for Type I II CF Readers 14 2 2 3 Installation for SM Readers 19 2 3 Uninstalling the Software in Windows 98 24 2 4 Software Installation for Apple 26 3 Basic Operations 27 Inserting the Card 27 Removing the Card 27 4 1 Using PhotoReader with Windows 98 28 Copying Files 28 Formatting Cards 28 4 2 Using PhotoReader with Apple 29 Copying Files 29 Formatting Cards 29 5 Troubleshooting with Windows 98...

Страница 4: ...to prevent possible failures do not use or store the unit in a place subject to excessive vibration or in an unstable place Do not place the unit close to a system which generates strong magnetic fields motor transformer television loudspeaker magnet etc to prevent malfunction Do not close vents that may cause internal temperature to rise Do not use in an enclosed unventilated area Precautions for...

Страница 5: ...does not offer patches for older Windows versions for compatibility with the card reader Before connecting the card reader turn on your computer and start the operating system Install the device drivers Installation is complete USB CompactFlash PhotoReader is ready to use Restart the computer Insert the CompactFlash or SmartMedia Card Windows A removable disk drive letter will appear under My Comp...

Страница 6: ...pper and lower parts of the connector Do not force connections as this may damage the computer or the card reader Note The USB cable from the USB PhotoReader may be plugged into the computer while the computer is running Under Windows 98 operating system as soon as the USB PhotoReader is connected you will see a window displaying the message New Hardware Found Proceed to next section for instructi...

Страница 7: ...hub Make sure the connections are secured firmly Note The USB cable from the USB PhotoReader may be plugged into the computer while the computer is running Under Windows 98 operating system as soon as the USB PhotoReader is connected you will see a window displaying the message New Hardware Found Proceed to next section for instructions on software installation Enlarged View Enlarged View USB cabl...

Страница 8: ...h Type I CF Cards or both Type I Type II CF Cards Check the label on the device Proceed to the following sections of the manual for software installation instructions For USB CompactFlash PhotoReader compatible with Type I CompactFlash Cards proceed to chapter 2 1 1 For USB CompactFlash PhotoReader compatible with Type I Type II CompactFlash Cards proceed to chapter 2 1 2 For USB SmartMedia PhotoR...

Страница 9: ... in the previous chapter the following window is displayed Click Next to continue 2 The Add new hardware wizard searches for the new drivers and the following screen is displayed Click Next to continue 3 The Add new hardware wizard displays the following screen Use the default recommended option The windows will search for the best driver for the device Click Next to continue ...

Страница 10: ...llation CD ROM in the CD ROM drive and click Next to continue Check the Specify a location click on the Browse button choose Type_I98 and click OK 5 The Add new hardware wizard will find the device driver SIMPLE SM CF USB PHOTOREADER and the screen similar to the following is displayed Click Next to continue ...

Страница 11: ...nue 8 The Add new hardware wizard displays the following screen Use the default recommended option The windows will search for the best driver for the device Click Next to continue 6 When the windows finishes installing the device driver the following window is displayed Click Finish to continue ...

Страница 12: ...n the windows finishes installing the device driver you will see the following display Click Finish to complete the driver installation Now the USB PhotoReader is ready to use 9 Windows will prompt you to insert the disk containing the device driver Insert the Software Installation CD ROM in the CD ROM drive and click Next to continue Make sure CD ROM box is ticked ...

Страница 13: ... the CompactFlash or the SmartMedia Card Double click on My Computer icon The USB PhotoReader will be displayed as a Removable Disk The drive letter assigned may vary Generally the last available drive letter is assigned to the USB PhotoReader ...

Страница 14: ...ined in the previous chapter the following window is displayed Click Next to continue 2 The Add new hardware wizard searches for the new drivers and the following screen is displayed Click Next to continue 3 The Add new hardware wizard displays the following screen Use the default recommended option The windows will search for the best driver for the device Click Next to continue ...

Страница 15: ...allation CD ROM in the CD ROM drive and click Next to continue Check Specify a location click on the Browse button choose Type_II98 and click OK 5 The Add new hardware wizard will find the device driver SIMPLE SM CF USB PHOTOREADER and the screen similar to the following is displayed Click Next to continue ...

Страница 16: ...nue 8 The Add new hardware wizard displays the following screen Use the default recommended option The windows will search for the best driver for the device Click Next to continue 6 When the windows finishes installing the device driver the following window is displayed Click Finish to continue ...

Страница 17: ...n the windows finishes installing the device driver you will see the following display Click Finish to complete the driver installation Now the USB PhotoReader is ready to use 9 Windows will prompt you to insert the disk containing the device driver Insert the Software Installation CD ROM in the CD ROM drive and click Next to continue Make sure CD ROM box is ticked ...

Страница 18: ... the CompactFlash or the SmartMedia Card Double click on My Computer icon The USB PhotoReader will be displayed as a Removable Disk The drive letter assigned may vary Generally the last available drive letter is assigned to the USB PhotoReader ...

Страница 19: ...in the previous chapter the following window is displayed Click Next to continue 2 The Add new hardware wizard searches for the new drivers and the following screen is displayed Click Next to continue 3 The Add new hardware wizard displays the following screen Use the default recommended option The windows will search for the best driver for the device Click Next to continue ...

Страница 20: ...allation CD ROM in the CD ROM drive and click Next to continue Check on Specify a location click on the Browse button choose SMwin98 and click OK 5 The Add new hardware wizard will find the device driver SIMPLE SM CF USB PHOTOREADER and the screen similar to the following is displayed Click Next to continue ...

Страница 21: ...nue 8 The Add new hardware wizard displays the following screen Use the default recommended option The windows will search for the best driver for the device Click Next to continue 6 When the windows finishes installing the device driver the following window is displayed Click Finish to continue ...

Страница 22: ...n the windows finishes installing the device driver you will see the following display Click Finish to complete the driver installation Now the USB PhotoReader is ready to use 9 Windows will prompt you to insert the disk containing the device driver Insert the Software Installation CD ROM in the CD ROM drive and click Next to continue Make sure CD ROM box is ticked ...

Страница 23: ... the CompactFlash or the SmartMedia Card Double click on My Computer icon The USB PhotoReader will be displayed as a Removable Disk The drive letter assigned may vary Generally the last available drive letter is assigned to the USB PhotoReader ...

Страница 24: ...need to uninstall the device driver follow the procedure listed below 1 Double click My Computer Then double click Control Panel The window shown below will appear Double click on Add Remove Programs icon 2 Highlight Simple USB CF SM Drives and click on Add Remove ...

Страница 25: ...ick Yes to continue with the uninstallation of the software 4 After the uninstallation is complete windows will prompt you to reboot for the uninstallation to take effect Click Yes to reboot the system The uninstallation of the software is complete ...

Страница 26: ...uble click Reader to install the USB device driver You will see the following display which warns you that the computer must be restarted after installation Click Yes to install the device driver 4 After the installation is complete the following message is displayed Click Restart to restart the computer The installation is complete Now you are ready to use the PhotoReader ...

Страница 27: ...ert the card in the proper direction Inserting a card upside down or forcing it may result in damage to your card reader and consequent loss of data Removing the Card CompactFlash Card Make sure you are not accessing the data before pulling out the CompactFlash card Then push the eject button and remove the card SmartMedia Card Make sure you are not accessing the data before pulling out the SmartM...

Страница 28: ...nd release the mouse button over the destination disk Most cards are factory formatted Formatting cards for Windows 98 may result in your digital camera being unable to recognize a card Do Not format cards in this way if you intend to use the cards in your digital camera Format cards when you intend to use them to exchange data between USB Series readers or between readers and notebook computers T...

Страница 29: ...lay Click OK and remove the Card from the USB PhotoReader Formatting Cards Most Cards are factory formatted Formatting Cards inside the USB PhotoReader in Mac OS may result in your digital camera being unable to recognize the card Format the Cards in the USB PhotoReader only when you intend the use the cards only to exchange data between dif ferent USB Readers or between USB readers and notebook c...

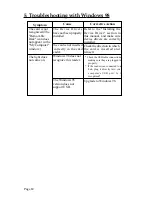
Страница 30: ...y installed Check the direction in which the card is inserted and reinsert The light does not come on Windows 98 does not recognize this reader Check the USB cable connections making sure they are plugged in properly If the reader was connected to a hub plug it directly into your computer s USB port Is it recognized The Windows 95 version does not support USB Upgrade to Windows 98 The card is not ...

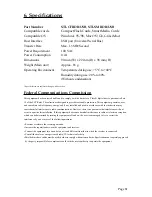
Страница 31: ...d can radiate radio frequency energy and if not installed and used in accordance with the instructions may caurce harmful interference to radio communications However there is no guarantee that interference will not occur in a particular installation If this equipment does cause harmful interference to radio or television reception which can be determined by turning the equipment off and on the us...

Страница 32: ...ase read this user manual and consult the Troubleshooting section of this manual before contacting us for assistance Tel 949 476 1180 or 800 4SIMPLE 800 474 6753 Only for USA and Canada Fax 949 476 1209 EMail support simpletech com Web http www simpletech com 3001 Daimler St Santa Ana CA 92705 http www simpletech com Document Number 61600 00034 003 ...

Отзывы: