11
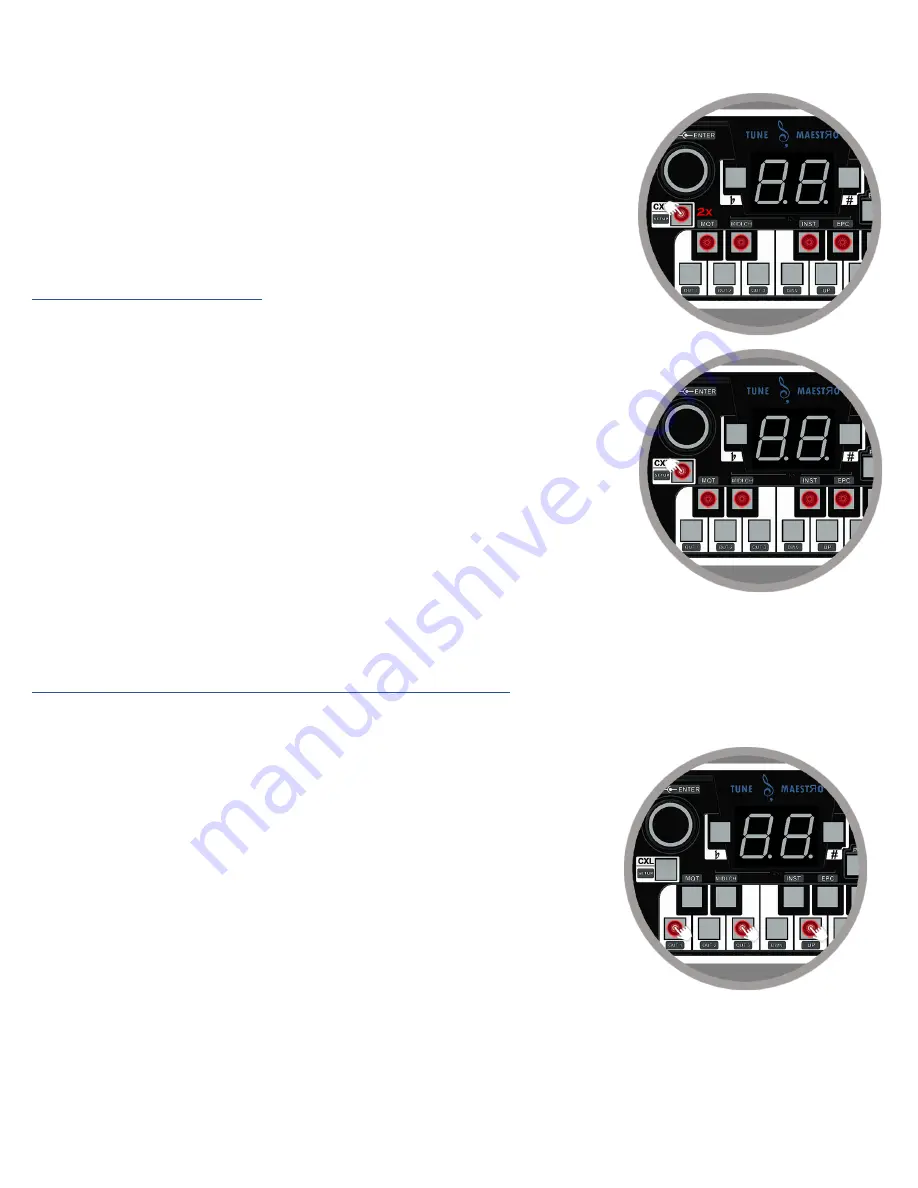
Press the “Setup” key 2 times as shown below to be brought back to the “Main” menu. At this point, the keys, C#,
D#, F#, and G# will again start flashing.
Saving the Entire Setup.
Once all the settings have been asserted and the Tune Maestro has been
setup completely, press the “Setup” key for 3 seconds as shown below. The
“Setup” key will flash 3 times indicating that the settings have been
saved
.
Don’t power off the unit while saving the settings as this will cause all the
settings to be deleted and the setup process must be repeated.
Keep in mind that if the data is not saved, once the device is powered off, then
all data will be erased, and the Tune Maestro will have to be setup all over
again.
Congratulations, the Tune Maestro has been completely setup and ready for
use.
Initializing the Tune Maestro
I
to Factory Settings.
The Tune Maestro
I
is equipped with initializing procedure in case the user needs to set it back to factory settings.
Follow the steps below to reset the Tune Maestro
I
back to factory settings.
1-
Make sure the Tune Maestro
I
power is turned Off.
2-
Press and hold C, E, and G simultaneously, as the picture shows below.
3-
While the above keys are pressed, plug the power cord back in to turn
the device back On.
4-
Keep the above buttons pressed simultaneously for 5 seconds while
plugging the power cord in.
5-
The 2 decimal points in the display will flash while your fingers are
pressing the keys above. Once they flash for 5 times, release your
fingers.
6-
Restart the Tune Maestro
I
again by doing a power cycle.
7-
The device is now reset back to factory settings.


