12
instructions given in section 4.3. The
gas feed pressure must under no
circumstances exceed 50 mbar.
– after have ultimated the conversion
of the boiler, please stick onto the
casing panel the plate showing the
relevant feeding gas which is inclu-
ded into the conversion kit.
NOTE: After assembling all the gas
connections, a test for gas tightness
must be carried out using soapy
water or special products. DO NOT
USE NAKED FLAMES.
4.6
DISASSEMBLY OF
EXPANSION VESSEL
To disassemble the boiler expansion
vessel, proceed as follows:
– make sure that the water has been
emptied out of the boiler;
– unscrew the connection connecting
the expansion vessel to the boiler
and the two self-tapping screws that
fasten the system to the bracket.
NOTE: Before refilling the system,
make sure that the expansion vessel
is pre-loaded at 1 bar pressure.
4.7
CLEANING AND
MAINTENANCE
At the end of each heating season, it is
essential to have the boiler thoroughly
checked and cleaned out. Proceed as
follows:
– turn the switching knob to OFF to stop
electric power reaching the boiler;
– close the gas feed cock;
– disassemble the outer casing;
– remove the smoke chamber,
unscrewing the screws that fasten it
to the combustion chamber;
– disassemble the gas burner-manifold
unit, as described in Section 4.5;
– to clean the burners, blow in a jet of
air, so as to remove any dust parti-
cles that may have accumulated;
– clean the heat exchanger, removing
any dust or residue from combustion;
– when cleaning the heat exchanger or
the burners, chemical products or
steel brushes MUST NOT BE USED;
– make sure that the tops of the bur-
ners with the holes are free from
encrustations;
– reassemble the items removed from
the boiler, making sure to follow the
correct sequence;
– check the chimney to make sure
that the flue is clean;
– check operation of the equipment
and of the main burner.
Preventive maintenance and checking
of efficient operation of equipment
and safety devices must be carried
out at the end of each season.
4.8
FAULT FINDING
Main burner does not start either to
draw off D.H.W. or heating.
– Check operation of smoke pressure
switch.
– Check, and if necessary replace,
smoke pressure switch.
– Replace electronic card.
– Check if SM is interrupted.
Fan turns but burner does not start.
– Check whether connection tubes of
smoke pressure switch PF are
obstructed and, if necessary, clean
away impurities or condensate.
– Smoke pressure switch PF needs
recalibrating or, better still, replacing
with a new factory-calibrated one.
Fan fails to turn.
– Check whether electric power is rea-
ching the terminals of the activator
motor.
– Motor winding is burnt out; replace.
– Replace electronic card.
Main burner fails to modulate both in
D.H.W. phase and in heating phase.
– Modulator M has a break in winding;
replace.
– Electronic card is faulty; replace.
Boiler makes noises and a sizzling
sound.
– Check whether circulating pumps
are obstructed; if necessary, clear
them out.
– Unclog impeller of circulating pump,
clearing away any impurities or sedi-
ments.
– Circulating pump is burnt out; replace.
– Check boiler output is adequate for
actual needs of heating system.
Boiler safety valve keeps going into
action.
– Check whether system cold charge
pressure is too high; keep to recom-
mended values.
– Check whether safety valve is out of
calibration; if necessary, replace.
– Check pre-loading pressure of
expansion vessel.
– Replace expansion vessel if faulty.
Radiators fail to heat up in winter.
– Knob is set to SUMMER. Turn it to
WINTER.
– Room stat TA is set too low or needs
replacing because faulty.
– Electrical connections of room stat
TA are wrong.
Radiators warm up also in summer.
– Check for right setting of knob.
– Check no impurities are present in
the non-return valve seat.
– Non-return valve is faulty; replace.
– Install non-return valve on system
return pipe.
Main burner burns badly: flames too
high, too yellow.
– Check that pressure of gas reaching
burner is regular.
– Check burners are clean.
Water from boiling unit isn’t suffi-
ciently hot.
– Air is still present at the top of the
boiler. Purge off through air relief
valve.
– Reduce hot-water drawing-off rate.
Smell of unburnt gases.
– Check boiler is properly clean.
– Check draught is sufficient.
– Check whether gas consumption is
too high.
Boiler operates but does not increa-
se temperature.
– Check whether gas consumption is
not lower than it should be.
– Check boiler is clean.
– Check boiler is sized in proportion to
system.
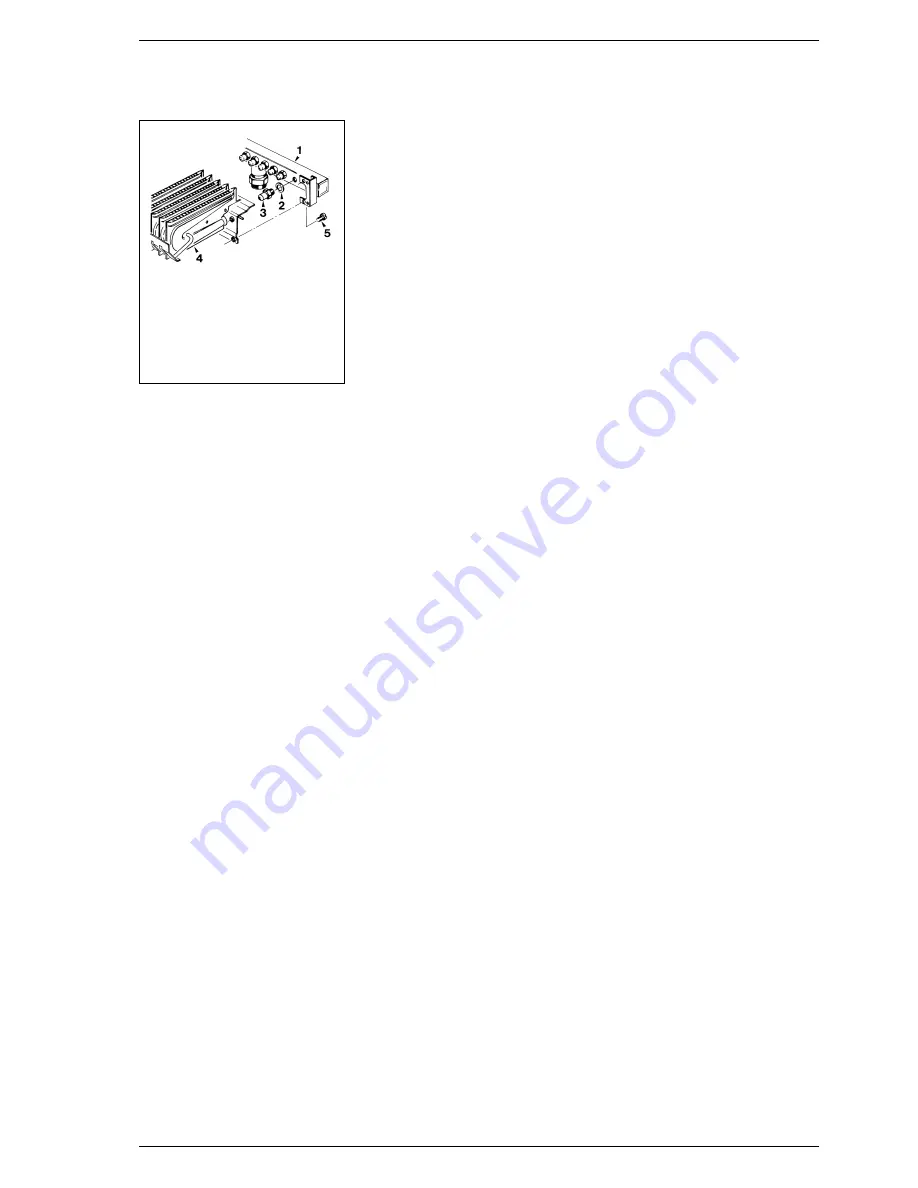
KEY
1
Burner manifold
2
Copper washer ø 6.1
3
Nozzle M6
4
Burner unit
5
Screw TCB M4 x 6
Fig. 19
Содержание Super four
Страница 1: ...Super four Installation and servicing instructions GB...
Страница 15: ......


