SilverStone CS351 Скачать руководство пользователя страница 33

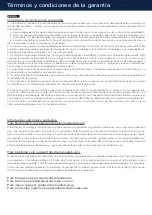
Warranty terms & conditions

Warranty terms & conditions

1. Product component defects or damages resulted from defective production is covered under warranty. Defects or damages 
with the following conditions will be fixed or replaced under SilverStone Technology’s jurisdiction.
    a. Usage in accordance with instructions provided in the manual, with no misuse, overuse, or other inappropriate actions*.
    b. Damage not caused by natural disaster (thunder, fire, earthquake, flood, salt, wind, insect, animals, etc…)
    c. Product is not modified or components replaced resulting in out of spec. operation.
    d. Loss or damages resulted from conditions other than ones listed above are not covered under warranty.
2. Under warranty, SilverStone Technology’s maximum liability is limited to the current market value for the product 
(depreciated value, excluding shipping, handling, and other fees). SilverStone Technology is not responsible for other 
damages or loss associated with the use of product.
3. Under warranty, SilverStone Technology is obligated to repair or replace its defective products. Under no circumstances 
will SilverStone Technology be liable for damages in connection with the sale, purchase, or use including but not limited to 
loss of data, loss of business, loss of profits, loss of use of the product or incidental or consequential damage whether or 
not foreseeable and whether or not based on breach of warranty, contract or negligence, even if SilverStone Technology 
has been advised of the possibility of such damages.
4. Warranty covers only the original purchaser through authorized SilverStone distributors and resellers and is not transferable 
to a second hand purchaser
5. You must provide sales receipt or invoice with clear indication of purchase date to determine warranty eligibility.
6. If a problem develops during the warranty period, please contact your retailer/reseller/SilverStone authorized distributors 
or SilverStone http://www.silverstonetek.com.

Please note that: (i) You must provide proof of original purchase of the product by a dated itemized receipt; (ii) You shall 
bear the cost of shipping (or otherwise transporting) the product to SilverStone authorized distributors. SilverStone authorized 
distributors will bear the cost of shipping (or otherwise transporting) the product back to you after completing the warranty 
service; (iii) Before you send the product, you must be issued a Return Merchandise Authorization (“RMA”) number from 
SilverStone. Updated warranty information will be posted on SilverStone’s official website. Please visit 
http://www.silverstonetek.com. for the latest updates.

Additional info & contacts

For North America usasupport(at)silverstonetek.com

SilverStone Technology in North America may repair or replace defective product with refurbished product that is not new 
but has been functionally tested. Replacement product will be warranted for remainder of the warranty period or thirty days, 
whichever is longer. All power supplies should be sent back to the place of purchase if it is within 30 days of purchase, 
after 30 days, customers need to initiate RMA procedure with SilverStone Technology in USA by first downloading the 
“USA RMA form for end-users” form from the below link and follow its instructions. http://silverstonetek.com/contactus.php

For Australia only support(at)silverstonetek.com

Our goods come with guarantees that cannot be excluded under the Australian Consumer Law. You are entitled to a 
replacement or refund for a major failure and for compensation for any other reasonably foreseeable loss or damage. You 
are also entitled to have the goods repaired or replaced if the goods fail to be of acceptable quality and the failure does not 
amount to a major failure. Please refer to above “Warranty terms & conditions” for further warranty details. SilverStone 
Technology Co., Ltd. 12F No. 168 Jiankang Rd., Zhonghe Dist., New Taipei City 235 Taiwan R.O.C. +886-2-8228-1238 
(standard international call charges apply)

For Europe support.eu(at)silverstonetek.de

For China support(at)silverstonetek.com.cn

For Japan support_jp(at)silverstonetek.co.jp

For all other regions support(at)silverstonetek.com

Содержание CS351

Страница 1: ...www silverstonetek com CS351 5 bay SAS 12G SATA 6G hot swappable high performance NAS chassis...

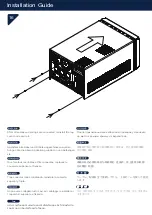
Страница 2: ...estricciones de componentes Restrictions relatives aux composants Limitazioni ai componenti Installation Guide Installationsanleitung Guide d installation Gu a de instalaci n Guida all installazione W...

Страница 3: ...ra FA HDD 3 5 3 5 Supporto per PSU HDD da 3 5 PSU 3 5 HDD 3 5 Fixation pour bloc d alimentation lectrique disque dur de 3 5 po Montage f r Motherboard Montaje para placa base Supporto per scheda madre...

Страница 4: ...Sie das 3 5 Zoll Festplattenfach 3 5 3 5 3 5 Bloquear la bandeja del disco duro de 3 5 3 5 Blocca il vassoio del disco rigido da 3 5 3 5 3 5 Verrouiller le plateau du disque dur 3 5 SCREW TF 6 32 5 Mo...

Страница 5: ...s tirez le vers l arri re et soulevez le l ext rieur du ch ssis Por favor retire los tornillos que sujetan la cubierta superior con un destornillador luego tire hacia atr s y lev ntela fuera del chasi...

Страница 6: ...L fterhalterung Retirez le support de lecteur 2 5 du support de ventilateur Retire el bracket para dispositivos de 2 5 del bracket para ventilador Rimuovere il supporto unit da 2 5 dal supporto vento...

Страница 7: ...is qui retiennent le cache de l emplacement de la carte d extension puis enlevez le Rimuovere le viti che fissano il coperchio dell alloggio della scheda di espansione e rimuoverlo Please remove the s...

Страница 8: ...du support de ventilateur puis retirez le support l ext rieur du ch ssis Rimuovere le viti sul supporto ventola quindi allontanare il supporto dal telaio Please remove the screws on the fan bracket an...

Страница 9: ...du plateau de disque dur du ch ssis Por favor quite los tornillos del m dulo de la bandeja para discos duros y saque el m dulo de la bandeja para discos duros del chasis Rimuovere le viti sul modulo...

Страница 10: ...tenk fig heraus Retirez les vis et sortez la cage de disque dur de 3 5 Retire los tornillos y saque la carcasa para discos duros de 3 5 Rimuovere le viti ed estrarre la gabbia del disco rigido da 3 5...

Страница 11: ...das Motherboard und befestigen Sie es mit Schrauben Installez la carte m re et fixez la avec des vis Instale la placa base y f jela con tornillos Installare la scheda madre e fissarla con le viti Inst...

Страница 12: ...5 remettez la dans le bo tier et fixez la avec les vis Tras instalar los discos duros en la carcasa para discos duros de 3 5 vuelva a instalarla en la carcasa y f jela con tornillos After installing...

Страница 13: ...este momento Raccomandiamo di collegare i connettori di alimentazione IO anteriore SATA sulla scheda madre in questa fase We recommend to connect the power front IO SATA connectors on the motherboard...

Страница 14: ...s connecteurs d alimentation et SATA Vuelva a instalar en la carcasa el m dulo de la bandeja para discos duros f jelo con tornillos y luego conecte la corriente y los conectores SATA Reinstallare il m...

Страница 15: ...loc d alimentation installez le dans le bo tier puis fixez le avec les vis Conecte todos los cables relevantes a la FA y vuelva a instalarla en la carcasa despu s f jela con tornillos Collegare tutti...

Страница 16: ...llez la carte graphique carte d extension C Branchez les connecteurs d alimentation sur la carte graphique carte d extension Instale la tarjeta gr fica tarjeta de expansi n A Retire la cubierta del z...

Страница 17: ...C A PCI B C A PCI B C Installare la scheda video scheda di espansione A Rimuovere il coperchio dello slot PCI B Installare la scheda video scheda di espansione C Collegare i connettori di alimentazio...

Страница 18: ...r le support de ventilateur et fixez la avec les vis Tras instalar los discos duros en el bracket para discos duros de 2 5 inst lelo en el bracket para ventilador y luego fije con tornillos Dopo aver...

Страница 19: ...en option sur le support de ventilateur Reinstale el bracket para ventilador en el chasis y f jelo con tornillos Se pueden instalar uno o dos ventiladores opcionales de 80mm en el bracket para ventil...

Страница 20: ...R installez le cache de l emplacement de la carte d extension et fixez le avec des vis Reinstale la cubierta del z calo para la tarjeta de expansi n y fije con tornillos Reinstallare il coperchio del...

Страница 21: ...fois tous les c bles et fils connect s replacez le couvercle sup rieur et fixez le Tras conectar todo el cableado reinstale la cubierta superior y f jela Dopo avere collegato tutti i cavi ed i cablag...

Страница 22: ...rte m re Si aucun ventilateur ne doit tre install le bord arri re doit tre au m me niveau que le bord arri re de la carte m re El l mite de altura del disipador de la CPU es de 82mm El disipador puede...

Страница 23: ...a la parte posteriore della scheda madre Se necessario installare una ventola aggiuntiva nella parte posteriore sottrarre lo spessore della ventola dalla parte posteriore dello spazio libero della sch...

Страница 24: ...ar la FA totalmente modular de SilverStone y los cables modulares cortos PP06 dise ados especialmente para carcasas con factor de forma peque o La massima profondit della PSU di 160 mm si consigliano...

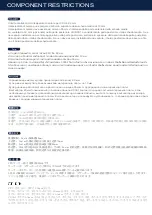
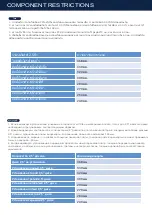
Страница 25: ...kness the rear of the graphics card is limited to 5mm at most and the front 60mm 4 When the graphics card is installed in the first and second slots on the motherboard the thickness of the front compo...

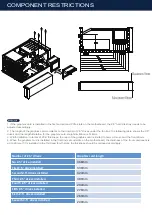
Страница 26: ...Laufwerke unter dem L ftereinsatz im Zusammenhang Folgende Tabelle zeigt die 2 5 Zoll Laufwerke und die maximale L nge der Grafikkarte Die maximale H he betr gt 148 mm 3 Breitenbeschr nkung In Bezug...

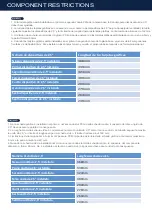
Страница 27: ...vo de 2 5 instalado 279mm Sexto disposi vo de 2 5 instalado 264mm S p mo disposi vo de 2 5 instalado 249mm Numero di unit da 2 5 Lunghezza scheda video Nessuna unit da 2 5 installata 368mm Prima unit...

Страница 28: ...IONS 1 PCIe 2 5 2 2 5 2 5 148 3 5 60 4 60 2 5 2 5 368 2 5 339 2 5 324 2 5 309 2 5 294 2 5 279 2 5 264 2 5 249 2 5 2 5 368 2 5 339 2 5 324 2 5 309 2 5 294 2 5 279 2 5 264 2 5 249 1 PCIe 2 5 2 2 5 2 5 1...

Страница 29: ...351 2 5 2 5 148 mm 3 5mm 4 60mm 2 5 368mm 2 5 339mm 2 5 324mm 2 5 309mm 2 5 294mm 2 5 279mm 2 5 264mm 2 5 249mm 1 2 5 2 CS351 2 5 2 5 148 mm 3 5mm 4 60mm 2 5 368mm 2 5 339mm 2 5 324mm 2 5 309mm 2 5 29...

Страница 30: ...309mm 4 2 5 294mm 5 2 5 279mm 6 2 5 264mm 7 2 5 249mm 1 PCIe 2 5 2 2 5 2 5 148mm 3 PCB 5mm 60mm 4 60mm 1 1 2 PCIe 2 5 2 2 5 2 5 148mm 3 PCB 5mm 60mm 4 1 2 60mm 3 4 2 5 2 5 368mm 1 2 5 339mm 2 2 5 324m...

Страница 31: ...ventilateurs il est recommand de connecter le ventilateur PWM de 80 mm fix au module de plateau du disque dur au connecteur ventilateur sur la carte m re afin de pouvoir ajuster la vitesse comme souh...

Страница 32: ...Se la scheda madre dispone di una funzione di monitoraggio della velocit della ventola si consiglia di collegare la ventola PWM da 80 mm collegata al modulo del cassetto del disco rigido sul connettor...

Страница 33: ...at i You must provide proof of original purchase of the product by a dated itemized receipt ii You shall bear the cost of shipping or otherwise transporting the product to SilverStone authorized distr...

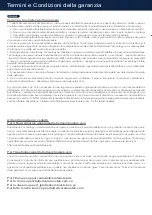
Страница 34: ...ufer autorisierten SilverStone Vertriebsh ndler oder an SilverStone http www silverstonetek com Bitte beachten Sie dass i Sie den Originalkaufbeleg des Produktes in Form eines mit Datum versehenen auf...

Страница 35: ...SilverStone con SilverStone directamente http www silverstonetek com Por favor tenga en cuenta i Debe proporcionar pruebas de la compra original mediante un recibo en el que aparezca la fecha ii Uste...

Страница 36: ...lverStone agr ou SilverStone https www silverstonetek com Veuillez noter que i Vous devez fournir la preuve d achat d origine du produit gr ce un re u d taill et dat ii Les frais d exp dition ou tout...

Страница 37: ...autorizzato SilverStone o Silverstone http www silverstonetek com Si prega di notare che i necessario fornire la prova di acquisto originale del prodotto a mezzo di una ricevuta datata e dettagliata i...

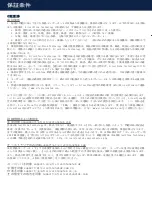
Страница 38: ...ilverstonetek com i ii SilverStone SilverStone iii SilverStone RMA SilverStone http www silverstonetek com usasupport at silverstonetek com SilverStone Technology 30 30 30 USA RMA SilverStone Technolo...

Страница 39: ...ilverstonetek com i ii SilverStone SilverStone iii SilverStone RMA SilverStone http www silverstonetek com usasupport at silverstonetek com SilverStone Technology 30 30 30 USA RMA SilverStone Technolo...

Страница 40: ...etek com i ii SilverStone SilverStone iii RMA SilverStone SilverStone http www silverstonetek com usasupport at silverstonetek com SilverStone Technology 30 30 30 RMA SilverStone Technology USA RMA fo...

Страница 41: ...Stone SilverStone http www silverstonetek com usasupport at silverstonetek com SilverStone Technology 30 30 30 RMA SilverStone Technology USA RMA form for end users http silverstonetek com contactus p...

Страница 42: ...sasupport at silverstonetek com 30 30 30 USA RMA form for end users http silverstonetek com contactus php support at silverstonetek com Warranty terms conditions support eu at silverstonetek de suppor...

Страница 43: ...A form for end users http silverstonetek com contactus php support at silverstonetek com Warranty terms conditions support eu at silverstonetek de support at silverstonetek com cn support_jp at silver...

Страница 44: ......

Отзывы: