background image

www.silverlinetools.com

7

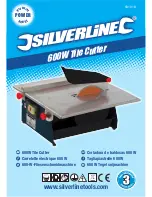
600W Tile Cutter

631018

Using your tile cutter

Preparation

1. Place the machine on a flat level surface
2. Before you connect the machine to the power supply, ensure that it is 

turned off. Press the red ‘Off’ button marked ‘O’ (18)

3. Check that the disc assembly is secure, and properly adjusted (see 

Assembling your tile cutter)

4. Ensure the Cutting Disc (8) is correctly screened by the Guard (2)

WARNING:

 Never operate the tile cutter without the Guard (2) in place

5. Pour water into the Water Tray (13) to a level that ensures the lower 

edge of the Cutting Disc (8) is immersed in the water

Adjusting the Guard

1. Adjust the Guard (2) so that it is just above the surface of the tile
2. Loosen the Guard Adjustment Knob (5)
3. Position Guard (2) as needed
4. Retighten the Guard Adjustment Knob (5)

Adjusting the Fence

1. Slacken the two Adjustment Knobs (20) and slide the Fence (19) to the 

required position. Use the rulers on the face of the table to align both 
sides of the fence

2. Retighten the two Adjustment Knobs (20)

Switching on and off

1. To switch the machine on: Press the green button marked ‘I’ (18)
2. To switch the machine off: Press the red button marked ‘O’ (18)

NOTE:

 The cutting disc will start turning immediately you press the green 

button. When you press the red button the machine will switch off, but the 
cutting disc will continue to rotate for a short time. Allow the disc to stop by 
itself. Do not attempt to stop the cutting disc by exerting pressure on the 
side of the disc.

Cutting

NOTE:

 It is strongly recommended that you make a test cut on scrap 

material to check machine settings are correct for the cutting task at hand
•  Only use this machine to cut tile, stone, concrete, roof tiles or similar 

products. 

•  Do not stand in line with the Cutting Disc (8) when in use
•  Do not attempt to make cuts that exceed the maximum cutting depth of 

the disc (34mm)

•  Do not start cutting before the machine reaches full speed
•  Never attempt to cut extremely small pieces of material

WARNING:

 Never touch the moving cutting disc

Cutting straight edges

•  Place the workpiece against the Fence (19)
•  Applying gentle and even pressure to the outside edge of the workpiece, 

guide the workpiece into the Cutting Disc (8)

•  If the disc does not cut smoothly or evenly, or if you find you need to 

apply force to make the cut, check alignment of the Fence (19), Guard (2) 
and Guard Support Bracket (3)

NOTE:

 If cutting remains uneven, or you need to apply force, the most likely 

cause will be a worn cutting disc; In such case, replace the cutting disc 
(see Maintenance)

Cutting 45º angles

1. Position Mitre Guide (23) on the Table (17) so that the long side is 

against the Fence (19)

2. Position the workpiece in the jaws of the Mitre Guide (23)
3. Fix the Fence (19) at the position for the depth of cut required
4. Applying gentle and even pressure to the Mitre Guide (23) and 

workpiece, guide the workpiece into the Cutting Disc (8)

Cutting raking angles 0 - 45º

1. Loosen the table Fixing/Adjustment Knobs (20)
2. Tilt the Table (17), using the angle gauges to locate and fix the table at 

the angle required

3. Retighten the table Fixing/Adjustment Knobs (20)
4. Check that the Table (17) is securely fixed at the angle required
5. Proceed with cut (as detailed above, in cutting straight edges)

During the work period

•  Regularly check that the lower edge of the Cutting Disc (8) is well 

below the water level in the cooling Water Tray (13); add more water as 
necessary

•  Do not perform any design, assembly or construction activities on the 

Table (17) while the machine is switched on

•  Do not subject the tile cutter to prolonged, uninterrupted periods of use. 

After 10 minutes usage, rest the tile cutter for 5 minutes to prevent heat 
overload

After use

•  Do not leave the work area until the machine has been switched off and 

the Cutting Disc (8) has come to a complete standstill

•  Unplug the machine
•  Empty the Water Tray (13) and rinse clean
•  Clean the unit in accordance with cleaning instructions (see Cleaning)

Cleaning

•  Use only mild soap and a slightly damp cloth to clean the tile cutter. DO 

NOT use petrol, lacquer, paint thinners or similar products

•  Never allow liquid inside the tile cutter; never immerse any part of the 

tile cutter in liquid

•  Keep the tile cutter free from oil and grease
•  Regularly clean the ventilation slots
•  Regularly remove grindings from the Disc Cover (14) and the guard

PDF Compressor Pro

Содержание 631018

Страница 1: ...es d utilisation 3 Jahre Garantie Registrieren Sie sich innerhalb von 30 Tagen online Es gelten die allgemeinen Gesch ftsbedingungen 3 a os de garant a Reg strese online dentro de 30 d as Se aplican l...

Страница 2: ...inetools com 631018 600WTileCutter POWER S ILVERLIN E R A N G E 600W Tile Cutter Carrelette lectrique 600 W 600 W Fliesenschneidmaschine Cortadora de baldosas 600 W Tagliapiastrelle 600W 600 W Tegel s...

Страница 3: ...2 2 3 5 4 7 6 8 9 12 10 11 13 14 15 16 18 19 17 23 20 21 22 Fig B Fig C Fig D Fig G Fig F Fig E Fig A 1...

Страница 4: ...www silverlinetools com 3 English 4 Fran ais 8 Deutsch 12 Espa ol 16 Italiano 20 Nederlands 24 600WTileCutter 11...

Страница 5: ...an unstable surface Accessories The use of any attachment or accessory other than those mentioned in this manual could be dangerous and result in damage or injury and may invalidate your warranty Neve...

Страница 6: ...ds without a break Maintain your power tool Ensure all ventilation holes are kept clear at all times otherwise overheating and fire may occur Always disconnect Before changing fittings or accessories...

Страница 7: ...disc and that the disc rotates freely 5 Attach the Table 17 a Thread table over the Guard Support Bracket 3 and the edge of the Cutting Disc 8 and onto the locating lugs see Fig A E b Place Washers 21...

Страница 8: ...piece against the Fence 19 Applying gentle and even pressure to the outside edge of the workpiece guide the workpiece into the Cutting Disc 8 If the disc does not cut smoothly or evenly or if you find...

Страница 9: ...ew disc 1 Thread new disc over Spindle 7 onto central raised profile of Spacer 6 2 Thread Large Washer 9 over Spindle 7 ensure flat side is facing towards the Cutting Disc 8 3 Thread Nut 10 onto Spind...

Страница 10: ...Claims made within the guarantee period will be verified by Silverline Tools to establish if the deficiencies are related to material or manufacturing of the product Carriage will not be refunded Item...

Страница 11: ...ux mentionn s dans ce manuel peut tre dangereuse entra ner des dommages mat riels ou des blessures et annulera votre garantie Ne vous tenez pas sur l outil En vous appuyant ou en montant sur l outil o...

Страница 12: ...e d incendie des poussi res de bois Lorsque cela est possible utilisez un syst me d extraction de la poussi re pour assurer un environnement de travail plus s r Carrelette lectrique 600 W S curit lect...

Страница 13: ...ur le poser sur les but es de positionnement Voir Fig A et E b Placez les rondelles 21 sur le filetage des boutons de r glage 20 et vissez les dans les trous de positionnement afin de fixer le plateau...

Страница 14: ...et uniforme sur le bord ext rieur de la pi ce couper faites la avancer vers le disque de coupe 8 Si le disque ne produit pas une coupe r guli re et nette ou s il vous faut exercer un effort pour faire...

Страница 15: ...ller un disque neuf 1 Enfilez le disque neuf sur la broche 7 jusqu au profil central en relief de l entretoise 6 2 Enfilez la grande rondelle 9 sur la broche 7 en v rifiant que sa face plate soit tour...

Страница 16: ...ls remplac s deviendront la propri t de Silverline Tools La r paration ou le remplacement de votre produit sous garantie vous apporte des avantages ces avantages s ajoutent vos droits statutaires en t...

Страница 17: ...den Sie keine Werkzeuge wenn Sie auf instabilem Untergrund stehen Zubeh r Die Verwendung von Einsatzwerkzeug oder Zubeh r das nicht in dieser Bedienungsanleitung erw hnt ist kann zu Sch den oder Verle...

Страница 18: ...nd kommt und nehmen Sie es vom Stromnetz bevor Sie es hinlegen Sicherheitshinweise f r Schneidwerkzeuge Korrektes Schneidwerkzeug verwenden Vergewissern Sie sich dass sich das Schneidwerkzeug f r die...

Страница 19: ...ie die Grundplatte 17 a Legen Sie die Grundplatte mit der ffnung ber die Schutzhaubenhalterung 3 und die Kante der Trennscheibe 8 auf die Haltevorrichtungen siehe Abb A und Abb E b Setzen Sie die Unte...

Страница 20: ...st ck gegen den Anschlag 19 an ben Sie leichten gleichm igen Druck auf die Au enkante des Werkst cks aus und schieben Sie das Werkst ck dabei in die Trennscheibe 8 vor Falls die Scheibe nicht gleichm...

Страница 21: ...en geltenden Vorschriften Anbringen einer neuen Trennscheibe 1 Setzen Sie die neue Trennscheibe auf die Spindel 7 so dass sie auf der mittigen Erhebung des Abstandhalters 6 aufliegt 2 Setzen Sie die g...

Страница 22: ...en Forderungen werden von Silverline Tools daraufhin berpr ft werden ob es sich bei den M ngeln um einen Material oder Fertigungsfehler handelt Versandkosten werden nicht zur ckerstattet Alle Artikel...

Страница 23: ...una superficie inestable Accesorios El uso de cualquier acoplamiento o accesorio diferente de los mencionados en este manual podr a ocasionar da os o lesiones El uso de accesorios incorrectos podr a s...

Страница 24: ...corte adecuada Aseg rese de que la herramienta de corte sea la adecuada para el trabajo a realizar No d por supuesto que la herramienta es adecuada sin antes comprobarlo en la documentaci n suministra...

Страница 25: ...rte de la protecci n 3 y del borde del disco de corte 8 hasta las clavijas de colocaci n v ase las figuras A y E b Coloque las arandelas 21 en las roscas de las perillas de ajuste 20 y enr squelas en...

Страница 26: ...erior de la pieza de trabajo gu e la pieza de trabajo hacia el disco de corte 8 Si el disco no corta bien o de manera poco uniforme o si usted encuentra que necesita aplicar fuerza para hacer el corte...

Страница 27: ...troduzca el disco nuevo sobre el husillo 7 sobre el perfil elevado del espaciador 6 2 Introduzca la arandela grande 9 por encima del husillo 7 asegur ndose de que el lado plano est orientado hacia el...

Страница 28: ...cubiertos por la garant a la herramienta ser reparada sin cargo alguno salvo los gastos de env o o bien la sustituiremos por una herramienta en perfecto estado de funcionamiento Las herramientas o pi...

Страница 29: ...e gioielli o altri oggetti che potrebbero restare impigliati nella macchina utensile Se necessario indossare calzature con suola antiscivolo o calzature dotate di puntale protettivo I capelli lunghi d...

Страница 30: ...manda pertanto di non tentare di sostituire gli utensili fino a quando questi si sono raffreddati completamente Fissare il pezzo in lavorazione Assicurarsi sempre che il pezzo in lavorazione sia salda...

Страница 31: ...disco di taglio ruota nella stessa direzione della freccia stampata sul disco d Infilare la rondella grande 9 al di sopra il mandrino 7 garantire che la parte piatta sia rivolta verso il disco e Infi...

Страница 32: ...gliare pezzi estremamente piccoli di materiale ATTENZIONE Non toccare mai il disco di taglio quando in movimento Taglio bordi dritti Posizionare il pezzo contro la guida 19 Applicando una leggera pres...

Страница 33: ...profilo del distanziatore 6 2 Inserire rondella di grandi dimensioni 9 sul mandrino 7 garantire lato piatto sia rivolto verso il disco di taglio 8 3 Inserire dado 10 sul mandrino 7 e serrare facendo...

Страница 34: ...ni che il prodotto e il difetto riscontrato sono coperti dalla garanzia Silverline Tools provveder a riparare l utensile gratuitamente esclusi i costi di spedizione o a propria discrezione a sostituir...

Страница 35: ...s bestemming Forceer of gebruik het gereedschap niet bij werkzaamheden waarvoor het niet is bestemd Draag gepaste kleding en schoeisel Draag geen loshangende kleding stropdassen sieraden of andere voo...

Страница 36: ...lheid van het freesgereedschap worden weggeslingerd Controleer of er geen andere personen in de werkruimte aanwezig zijn Indien de aanwezigheid van andere personen noodzakelijk is is de gebruiker er v...

Страница 37: ...iet raakt 5 Plaats het tafelblad 17 a Plaats het tafelblad over de ondersteuningsbeugel van de beschermkap 3 en de rand van de snijschijf 8 en op de locators plaatsbepalers zie fig A E b Plaats de slu...

Страница 38: ...snijden WAARSCHUWING Raak de draaiende schijf nooit aan Het snijden van rechte hoeken Plaats het werkstuk tegen de geleider 19 Oefen een lichte en even druk op de buitenranden van het werkstuk uit bij...

Страница 39: ...van de hand volgens de geldende regels Een nieuw wiel plaatsen 1 Schuif een nieuw wiel over de as 7 op het verhoogde middenprofiel van het afstandstuk 6 2 Schuif de grote sluitring 9 over de as 7 zor...

Страница 40: ...uden gereedschappen of onderdelen die zijn vervangen worden het eigendom van Silverline Tools De reparatie of vervanging van het product onder garantie zijn voordelen die bijkomstig zijn aan uw wettel...

Отзывы: