background image

SDBS 2400 B2

NL

BE

 67


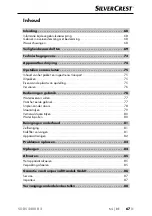
Inhoud

Inleiding  . . . . . . . . . . . . . . . . . . . . . . . . . . . . . . . . . . . . . . . . . . . . . . . .68

Informatie bij deze gebruiksaanwijzing . . . . . . . . . . . . . . . . . . . . . . . . . . . . . . . . . .68
Gebruik in overeenstemming met bestemming . . . . . . . . . . . . . . . . . . . . . . . . . . . . .68
Waarschuwingen . . . . . . . . . . . . . . . . . . . . . . . . . . . . . . . . . . . . . . . . . . . . . . . . . . .68

Veiligheidsvoorschriften  . . . . . . . . . . . . . . . . . . . . . . . . . . . . . . . . . . .69

Technische gegevens  . . . . . . . . . . . . . . . . . . . . . . . . . . . . . . . . . . . . . .73

Apparaatbeschrijving  . . . . . . . . . . . . . . . . . . . . . . . . . . . . . . . . . . . . .74

Opstellen en aansluiten . . . . . . . . . . . . . . . . . . . . . . . . . . . . . . . . . . . .75

Inhoud van het pakket en inspectie na transport . . . . . . . . . . . . . . . . . . . . . . . . . . .75
Uitpakken . . . . . . . . . . . . . . . . . . . . . . . . . . . . . . . . . . . . . . . . . . . . . . . . . . . . . . . . .75
Eisen aan de plaats van opstelling . . . . . . . . . . . . . . . . . . . . . . . . . . . . . . . . . . . . . .75
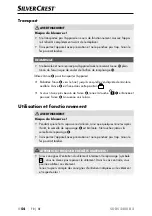
Vervoeren  . . . . . . . . . . . . . . . . . . . . . . . . . . . . . . . . . . . . . . . . . . . . . . . . . . . . . . . . .76

Bediening en gebruik . . . . . . . . . . . . . . . . . . . . . . . . . . . . . . . . . . . . . .76

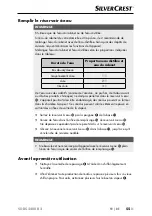
Waterreservoir vullen . . . . . . . . . . . . . . . . . . . . . . . . . . . . . . . . . . . . . . . . . . . . . . . .77
Vóór het eerste gebruik  . . . . . . . . . . . . . . . . . . . . . . . . . . . . . . . . . . . . . . . . . . . . . .77
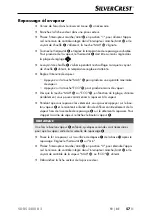
Strijken zonder stoom . . . . . . . . . . . . . . . . . . . . . . . . . . . . . . . . . . . . . . . . . . . . . . . .78
Stoomstrijken  . . . . . . . . . . . . . . . . . . . . . . . . . . . . . . . . . . . . . . . . . . . . . . . . . . . . . .79
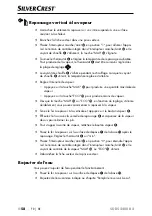
Verticaal stoomstrijken  . . . . . . . . . . . . . . . . . . . . . . . . . . . . . . . . . . . . . . . . . . . . . . .80
Water bijvullen . . . . . . . . . . . . . . . . . . . . . . . . . . . . . . . . . . . . . . . . . . . . . . . . . . . . .80

Reiniging en onderhoud  . . . . . . . . . . . . . . . . . . . . . . . . . . . . . . . . . . .81

Zelfreiniging . . . . . . . . . . . . . . . . . . . . . . . . . . . . . . . . . . . . . . . . . . . . . . . . . . . . . . .81
Kalkfilter vervangen . . . . . . . . . . . . . . . . . . . . . . . . . . . . . . . . . . . . . . . . . . . . . . . . .81
Apparaat reinigen  . . . . . . . . . . . . . . . . . . . . . . . . . . . . . . . . . . . . . . . . . . . . . . . . . .82

Problemen oplossen . . . . . . . . . . . . . . . . . . . . . . . . . . . . . . . . . . . . . . .83

Opbergen . . . . . . . . . . . . . . . . . . . . . . . . . . . . . . . . . . . . . . . . . . . . . . .84

Afvoeren  . . . . . . . . . . . . . . . . . . . . . . . . . . . . . . . . . . . . . . . . . . . . . . . .85

Het apparaat afvoeren . . . . . . . . . . . . . . . . . . . . . . . . . . . . . . . . . . . . . . . . . . . . . . .85
Verpakking afvoeren  . . . . . . . . . . . . . . . . . . . . . . . . . . . . . . . . . . . . . . . . . . . . . . . .85

Garantie van Kompernaß Handels GmbH . . . . . . . . . . . . . . . . . . . . .86

Service . . . . . . . . . . . . . . . . . . . . . . . . . . . . . . . . . . . . . . . . . . . . . . . . . . . . . . . . . . .87
Importeur . . . . . . . . . . . . . . . . . . . . . . . . . . . . . . . . . . . . . . . . . . . . . . . . . . . . . . . . .87

Vervangingsonderdelen bestellen . . . . . . . . . . . . . . . . . . . . . . . . . . .88

Содержание 306479

Страница 1: ... VAPEUR Mode d emploi DAMPFBÜGELSTATION Bedienungsanleitung STEAM GENERATOR IRON Operating instructions CENTRO DE PLANCHADO DE VAPOR Instrucciones de uso FERRO COM CALDEIRA Manual de instruções STOOMSTRIJKIJZER STATION Gebruiksaanwijzing NAPAŘOVACÍ ŽEHLIČKA S PARNÍ STANICÍ Návod k obsluze ...

Страница 2: ...miliarise yourself with all functions of the device Avant de lire le mode d emploi ouvrez la page contenant les illustrations et familiarisez vous ensuite avec toutes les fonctions de l appareil Vouw vóór het lezen de pagina met de afbeeldingen open en maak u vertrouwd met alle functies van het apparaat Před čtením si otevřete stranu s obrázky a potom se seznamte se všemi funkcemi přístroje Antes ...

Страница 3: ...A B C ...
Страница 4: ...uspacken 9 Anforderungen an den Aufstellort 9 Transportieren 10 Bedienung und Betrieb 10 Wassertank befüllen 11 Vor dem ersten Gebrauch 11 Bügeln ohne Dampf 12 Dampfbügeln 13 Senkrechtes Dampfbügeln 14 Wasser nachfüllen 14 Reinigung und Wartung 15 Selbstreinigung 15 Kalkfilter wechseln 15 Gerät reinigen 16 Fehlerbehebung 17 Lagerung 18 Entsorgung 19 Gerät entsorgen 19 Verpackung entsorgen 19 Garant...

Страница 5: ...Gerät ist nicht zur Verwendung in gewerblichen oder industriellen Bereichen vorgesehen Ansprüche jeglicher Art wegen Schäden aus nicht bestimmungsgemäßer Verwen dung unsachgemäßen Reparaturen unerlaubt vorgenommener Veränderungen oder Verwendung nicht zugelassener Ersatzteile sind ausgeschlossen Das Risiko trägt allein der Betreiber Warnhinweise In der vorliegenden Bedienungsanleitung werden folge...

Страница 6: ... Umgang mit dem Gerät die folgenden Sicherheitshinweise Das Gerät darf nicht benutzt werden falls es herunter gefallen ist wenn es sichtbare Beschädigungen aufweist oder undicht ist Lassen Sie beschädigte Netzstecker oder Netzkabel sofort von autorisiertem Fachpersonal oder dem Kundenservice austauschen um Gefährdungen zu vermeiden Lassen Sie Reparaturen am Gerät nur von autorisierten Fach betrieb...

Страница 7: ...cheren Gebrauchs des Gerätes un terwiesen wurden und die daraus resultierenden Gefahren verstanden haben Kinder dürfen nicht mit dem Gerät spie len Reinigung und Benutzer Wartung dürfen nicht durch Kinder ohne Beaufsichtigung durchgeführt werden Das Gerät und dessen Anschlussleitung müssen während des Einschaltens oder Abkühlens außer Reichweite von Kindern sein die jünger als 8 Jahre alt sind Kin...

Страница 8: ...aus und benutzen Sie es auch niemals in feuchter oder nasser Umgebung Fassen Sie das Netzkabel immer am Netzstecker an und ziehen Sie nicht am Kabel selbst Fassen Sie das Netzkabel oder den Netzstecker niemals mit feuchten Händen an Stellen Sie weder das Gerät Möbelstücke o Ä auf das Netzkabel und achten Sie darauf dass es nicht eingeklemmt wird Achten Sie darauf dass die Anschlussleitung während ...

Страница 9: ...heiß Berühren Sie dann niemals die Bügelsohle Fassen Sie das Bügeleisen nur am Griff an wenn es heiß ist Kinder sollten beaufsichtigt werden um sicherzustellen dass sie nicht mit dem Gerät spielen Halten Sie niemals Ihre Hände in den Dampfstoß oder an heiße Metallteile Richten Sie den Dampfstrahl niemals auf Personen oder Tiere Bügeln oder bedampfen Sie niemals Kleidung oder anderes Gewebe während ...

Страница 10: ... Verbindungs schlauch in Kontakt mit der heißen Bügelsohle kommen Verkratzen Sie die Bügelsohle nicht Vermeiden Sie einen Kontakt der Bügelsohle mit Metallteilen wie z B Knöpfe oder Reißverschlüsse Betreiben Sie das Gerät nur auf einer stabilen geraden und ebenen Fläche Technische Daten Dampfbügelstation Spannungsversorgung 220 240 V Wechselstrom 50 60 Hz Leistungsaufnahme 2000 2400 W Max Füllmeng...

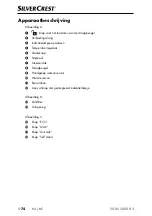
Страница 11: ...ngsschlauch Aufheizkontrollleuchte Temperaturregler Dampf Taste Bügelsohle Abstellfläche Tragebügel Griff Wassertank Wassertank Basisstation 3 Ein Aus Schalter mit integrierter Kontrollleuchte Abbildung B Kalkfilter Einfüllöffnung Abbildung C 0 Taste ECO 6 Taste MAX 1 Taste Anti calc Taste Self clean ...

Страница 12: ...ndigen Lieferung oder Schäden infolge mangelhafter Verpackung oder durch Transport wenden Sie sich an die Service Hotline siehe Kapitel Service Auspacken WARNUNG Erstickungsgefahr Verpackungsmaterialien dürfen nicht zum Spielen verwendet werden Es besteht Erstickungsgefahr Entnehmen Sie alle Teile des Gerätes und die Bedienungsanleitung aus dem Karton Entfernen Sie sämtliches Verpackungsmaterial A...

Страница 13: ...Tragebügel ist in dieser Position fixiert Wenn Sie den Tragebügel nicht mehr benötigen halten Sie die Taste gedrückt und drücken Sie den Tragebügel wieder nach unten Bedienung und Betrieb WARNUNG Verletzungsgefahr Während das Bügeleisen eingeschaltet ist sowie einige Minuten nach dem Abschalten ist die Bügelsohle sehr heiß Berühren Sie dann niemals die Bügelsohle Transportieren Sie das Gerät vorsic...

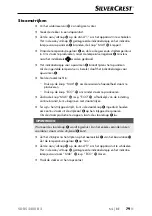
Страница 14: ...s Gerät könnte dadurch beschädigt werden da sich Rückstände in der Dampfkammer bilden können Diese Rückstände können beim Ausfallen durch die Dampfaustrittsöffnungen das Bügelgut verunreinigen Ziehen Sie den Wassertank am Griff aus der Basisstation heraus Füllen Sie Wasser in die Einfüllöffnung des Wassertanks Übersteigen Sie dabei jedoch nicht die MAX Markierung am Wassertank Schieben Sie den Wasser...

Страница 15: ... 3 integrierte Kontrollleuchte und die Aufheizkontrollleuchte leuchten die Taste MAX 6 blinkt Drehen Sie den Temperaturregler und stellen Sie so die gewünschte Bügeltemperatur ein Die Aufheizkontrollleuchte leuchtet während des Aufheizens Sobald die Aufheizkontrollleuchte erlischt ist die eingestellte Temperatur erreicht und Sie können mit dem Bügeln beginnen Stellen Sie das Bügeleisen nach dem Bü...

Страница 16: ...e die Taste MAX 6 um maximale Dampfmenge zu erzeugen Drücken Sie die Taste ECO 0 um weniger Dampf zu erzeugen Sobald die Taste MAX 6 bzw ECO 0 je nach Einstellung dauerhaft leuchtet können Sie mit dem Dampfbügeln beginnen Während Sie das Bügelgut bügeln können Sie nun die Dampf Taste drücken und halten um anhaltend Dampf aus der Bügelsohle auf das Bügelgut zu geben Um den Dampfausstoß zu beenden l...

Страница 17: ...ale Dampfmenge zu erzeugen Drücken Sie die Taste ECO 0 um weniger Dampf zu erzeugen Sobald die Taste MAX 6 bzw ECO 0 je nach Einstellung dauerhaft leuchtet können Sie mit dem Dampfbügeln beginnen Halten Sie das Bügeleisen in senkrechter Position und drücken Sie die Dampf Taste Berühren Sie das Gewebe leicht mit der Bügelsohle und bedampfen Sie es um Falten zu entfernen Um den Dampfausstoß zu beend...

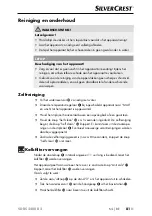
Страница 18: ... Auffangschüssel oder ein Waschbecken Drücken Sie die Taste Self clean für ca 5 Sekunden der Selbstrei nigungsvorgang beginnt die Taste Self clean blinkt Dampf tritt aus den Dampfaustrittslöchern in der Bügelsohle aus Eventuell vorhandene Verunreinigungen werden dabei herausgespült Sobald der Selbstreinigungsvorgang beendet ist nach ca 80 Sekunden hört die Taste Self clean auf zu blinken Kalkfilter ...

Страница 19: ...s Gerätes ist es sinnvoll immer einen Er satzkalkfilter auf Vorrat zu haben Dann können Sie den Kalkfilter sofort wechseln wenn die Taste Anti calc 1 leuchtet Neue Kalkfilter können Sie über unseren Service bestellen siehe Kapitel Ersatzteile bestellen Gerät reinigen Ziehen Sie falls noch nicht geschehen den Netzstecker aus der Netzsteckdose Lassen Sie das Gerät ggf vollständig abkühlen Reinigen Sie ...

Страница 20: ...n Sie die Dampf Taste länger Der Dampf benötigt einige Zeit bis dieser aus der Bügelsohle austritt Wasser tropft aus der Bügelsohle Wird das Dampfbügeln kurz unterbrochen kondensiert der sich abkühlende Dampf im Ver bindungsschlauch Dies führt zur Tropfenbildung Das ist normal Halten Sie das Bügeleisen über ein Auffangtuch oder behälter und drücken Sie die Dampf Taste Nach einigen Sekunden tritt Da...

Страница 21: ...einigung und Wartung beschrieben Legen Sie den Verbindungsschlauch in der Mitte zusammen und schieben Sie ihn in die Vertiefung am Gerät Wickeln Sie das Netzkabel auf und fixieren Sie es mit dem mitgelieferten Klettband Lagern Sie das Gerät an einem trockenen und sauberen Ort ...

Страница 22: ...bei Ihrer Gemeinde oder Stadtverwaltung Verpackung entsorgen Die Verpackung schützt das Gerät vor Transportschäden Die Verpackungsmateriali en sind nach umweltverträglichen und entsorgungstechnischen Gesichtspunkten ausgewählt und deshalb recyclebar Entsorgen Sie die Verpackung umweltgerecht Beachten Sie die Kennzeichnung auf den verschiedenen Verpackungsmaterialien und trennen Sie diese gegeben e...

Страница 23: ...che Die Garantiezeit wird durch die Gewährleistung nicht verlängert Dies gilt auch für ersetzte und reparierte Teile Eventuell schon beim Kauf vorhandene Schäden und Mängel müssen sofort nach dem Auspacken gemeldet werden Nach Ablauf der Garantiezeit anfallende Reparaturen sind kostenpflichtig Garantieumfang Das Gerät wurde nach strengen Qualitätsrichtlinien sorgfältig produziert und vor Auslieferu...

Страница 24: ...Sie dann unter Beifügung des Kauf belegs Kassenbon und der Angabe worin der Mangel besteht und wann er aufgetreten ist für Sie portofrei an die Ihnen mitgeteilte Service Anschrift übersenden Auf www lidl service com können Sie diese und viele weitere Handbücher Produktvideos und Software herunterladen Service Service Deutschland Tel 0800 5435 111 Kostenfrei aus dem dt Festnetz Mobilfunknetz E Mail...

Страница 25: ...t SDBS 2400 B2 bestellen Kalkfilter Bestellen Sie die Ersatzteile über unsere Service Hotline siehe Kapitel Service oder bequem auf unserer Webseite unter www kompernass com HINWEIS Halten Sie die IAN Nummer die Sie auf dem Umschlag dieser Bedienungsanleitung finden für Ihre Bestellung bereit ...

Страница 26: ...the set up location 31 Transport 32 Handling and operation 32 Filling the water tank 33 Before first use 33 Ironing without steam 34 Steam ironing 35 Vertical steam ironing 36 Refilling with water 36 Cleaning and maintenance 37 Self cleaning function 37 Replacing the limescale filter 37 Cleaning the appliance 38 Troubleshooting 39 Storage 40 Disposal 41 Disposal of the appliance 41 Disposal of packag...

Страница 27: ... any other purpose nor for use beyond the scope described The appliance is not intended for use in commercial or industrial environments The manufacturer accepts no responsibility for damage caused by failure to observe these instructions improper use or repairs unauthorised modifications or the use of unapproved replacement parts The user bears sole liability Warnings The following warnings are us...

Страница 28: ...llow the safety guidelines set out below The appliance may not be used if it has fallen down if it shows visible damage or is leaking Arrange for defective power plugs and or cables to be replaced as soon as possible by a qualified technician or by our Customer Service Department to avoid any risk of injury All repairs must be carried out by authorised specialist workshops or by the Customer Servic...

Страница 29: ...ted in the safe use of the appliance and have understood the potential risks Do not allow children to play with the appliance Cleaning and user maintenance must not be carried out by children unless they are supervised When it is switched on or cooling down the appliance and its power cable must be kept out of the reach of children who are younger than 8 years old Do not allow children to use the ...

Страница 30: ... not expose the appliance to rain and never use it in a humid or wet environment Always hold the plug when handling the power cable and never pull on the cable itself Never touch the power cable or the plug with wet hands Do not place the appliance itself or furniture etc on the power cable and ensure that it is not jammed Ensure that the power cable never becomes wet or moist during operation Do ...

Страница 31: ... turned off the sole of the iron remains very hot Never touch the sole of the iron When the iron is hot hold it only by the handle Children should be supervised to ensure that they do not play with the appliance Never place your hands in the steam spray or on the hot metal parts Do not aim the steam jet at people or animals Never iron or steam clothes or other fabrics while they are being worn or h...

Страница 32: ...he connection hose come into contact with the hot sole of the iron Do not scratch the sole of the iron Avoid contact between the sole of the iron and metal parts such as buttons or zips Operate the appliance only on a stable and level working surface Technical data Steam iron station Power supply 220 240 V AC 50 60 Hz Power consumption 2000 2400 W Max fill level of the water tank 1 5 l Steam produc...

Страница 33: ...cting hose Heat up indicator lamp Temperature control Steam button Sole of the iron Stand Carrying handle Water tank grip Water tank Base station 3 On off switch with integrated control lamp Figure B Limescale filter Filler opening Figure C 0 ECO button 6 MAX button 1 Anti calc button Self clean button ...

Страница 34: ...e If the delivery is incomplete or damage has occurred as a result of defec tive packaging or during transport contact the Service hotline see section Service Unpacking WARNING Risk of suffocation Do not allow children to play with packaging materials There is a risk of suffocation Remove all parts of the appliance and the operating instructions from the box Remove all packaging material Requirement...

Страница 35: ...handle is then fixed in this position When you have finished using the carrying handle hold down the button and then push the carrying handle back downwards Handling and operation WARNING Risk of injury While the iron is turned on and a few minutes after the power is turned off the sole of the iron remains very hot Never touch the sole of the iron Transport the appliance carefully and try to avoid sw...

Страница 36: ...r other chemicals to the water tank These could damage the appliance as residues can form in the steam chamber The residues could contaminate the clothing if they come out of the steam outlets Pull the water tank by the grip out of the base station Fill the water tank with tap water via the filler opening Do not fill above the MAX marking in the water tank Push the water tank back into the base stat...

Страница 37: ...ance on The integrated control lamp in the On Off switch 3 and the heat up indicator lamp light up the MAX button 6 flashes Turn the temperature control to set the required ironing temperature The heat up indicator lamp lights up during heating As soon as the heat up indicator lamp goes out the set temperature has been reached and you can start ironing Put the iron down on the stand on the base stat...

Страница 38: ...utton 6 to create maximum steam Press the ECO button 0 to make the appliance produce less steam As soon as the MAX 6 or ECO button 0 lights up continuously depending on the setting you can start steam ironing While you are ironing you can now press and hold the steam button to continuously spray steam onto the items being ironed from the sole of the iron Release the steam button to stop producing ...

Страница 39: ...te maximum steam Press the ECO button 0to produce less steam As soon as the MAX 6 or ECO button 0 lights up continuously depending on the setting you can start steam ironing Hold the steam iron in a vertical position and press the steam button Touch the fabric lightly with the sole of the iron and steam it to remove creases Release the steam button to stop the appliance producing steam Put the iro...

Страница 40: ...as heated up Hold the iron horizontally over a suitable container or sink Press the Self clean button for about 5 seconds The self cleaning process starts and the Self clean button flashes Steam flows from the steam exit holes in the sole of the iron Any impurities that may be present are flushed out As soon as the self cleaning process is complete after about 80 seconds the Self clean button stops fl...

Страница 41: ...dry location If the appliance is used regularly it is advisable to always have a replacement limescale filter available This means that you can replace the limescale filter immediately as soon as the Anti calc button 1 lights up You can order new limescale filters from our service department see section Ordering replacement parts Cleaning the appliance Remove the power plug from the mains power socke...

Страница 42: ... steam button down a little longer The steam takes a little time until it comes out of the sole of the iron Water drips out of the sole of the iron If steam ironing is paused briefly the cooling steam condenses in the connecting hose This can lead to drips This is normal Hold the iron over a collecting cloth or container and press the steam button Steam will discharge from the sole of the iron inst...

Страница 43: ...as described in the section Cleaning and maintenance Fold the connecting hose in the middle and push it into the recess in the appliance Wind up the power cable and fasten it with the Velcro tape supplied Store the appliance in a dry and clean location ...

Страница 44: ... to dispose of the product Disposal of packaging The packaging protects the appliance from damage during transport The pack aging materials have been selected for their environmental friendliness and ease of disposal and are therefore recyclable Dispose of the packaging in an environmentally friendly manner Note the labelling on the packaging and separate the packaging material components for disp...

Страница 45: ...cts The warranty period is not prolonged by repairs effected under the warranty This also applies to replaced and repaired components Any damage and defects present at the time of purchase must be reported immediately after unpacking Repairs carried out after expiry of the warranty period shall be subject to a fee Scope of the warranty This appliance has been manufactured in accordance with strict ...

Страница 46: ...product to us free of charge to the service address that will be provided to you Ensure that you enclose the proof of purchase till receipt and information about what the defect is and when it occurred You can download these instructions along with many other manuals product videos and software on www lidl service com Service Service Great Britain Tel 0800 404 7657 E Mail kompernass lidl co uk Ser...

Страница 47: ... for product SDBS 2400 B2 Limescale filter Order the replacement parts via the Service hotline see section Service or simply visit our website at www kompernass com NOTE Have the IAN number of the appliance ready can be found on the cover of these operating instructions when you place your order ...

Страница 48: ...stallation 53 Transport 54 Utilisation et fonctionnement 54 Remplir le réservoir à eau 55 Avant la première utilisation 55 Repassage sans vapeur 56 Repassage à la vapeur 57 Repassage vertical à la vapeur 58 Rajouter de l eau 58 Nettoyage et entretien 59 Auto nettoyage 59 Remplacer le filtre antitartre 59 Nettoyage de l appareil 60 Dépannage 61 Rangement 62 Recyclage 63 Mise au rebut de l appareil 6...

Страница 49: ...appareil n est pas conçu pour être utilisé dans des contextes commerciaux ou industriels Les prétentions de toute nature pour dommages résultant d un usage non conforme de réparations inappropriées de modifications réalisées sans autorisation ou du recours à des pièces de rechange non autorisées sont exclues L utilisateur assume seul la responsabilité des risques encourus Avertissements Les avertis...

Страница 50: ...sécurité ci des sous afin de garantir une utilisation en toute sécurité de l appareil L appareil ne doit pas être utilisé s il est tombé par terre ou s il présente des détériorations visibles ou n est pas étanche Faites immédiatement remplacer la fiche secteur ou le cordon d alimentation endommagé par des techniciens spécialisés agréés ou par le service après vente pour éviter tout risque Confiez les...

Страница 51: ... instructions concernant l utilisation de l appareil en toute sécurité et qu elles com prennent les dangers encourus Les enfants ne doivent pas jouer avec l appareil Ne pas laisser un enfant sans surveil lance effectuer un nettoyage ou une opération d entretien Tenir l appareil et son cordon d alimentation électrique lorsqu il est en service ou encore chaud hors de portée des enfants de moins de 8 ...

Страница 52: ...utilisez jamais dans un environnement humide ou mouillé Saisissez toujours le câble par la fiche secteur et ne tirez pas sur le cordon Ne manipulez jamais le cordon d alimentation ou la prise secteur avec les mains mouillées Ne placez ni l appareil ni des meubles par exemple sur le cordon d alimentation et veillez à ce qu il ne reste pas coincé Assurez vous que le cordon d alimentation ne soit jama...

Страница 53: ...la semelle de repassage Tenez le fer à repasser uniquement par sa poignée lorsqu il est chaud Il faut surveiller les enfants pour être sûr qu ils ne jouent pas avec l appareil Ne placez jamais les mains devant le jet de vapeur ou sur les pièces métalliques chaudes Ne dirigez jamais le jet de vapeur vers des personnes ou des animaux Ne repassez ou ne passez jamais à la vapeur des vêtements ou autre...

Страница 54: ...avec la semelle brûlante Ne rayez pas la semelle de repassage Évitez tout contact de la semelle de repassage avec des pièces métalliques comme par ex des boutons ou fermetures éclair Installez l appareil uniquement sur une surface stable droite et plane Caractéristiques techniques Centrale vapeur Alimentation électrique 220 240 V courant alternatif 50 60 Hz Puissance absorbée 2000 2400 W Capacité ...

Страница 55: ...Voyant de chauffe Thermostat Bouton vapeur Semelle de repassage Surface de dépose Anse Poignée du réservoir à eau Réservoir à eau Base 3 Interrupteur marche arrêt avec témoin de contrôle intégré Figure B Filtre antitartre Orifice de remplissage Figure C 0 Touche ECO 6 Touche MAX 1 Touche Anti calc Touche Self clean ...

Страница 56: ...mmages résultant d un emballage défectueux ou liés au transport veuillez vous adresser à la hotline du service après vente voir le chapitre Service après vente Déballage AVERTISSEMENT Risque d étouffement Les matériaux d emballage ne doivent pas être utilisés comme des jouets Il y a risque d étouffement Sortez du carton toutes les pièces de l appareil et le mode d emploi Retirez tous les matériaux d...

Страница 57: ...anse est fixée dans cette position Si vous n avez plus besoin de l anse tenez la touche enfoncée et poussez l anse à nouveau vers le bas Utilisation et fonctionnement AVERTISSEMENT Risque de blessures Pendant que le fer à repasser est allumé ainsi que quelques minutes après l arrêt la semelle de repassage est brûlante Ne touchez jamais la semelle de repassage Transportez l appareil avec précaution ...

Страница 58: ...éservoir à eau L appareil pourrait alors être endommagé des résidus pouvant se former dans la chambre à vapeur Ces résidus peuvent salir le vêtement repassé en sortant des orifices de sortie de la vapeur Sortez le réservoir à eau par la poignée de la base Versez de l eau dans l orifice de remplissage du réservoir à eau Ne dépassez cependant pas le repère MAX sur le réservoir à eau Glissez à nouveau ...

Страница 59: ...de contrôle intégré dans l interrupteur marche arrêt 3 et le voyant de chauffe s allument la touche MAX 6 clignote Tournez le thermostat et réglez la température de repassage souhaitée Le voyant de chauffe s allume pendant le chauffage Lorsque le voyant de chauffe s éteint la température réglée est atteinte et vous pouvez commencer à repasser Posez le fer à repasser sur la surface de dépose de la base...

Страница 60: ...puyez sur la touche ECO 0 pour produire moins de vapeur Dès que la touche MAX 6 ou ECO 0 en fonction du réglage s allume durablement vous pouvez commencer à repasser à la vapeur Pendant que vous repassez les vêtements vous pouvez appuyer sur le bou ton vapeur et le maintenir enfoncé afin de diffuser continuellement de la vapeur hors de la semelle de repassage sur le vêtement à repasser Pour stopper ...

Страница 61: ...ur Appuyez sur la touche ECO 0 pour produire moins de vapeur Dès que la touche MAX 6 ou ECO 0 en fonction du réglage s allume durablement vous pouvez commencer à repasser à la vapeur Tenez le fer à repasser à la verticale et appuyez sur le bouton vapeur Effleurez le tissu avec la semelle de repassage et vaporisez de la vapeur dessus pour éliminer les plis Pour stopper la sortie de vapeur relâchez le...

Страница 62: ...uffer Maintenez le fer à repasser à l horizontale au dessus d une bassine ou d un lavabo Appuyez sur la touche Self clean pendant env 5 secondes l opération d auto nettoyage démarre la touche Self clean clignote De la vapeur sort des perforations de sortie de la vapeur aménagées dans la semelle de repassage Les salissures qui s y trouvent éventuellement sont alors évacuées Dès que l opération d aut...

Страница 63: ... la boisson Conservez le filtre antitartre hors de portée des enfants Conservez le filtre antitartre de remplacement dans un endroit frais et sec En cas d utilisation régulière de l appareil il est judicieux de toujours avoir un filtre antitartre de rechange en stock Cela vous permet de remplacer immé diatement le filtre antitartre lorsque la touche Anti calc 1 s allume Vous pouvez commander de nouvea...

Страница 64: ...yant de contrôle de la tempé rature s éteigne Le thermostat se trouve dans la plage de réglage Réglez une température adaptée au repassage vapeur plage de réglage La génération de vapeur n a pas été utilisée depuis longtemps ou est utilisée pour la première fois Maintenez le bouton vapeur plus longtemps La vapeur a besoin d un certain temps avant de sortir par la semelle de repassage De l eau gout...

Страница 65: ...ches humides sur le vêtement sans vapeur pour les sécher REMARQUE Si vous ne réussissez pas à résoudre le problème à l aide des mesures précitées veuil lez vous adresser au service après vente Rangement Nettoyez l appareil comme décrit au chapitre Nettoyage et maintenance Pliez le flexible de raccordement au centre et poussez le dans la cavité sur l appareil Enroulez le cordon d alimentation et fixe...

Страница 66: ... produit usagé Mise au rebut de l emballage L emballage protège l appareil de tous dommages au cours du transport Les matériaux d emballage ont été sélectionnés selon des critères de respect de l environnement et de facilité d élimination qui permettent le recyclage Éliminez l emballage d une manière respectueuse de l environnement Observez le marquage sur les différents matériaux d emballage et tr...

Страница 67: ...iode de garantie Cette disposition s applique également aux pièces remplacées ou réparées Les dommages et vices éventuellement déjà présents à l achat doivent être signalés immédiatement après le déballage Toute réparation survenant après la période sous garantie fera l objet d une facturation Étendue de la garantie L appareil a été fabriqué avec soin conformément à des directives de qualité stric...

Страница 68: ...ientèle cité ci dessous par téléphone ou par e mail Vous pouvez ensuite retourner un produit enregistré comme étant défectueux en joignant le ticket de caisse et en indiquant en quoi consiste le vice et quand il est survenu sans devoir l affranchir à l adresse de service après vente communiquée Sur www lidl service com vous pouvez télécharger ce manuel ainsi que beaucoup d autres des vidéos produit...

Страница 69: ...it SDBS 2400 B2 Filtre antitartre Commandez les pièces de rechange via notre ligne téléphonique de service après vente voir chapitre Service après vente ou tout simplement sur notre site web www kompernass com REMARQUE Tenez le numéro IAN que vous trouverez sur la couverture de ce mode d emploi prêt pour passer votre commande ...

Страница 70: ...tpakken 75 Eisen aan de plaats van opstelling 75 Vervoeren 76 Bediening en gebruik 76 Waterreservoir vullen 77 Vóór het eerste gebruik 77 Strijken zonder stoom 78 Stoomstrijken 79 Verticaal stoomstrijken 80 Water bijvullen 80 Reiniging en onderhoud 81 Zelfreiniging 81 Kalkfilter vervangen 81 Apparaat reinigen 82 Problemen oplossen 83 Opbergen 84 Afvoeren 85 Het apparaat afvoeren 85 Verpakking afvoe...

Страница 71: ...s niet bedoeld voor gebruik in commerciële of industriële omgevingen De fabrikant aanvaardt geen aansprakelijkheid voor schade als gevolg van ge bruik dat niet in overeenstemming met de bestemming is onvakkundige reparaties veranderingen die ongeoorloofd zijn uitgevoerd of gebruik van vervangingson derdelen die niet zijn toegestaan Het risico ligt uitsluitend bij de gebruiker Waarschuwingen In dez...

Страница 72: ... volgende veiligheidsvoorschriften in acht voor een veilige omgang met het apparaat Het apparaat mag niet worden gebruikt wanneer het is gevallen zichtbare beschadigingen vertoont of lekt Laat beschadigde stekkers en snoeren onmiddellijk door een gekwalificeerd vakman of door de klantenservice vervangen om risico s te vermijden Laat reparaties aan het apparaat alleen door erkende vak bedrijven of d...

Страница 73: ...zicht staan of tevoren zijn geïn strueerd over het veilige gebruik van het apparaat en de daaruit voortkomende gevaren hebben begrepen Kinderen mogen niet met het apparaat spelen Kinderen mogen geen reiniging en gebruikersonderhoud uitvoeren zonder toezicht Het apparaat en het snoer moeten tijdens het inschakelen of afkoelen buiten bereik zijn van kinderen die jonger zijn dan 8 jaar Kinderen mogen...

Страница 74: ...t niet bloot aan regen en gebruik het ook nooit in een vochtige of natte omgeving Pak het snoer altijd bij de stekker vast en trek niet aan het snoer zelf Pak het snoer of de stekker nooit met vochtige handen vast Zet het apparaat meubelstukken en dergelijke niet op het snoer en let erop dat het snoer niet ingeklemd raakt Let erop dat het aansluitsnoer nooit nat of vochtig wordt als het apparaat i...

Страница 75: ...l dan nooit aan Pak het strijkijzer als het heet is alleen bij de handgreep vast Bij kinderen is supervisie noodzakelijk om ervoor te zorgen dat ze niet met het apparaat spelen Houd uw handen nooit in de stoomstoot of tegen de hete metalen delen van het apparaat Richt de stoomstraal nooit op personen of dieren Strijk of stoomstrijk nooit kledingstukken of andere weefsels terwijl ze door personen w...

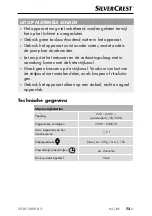
Страница 76: ...indingsslang niet in aanraking komen met de hete strijkzool Maak geen krassen op de strijkzool Voorkom contact van de strijkzool met metalen delen zoals knopen of ritssluitin gen Gebruik het apparaat alleen op een stabiel recht en egaal oppervlak Technische gegevens Stoomstrijkstation Voeding 220 240 V wisselstroom 50 60 Hz Opgenomen vermogen 2000 2400 W Max capaciteit van het waterreservoir 1 5 l...

Страница 77: ...indingsslang Indicatielampje opwarmen Temperatuurregelaar Stoomknop Strijkzool Neerzetvlak Draagbeugel Handgreep waterreservoir Waterreservoir Basisstation 3 Aan uitknop met geïntegreerd indicatielampje Afbeelding B Kalkfilter Vulopening Afbeelding C 0 Knop ECO 6 Knop MAX 1 Knop Anti calc Knop Self clean ...

Страница 78: ... contact op met de service hotline zie het hoofdstuk Service als het pakket niet compleet is of indien er sprake is van schade door gebrekkige verpakking of transport Uitpakken WAARSCHUWING Verstikkingsgevaar Verpakkingsmateriaal mag niet als speelgoed worden gebruikt Er bestaat gevaar voor verstikking Haal alle onderdelen van het apparaat en de gebruiksaanwijzing uit de doos Verwijder al het verp...

Страница 79: ...rbaar vastklikt De draagbeugel zit in deze positie vast Wanneer u de draagbeugel niet meer nodig hebt houdt u de knop ingedrukt en drukt u de draagbeugel weer omlaag Bediening en gebruik WAARSCHUWING Letselgevaar Terwijl het strijkijzer is ingeschakeld en enkele minuten na uitschakeling is de strijkzool zeer heet Raak de strijkzool dan nooit aan Transporteer het apparaat voorzichtig en draai het n...

Страница 80: ...echtkomen Het apparaat zou daardoor beschadigd kunnen raken omdat zich resten in het stoomreser voir kunnen vormen Deze resten kunnen het strijkgoed verontreinigen als ze uit de stoomopeningen komen Trek het waterreservoir aan de handgreep uit het basisstation Giet water in de vulopening van het waterreservoir Overschrijd daarbij niet de markering MAX op het waterreservoir Schuif het waterreservoi...

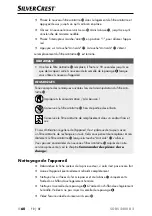
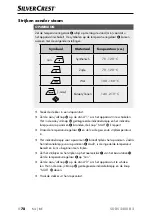
Страница 81: ... aan uitknop 3 geïntegreerde indicatielampje en het indicatie lampje voor opwarmen branden de knop MAX 6 knippert Draai de temperatuurregelaar en stel zo de gewenste strijktemperatuur in Het indicatielampje voor opwarmen brandt tijdens het opwarmen Zodra het indicatielampje voor opwarmen dooft is de ingestelde temperatuur bereikt en kunt u beginnen met strijken Zet het strijkijzer na het strijken ...

Страница 82: ...knop MAX 6 om de maximale hoeveelheid stoom te produceren Druk op de knop ECO 0 om minder stoom te produceren Zodra de knop MAX 6 resp ECO 0 afhankelijk van de instelling continu brandt kunt u beginnen met stoomstrijken Terwijl u het strijkgoed strijkt kunt u de stoomknop ingedrukt houden om continu stoom uit de strijkzool op het strijkgoed te sproeien Om de stoomproductie te stoppen laat u de sto...

Страница 83: ...eelheid stoom te produceren Druk op de knop ECO 0 om minder stoom te produceren Zodra de knop MAX 6 resp ECO 0 afhankelijk van de instelling continu brandt kunt u beginnen met stoomstrijken Houd het strijkijzer in verticale positie en druk op de stoomknop Raak het weefsel licht aan met de strijkzool en voeg stoom toe om plooien te verwijderen Om de stoomproductie te stoppen laat u de stoomknop los...

Страница 84: ...akeld apparaat naar MAX en wacht tot het apparaat is opgewarmd Houd het strijkijzer horizontaal boven een opvangbak of een gootsteen Houd de knop Self clean ca 5 seconden ingedrukt De zelfreiniging begint de knop Self clean knippert Er komt stoom uit de stoomope ningen in de strijkzool Eventueel aanwezige verontreinigingen worden daarbij weggespoeld Zodra de zelfreiniging gereed is na ca 80 second...

Страница 85: ...eservekalkfilters op een koele droge plaats Bij regelmatig gebruik van het apparaat is het zinvol om altijd een reservekalk filter op voorraad te hebben Dan kunt u het kalkfilter meteen vervangen wanneer de knop Anti calc 1 brandt Nieuwe kalkfilters kunt u bestellen via onze service zie het hoofdstuk Vervangingsonderdelen bestellen Apparaat reinigen Trek de stekker als dat nog niet was gebeurd uit het...

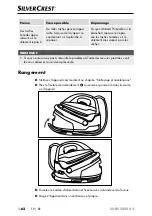
Страница 86: ...t of wordt voor het eerst gebruikt Houd de stoomknop langer ingedrukt Het duurt enige tijd voordat er stoom uit de strijkzool komt Er druppelt water uit de strijkzool Als het stoomstrijken kort wordt onderbroken condenseert de afkoelende stoom in de verbin dingsslang Dit resulteert in druppelvorming Dat is normaal Houd het strijk ijzer boven een opvangdoek of bak en druk op de stoomknop Na enkele ...

Страница 87: ...eschreven in het hoofdstuk Reiniging en onder houd Vouw de verbindingslang in het midden op en schuif hem in de verdie ping van het apparaat Wikkel het snoer op en maak het vast met het meegeleverde klittenband Bewaar het apparaat op een droge en schone plaats ...

Страница 88: ...niging Verpakking afvoeren De verpakking beschermt het apparaat tegen transportschade De verpakkings materialen zijn niet schadelijk voor het milieu Ze zijn gekozen op grond van milieuvriendelijkheid en daarom recyclebaar Voer de verpakking af conform de milieuvoorschriften Let op de aanduiding op de verschillende verpakkingsmaterialen en voer ze zo nodig gescheiden af De verpakkingsmaterialen zij...

Страница 89: ...erlengd Dat geldt ook voor vervangen en gerepareerde onderdelen Eventueel al bij aankoop aanwezige schade en gebreken moeten meteen na het uitpakken worden gemeld Voor repa raties na afloop van de garantieperiode worden kosten in rekening gebracht Garantieomvang Het apparaat is op basis van strenge kwaliteitsnormen met de grootst mogelijke zorg vervaardigd en voorafgaand aan de levering nauwkeurig ...

Страница 90: ... genoemde serviceafdeling telefonisch of via e mail Een als defect geregistreerd product kunt u dan zonder portokosten naar het aan u doorgegeven serviceadres sturen Voeg het aankoopbewijs kassabon bij en vermeld waaruit het gebrek bestaat en wanneer het is opgetreden Op www lidl service com kunt u deze en vele andere handboeken productvideo s en software downloaden Service Service Nederland Tel 0...

Страница 91: ... de volgende vervangingsonderdelen bestellen Kalkfilter Bestel de vervangingsonderdelen via onze service hotline zie het hoofdstuk Service of op onze website www kompernass com OPMERKING Houd het IAN nummer dat op het omslag van deze gebruiksaanwijzing staat bij de hand bij het bestellen ...

Страница 92: ...sto instalace 97 Přeprava 98 Obsluha a provoz 98 Naplnění nádržky na vodu 99 Před prvním použitím 99 Žehlení bez páry 100 Žehlení s napařováním 101 Kolmé parní žehlení 102 Nalití vody 102 Čištění a údržba 103 Samočištění 103 Výměna filtru proti vodnímu kameni 103 Čištění přístroje 104 Odstranění závad 105 Skladování 106 Likvidace 107 Likvidace přístroje 107 Likvidace obalu 107 Záruka společnosti Ko...

Страница 93: ...oužití v živnostenských či v průmyslových oblastech Nároky na náhradu škody jakéhokoli druhu vzniklé v důsledku použití v rozporu s určením neodborné opravy neoprávněně provedené změny nebo úpravy nebo v důsledku použití nepovolených náhradních dílů jsou vyloučeny Riziko nese v plném rozsahu sám provozovatel Výstražná upozornění V tomto návodu k obsluze jsou použita následující výstražná upozorněn...

Страница 94: ...odám Pro bezpečnou manipulaci se zařízením dodržujte násle dující bezpečnostní pokyny Přístroj se nesmí používat pokud upadl když došlo k jeho viditelnému poškození nebo pokud vykazuje netěsnosti Poškozené zástrčky nebo poškozený síťový kabel nechte ihned vyměnit autorizovaným odborným personálem nebo zákaznickým servisem aby se tím zabránilo nebezpečí Opravy na přístroji nechte provádět pouze aut...

Страница 95: ...ud jsou pod dohledem nebo pokud byly pouče ny o bezpečném používání přístroje a pokud porozuměly z toho vyplývajícímu nebezpečí Děti si nesmí s přístrojem hrát Čištění a uživatelskou údržbu nesmí provádět děti bez dozoru Přístroj a jeho připojovací kabel musí být při zapnutí nebo ochlazování mimo dosah dětí které jsou mladší než 8 let Děti si nesmí s přístrojem hrát Na přístroj nestavte žádné před...

Страница 96: ... nikdy nepoužívejte ve vlhkém nebo mokrém prostředí Síťový kabel uchopte vždy za síťovou zástrčku a nikdy neta hejte za samotný kabel Nikdy se kabelu ani zástrčky nedotýkejte vlhkýma rukama Na síťový kabel nestavte ani přístroj ani nábytek apod a dbejte na to aby kabel nebyl přiskřípnutý Dbejte na to aby nebyl připojovací kabel během provozu nikdy vlhký nebo mokrý Neotevírejte kryt přístroje příst...

Страница 97: ... horká Poté se nikdy nedotýkejte žehlicí plochy Pokud je žehlička horká uchopte ji pouze za rukojeť Děti musí být pod dohledem a to pro jistotu aby si s přístro jem nehrály Ruce nikdy nedržte v proudu páry ani nepokládejte na hor ké kovové díly Nikdy nezaměřujte horký proud páry na osoby nebo zvířata Nikdy nežehlete ani nenapařujte oděv nebo jinou tkaninu kterou osoby drží nebo ji mají oblečenou V...

Страница 98: ... nebo spojovací hadice nepřišly do styku s horkou žehlicí plochou Žehlicí plochu nepoškrábejte Zabraňte styku žehlicí plochy s kovovými předměty jako např knoflíky nebo zipy Provozujte přístroj pouze na stabilní a rovné ploše Technické údaje Parní žehlicí stanice Napájecí napětí 220 240 V střídavý proud 50 60 Hz Příkon 2000 2400 W Max množství naplnění nádržky na vodu 1 5 l Výroba páry Max cca 120 ...

Страница 99: ...ahřívání regulátor teploty tlačítko páry žehlicí plocha odstavná plocha rukojeť rukojeť nádržky na vodu nádržka na vodu základní přístroj 3 vypínač s integrovanou kontrolkou Obrázek B filtr proti vodnímu kameni plnicí otvor Obrázek C 0 tlačítko ECO 6 tlačítko MAX 1 tlačítko Anti calc tlačítko Self clean ...

Страница 100: ...viditelně poškozena V případě neúplné dodávky nebo poškození vzniklého v důsledku vadného obalu nebo během přepravy kontaktujte servisní poradenskou linku viz kapitola Servis Vybalení VÝSTRAHA Nebezpečí udušení Obalový materiál není na hraní Hrozí nebezpečí udušení Vyjměte všechny části přístroje a návod k obsluze z krabice Odstraňte veškerý obalový materiál Požadavky na místo instalace Pracovní p...

Страница 101: ...ť nahoru aby slyšitelně zaskočila Rukojeť je v této poloze zafixovaná Pokud rukojeť už nepotřebujete podržte stisknuté tlačítko a rukojeť opět zatlačte dolů Obsluha a provoz VÝSTRAHA Nebezpečí zranění Během zapnutí žehličky a několik minut po vypnutí je žehlicí plocha velmi horká Poté se nikdy nedotýkejte žehlicí plochy Přístroj přemisťujte opatrně a příliš jej nenaklánějte Jinak by žehlička mohla ...

Страница 102: ... do nádržky na vodu Přístroj by se tím mohl poškodit pro tože se v parní komoře mohou vytvořit zbytky Tyto zbytky při vypadnutí skrze otvory pro únik páry mohou znečistit žehlenou tkaninu Vytáhněte nádržku na vodu za rukojeť nádržky na vodu ze základního přístroje Naplňte vodu plnicím otvorem nádržky na vodu Nepřekročte přitom však značku MAX na nádržce na vodu Zasuňte nádržku na vodu zpět do zákl...

Страница 103: ...řepnutím vypínače 3 do polohy 1 Kontrolka integrovaná ve vypínači 3 a kontrolka zahřívání svítí tlačítko MAX 6 bliká Otočte regulátorem teploty čímž nastavíte požadovanou teplotu žehlení Během zahřívání svítí kontrolka zahřívání Jakmile kontrolka zahřívání zhasne je dosažena nastavená teplota a můžete začít žehlit Po žehlení odstavte žehličku na žehlicí plochu základního přístroje Nastavte regulát...

Страница 104: ... 6 pro dosažení maximálního množství páry Stiskněte tlačítko ECO 0 k výrobě menšího množství páry Jakmile tlačítko MAX 6 nebo ECO 0 podle nastavení trvale svítí můžete začít s parním žehlením Během žehlení textilií můžete nyní stisknout tlačítko páry a toto podržet stisknuté pro trvalé napařování přes žehlicí plochu na žehlený textil K ukončení výstupu páry tlačítko páry uvolněte UPOZORNĚNÍ Při st...

Страница 105: ...osažení maximálního množství páry Stiskněte tlačítko ECO 0 abyste vytvořili méně páry Jakmile tlačítko MAX 6 nebo ECO 0 podle nastavení trvale svítí můžete začít s parním žehlením Držte žehličku ve svislé poloze a stiskněte tlačítko páry Tkaniny se lehce dotýkejte žehlicí plochou a napařte ji abyste odstranili záhyby K ukončení výstupu páry tlačítko páry uvolněte Po žehlení odstavte žehličku na že...

Страница 106: ...u vodorovně nad záchytnou nádobou nebo umyvadlem Stiskněte tlačítko Self clean na cca 5 sekund proces samočištění se spustí tlačítko Self clean bliká Pára vystupuje z výstupních otvorů na páru v žehlicí ploše Zároveň se vypláchnou případné nečistoty Jakmile je proces samočištění dokončen po cca 80 sekundách tlačítko Self clean přestane blikat Výměna filtru proti vodnímu kameni Jakmile bude tlačítko...

Страница 107: ...dní filtr proti vodnímu kameni uchovávejte na chladném suchém místě Při pravidelném používání přístroje je vhodné mít vždy v zásobě náhradní filtr proti vodnímu kameni Potom můžete filtr proti vodnímu kameni okamžitě vyměnit když svítí tlačítko Anti calc 1 Nový filtr proti vodnímu kameni můžete objednat prostřednictvím našeho servisu viz kapitola Objednávání náhradních dílů Čištění přístroje Pokud se ...

Страница 108: ...použita poprvé Podržte déle stisknuté tlačítko páry Než začne pára vystupovat z žehlicí plochy uplyne jistá doba Voda kape ze žehlicí plochy Pokud se parní žehlení krátce přeruší kondenzuje se ochlazená pára ve spojovací hadici To vede k tvorbě kapiček To je normální Podržte žehličku nad záchytnou utěrkou nebo záchytnou nádobou a stiskněte tlačítko páry Po několika sekundách ze žehlicí plochy unik...

Страница 109: ...oj vyčistěte tak jak je popsáno v kapitole Čištění a údržba Spojovací hadici uprostřed spojte a zasuňte ji do prohloubeniny na přístroji Naviňte síťový kabel a upevněte jej dodaným suchým zipem Přístroj uchovávejte na suchém a čistém místě ...

Страница 110: ...oužilého výrobku vám podá správa vašeho obecního nebo městského úřadu Likvidace obalu Obal chrání přístroj před poškozením při přepravě Zvolený obalový materiál odpovídá hlediskům ochrany životního prostředí a likvidace a je tudíž recyklo vatelný Balení zlikvidujte ekologicky Dbejte na označení na různých obalových materiálech a v případě potřeby tyto obaly roztřiďte Obalové materiály jsou označen...

Страница 111: ...ční doba neprodlužuje To platí i pro vyměněné a opravené součásti Poškození nebo vady vyskytující se případně již při nákupu se musí oznámit ihned po vybalení Po uplynutí záruční doby podléhají veškeré opravy zpoplatnění Rozsah záruky Přístroj byl vyroben pečlivě podle přísných směrnic kvality a před expedicí byl svědomitě vyzkoušen Záruka se vztahuje na materiálové nebo výrobní vady Tato záruka s...

Страница 112: ...dené servisní oddělení telefonicky nebo e mailem Výrobek zaevidovaný jako vadný výrobek pak můžete při přiložení dokladu o nákupu pokladní lístek a při uvedení v čem spočívá vada a kdy k ní došlo poslat výrobek pro Vás bez poštovného na adresu kterou Vám oznámí servis Na webových stránkách www lidl service com si můžete stáhnout tyto a mnoho dalších příruček videí o výrobku a software Servis Servi...

Страница 113: ...áhradní díly Filtr proti vodnímu kameni Náhradní díly objednávejte prostřednictvím naší servisní poradenské linky viz kapitola Servis nebo pohodlně na našich webových stránkách www kompernass com UPOZORNĚNÍ Pro Vaši objednávku mějte připravené číslo IAN které najdete na obalu tohoto návodu k obsluze ...

Страница 114: ... del lugar de instalación 119 Transporte 120 Manejo y funcionamiento 120 Llenado del depósito de agua 121 Antes del primer uso 121 Planchado sin vapor 122 Planchado con vapor 123 Planchado vertical con vapor 124 Relleno de agua 124 Limpieza y mantenimiento 125 Autolimpieza 125 Cambio del filtro antical 125 Limpieza del aparato 126 Solución de fallos 127 Almacenamiento 128 Desecho 129 Desecho del ap...

Страница 115: ...ntrario al uso previsto Este aparato no está previsto para su uso comercial o industrial Se excluyen las reclamaciones de cualquier tipo por los daños causados por un uso contrario a lo dispuesto reparaciones incorrectas modificaciones no auto rizadas o el uso de recambios no homologados El riesgo será responsabilidad exclusiva del usuario Indicaciones de advertencia En estas instrucciones de uso s...

Страница 116: ...nerse en cuenta las siguientes indicaciones de seguridad No debe utilizarse el aparato si se ha caído si presenta daños visibles o si no es hermético Si el enchufe o el cable de red están dañados encomiende su sustitución al personal técnico autorizado o al servicio de asistencia técnica para evitar peligros Solo los talleres autorizados o el servicio de asistencia técnica pueden reparar el aparat...

Страница 117: ...ladas o hayan sido instruidas correctamente sobre el uso seguro del aparato y hayan comprendido los peligros que entra ña Los niños no deben jugar con el aparato Los niños no deben realizar las tareas de limpieza y mantenimiento sin estar bajo supervisión Mientras el aparato esté encendido o en proceso de enfriamiento mantenga la plancha y su cable de conexión fuera del alcance de los niños menore...

Страница 118: ...o a la lluvia ni lo utilice en lugares mojados o húmedos Desconecte siempre el cable de red de la toma eléctrica tirando del enchufe y no del propio cable No toque nunca el enchufe o el cable de red con las manos húmedas No coloque el aparato muebles ni similares sobre el cable de red y procure que este no quede atrapado Procure que el cable de conexión nunca se moje ni se hume dezca durante el fu...

Страница 119: ...la de la plancha mientras esté caliente Sujete la plancha exclusivamente por el asa cuando esté caliente Vigile a los niños para asegurarse de que no jueguen con el aparato No ponga nunca las manos bajo el chorro de vapor ni toque las piezas metálicas calientes No dirija el chorro de vapor hacia personas o animales No planche ni aplique nunca vapor sobre prendas de ropa u otros tejidos mientras lo...

Страница 120: ... caliente No arañe la suela de la plancha Evite que la suela entre en contacto con piezas metálicas como botones o cierres de cremallera Utilice el aparato exclusivamente sobre una superficie estable recta y plana Características técnicas Estación de la plancha de vapor Alimentación de tensión 220 240 V corriente alterna 50 60 Hz Consumo de potencia 2000 2400 W Cantidad máx de llenado del depósito ...

Страница 121: ...entamiento Regulador de temperatura Botón del vapor Suela Superficie de apoyo Asa de transporte Agarre del depósito de agua Depósito de agua Estación de base 3 Interruptor de encendido apagado con piloto de control integrado Figura B Filtro antical Orificio de llenado Figura C 0 Botón ECO 6 Botón MAX 1 Botón Anti calc Botón Self clean ...

Страница 122: ...á incompleto o se observan daños debido a un embala je deficiente o al transporte póngase en contacto con la línea directa de asistencia consulte el capítulo Asistencia técnica Desembalaje ADVERTENCIA Peligro de asfixia Los materiales de embalaje no deben usarse para jugar Existe peligro de asfixia Extraiga todas las piezas del aparato y las instrucciones de uso de la caja Retire todo el material de ...

Страница 123: ...a audible El asa de transporte quedará fijada en esta posición Si ya no necesita el asa de transporte mantenga pulsado el botón y vuelva a presionar el asa de transporte hacia abajo Manejo y funcionamiento ADVERTENCIA Peligro de lesiones La suela está muy caliente mientras la plancha está activada y durante algunos minutos después de apagarse No toque nunca la suela de la plancha mientras esté cali...

Страница 124: ...s De lo contrario po dría dañarse el aparato por la formación de residuos en la cámara de vapor Además dichos residuos podrían manchar el tejido al salir por los orificios de salida del vapor Tire del depósito de agua por el agarre para extraerlo de la esta ción de base Vierta agua en el orificio de llenado del depósito de agua Para ello no supere la marca MAX del depósito de agua Vuelva a colocar e...

Страница 125: ...ido apagado 3 y el piloto de control de calentamiento se iluminan y el botón MAX 6 parpadea Gire el regulador de temperatura y ajuste la temperatura deseada para el planchado El piloto de control de calentamiento se ilumina durante el calentamien to Cuando el piloto de control de calentamiento se apague se habrá alcanzado la temperatura ajustada y podrá comenzarse el planchado Después del planchad...

Страница 126: ... la intensidad del vapor Pulse el botón MAX 6 para generar la máxima cantidad de vapor Pulse el botón ECO 0 para generar menos vapor En cuanto el botón MAX 6 o ECO 0 según el ajuste se ilumine permanentemente puede iniciarse el planchado Mientras plancha el tejido puede pulsar y mantener pulsado el botón del vapor para dejar salir vapor de forma continua por la suela Para finalizar la salida del va...

Страница 127: ...r la máxima cantidad de vapor Pulse el botón ECO 0 para generar menos vapor En cuanto el botón MAX 6 o ECO 0 según el ajuste se ilumine permanentemente puede iniciarse el planchado Mantenga la plancha en posición vertical y pulse el botón del vapor Toque el tejido ligeramente con la suela y aplique el vapor para eliminar las arrugas Para finalizar la salida del vapor suelte el botón del vapor Despu...

Страница 128: ...en posición horizontal sobre un recipiente o lavabo Pulse el botón Self clean durante aprox 5 segundos con esto comienza el proceso de autolimpieza y el botón Self clean parpadea El vapor saldrá por los orificios de salida de vapor de la suela Con este proceso se expulsan las impurezas que puedan haberse acumulado En cuanto finalice el proceso de autolimpieza tras aprox 80 segundos el botón Self cle...

Страница 129: ...al fuera del alcance de los niños Guarde el filtro antical de repuesto en un lugar fresco y seco Si se utiliza regularmente el aparato se recomienda mantener siempre un filtro antical de repuesto Así podrá cambiar el filtro antical inmediatamente cuando se ilumine el botón Anti calc 1 Podrá solicitar nuevos filtros antical a través de nuestro servicio de asisten cia técnica consulte el capítulo Pedido...

Страница 130: ...para el planchado con vapor rango de ajuste No se ha utilizado durante mucho tiempo la generación de vapor o se utiliza por primera vez Mantenga pulsado el botón del vapor durante más tiempo El vapor precisa un poco de tiempo para salir por la suela Sale agua por la suela Si se interrumpe brevemente el planchado con vapor el vapor se condensa en el tubo de conexión al enfriarse y se acaban formand...

Страница 131: ...contacto con el servicio de asistencia técnica Almacenamiento Limpie el aparato como se describe en el capítulo Limpieza y mantenimiento Pliegue el tubo de conexión por el centro e insértelo en el alojamiento del aparato Enrolle el cable de red y fíjelo con la tira de velcro suministrada Guarde el aparato en un lugar limpio y seco ...

Страница 132: ...tración municipal o ayuntamiento Desecho del embalaje El embalaje protege el aparato durante el transporte El material de embalaje se ha seleccionado teniendo en cuenta criterios ecológicos y de desecho por lo que es reciclable Deseche el embalaje de forma respetuosa con el medio ambiente Observe las indicaciones de los distintos materiales de embalaje y si procede recíclelos de la manera correspo...

Страница 133: ...a duración de la garantía no se prolonga por hacer uso de ella Este principio también se aplica a las piezas sustituidas y reparadas Si después de la compra del aparato se detecta la existencia de daños o de defectos al desembalarlo deben notificarse de inmediato Cualquier reparación que se realice una vez finalizado el plazo de garantía estará sujeta a costes Alcance de la garantía El aparato se ha...

Страница 134: ...n por teléfono o por correo electrónico Podrá enviar el producto calificado como defectuoso junto con el justificante de compra comprobante de caja y la descripción del defecto y de las circunstancias en las que se haya producido de forma gratuita a la dirección de correo proporcionada En www lidl service com podrá descargar este manual de usuario y muchos otros más así como vídeos sobre los product...

Страница 135: ...tro antical Solicite los recambios a través de nuestra línea directa de asistencia técnica consulte el capítulo Asistencia técnica o cómodamente a través de nuestro sitio web www kompernass com INDICACIÓN Al realizar su pedido tenga a mano el número IAN que encontrará en la página desplegable de estas instrucciones ...

Страница 136: ...nstalação 141 Transportar 142 Operação e funcionamento 142 Encher o depósito de água 143 Antes da primeira utilização 143 Engomar sem vapor 144 Engomar a vapor 145 Engomar a vapor na vertical 146 Reabastecer água 146 Limpeza e manutenção 147 Autolimpeza 147 Substituir o filtro anticalcário 147 Limpar o aparelho 148 Resolução de falhas 149 Armazenamento 150 Eliminação 151 Eliminação do aparelho 151 ...

Страница 137: ...orreta O aparelho não se destina à utilização em áreas comerciais ou industriais Não é assumida qualquer responsabilidade por danos resultantes da utilização incorreta de reparações indevidas de alterações não autorizadas ou da utiliza ção de peças sobresselentes não permitidas O risco é assumido exclusivamente pelo proprietário Indicações de aviso No presente manual de instruções são utilizadas a...

Страница 138: ...te as seguintes instruções de segurança O aparelho não pode ser utilizado se tiver caído apresen tar danos visíveis ou tiver fugas Os cabos ou fichas danificados devem ser imediatamente substituídos por técnicos autorizados ou pelo Serviço de Assistência Técnica de modo a evitar situações de perigo Solicite as reparações do aparelho apenas a empresas autorizadas ou ao Serviço de Assistência Técnica ...

Страница 139: ...utilização segura do apare lho e tenham compreendido os perigos daí resultantes As crianças não podem brincar com o aparelho A limpeza e a manutenção por parte do utilizador não podem ser realizadas por crianças não vigiadas O aparelho e o respetivo cabo de ligação enquanto este se encontra ligado ou a arrefecer devem ser mantidos fora do alcance de crianças com idades inferiores a 8 anos As crian...

Страница 140: ... Não exponha o aparelho à chuva e nunca o utilize em ambientes húmidos ou molhados Segure sempre o cabo de alimentação pela ficha e nunca puxe pelo próprio cabo Nunca toque no cabo ou na ficha de alimentação com as mãos húmidas Não coloque o aparelho móveis ou similares sobre o cabo de alimentação e certifique se de que este não fica entalado Certifique se de que o cabo de alimentação nunca fica mo lhad...

Страница 141: ...ito quente Nunca toque na placa metálica Quando o ferro de engomar estiver quente agarre o ape nas pela pega As crianças devem ser vigiadas para garantir que não brin cam com o aparelho Nunca coloque as suas mãos no jato de vapor ou em peças metálicas quentes Nunca direcione o jato de vapor para pessoas ou animais Nunca engome a seco ou a vapor roupa ou outro tecido quando este estiver a ser segur...

Страница 142: ...rro quente Não risque a placa metálica do ferro de engomar Evite o contacto da placa metálica do ferro de engomar com peças metálicas como p ex botões ou fechos de correr Utilize o aparelho apenas sobre uma superfície de trabalho estável nivelada e plana Dados técnicos Estação de engomar a vapor Alimentação de tensão 220 240 V corrente alternada 50 60 Hz Consumo de energia 2000 2400 W Quantidade m...

Страница 143: ...nto Regulador de temperatura Botão de vapor Placa metálica do ferro Superfície de colocação Aro de transporte Pega do depósito de água Depósito de água Estação base 3 Interruptor Ligar desligar com luz de controlo integrada Figura B Filtro anticalcário Orifício de enchimento Figura C 0 Tecla ECO 6 Tecla MAX 1 Tecla Anti calc Tecla Self clean ...

Страница 144: ...gum componente ou se verifiquem danos resultantes de emba lagem defeituosa ou do transporte contacte a linha direta de Assistência Técnica ver capítulo Assistência Técnica Desembalagem AVISO Perigo de asfixia Os materiais de embalagem não podem ser utilizados para brincar Perigo de asfixia Retire todas as peças do aparelho e o manual de instruções da caixa Remova todo o material de embalagem Requisit...

Страница 145: ...oqueado nesta posição Quando já não precisar do aro de transporte mantenha premido o botão e pressione o aro de transporte novamente para baixo Operação e funcionamento AVISO Perigo de ferimentos Quando o ferro de engomar está ligado e durante alguns minutos após ser desligado a placa metálica do ferro está muito quente Nunca toque na placa metálica Transporte o aparelho com cuidado e não o abane ...

Страница 146: ...sito de água O aparelho poderia ficar danificado por este motivo porque se formam resíduos na câmara de vapor Estes resíduos ao saírem pelos orifícios de saída de vapor podem sujar a peça a engomar Retire o depósito de água pela pega da estação base Introduza água no orifício de enchimento do depósito de água Não ultrapasse no entanto a marcação MAX no depósito de água Volte a inserir o depósito de ...

Страница 147: ...r 3 e a luz de controlo de aquecimento integrada acendem se e a tecla MAX 6 pisca Rode o regulador de temperatura e ajuste assim a temperatura de engomar desejada A luz de controlo de aquecimento acende se durante o aquecimento Quando a luz de controlo de aquecimento se apaga significa que a temperatura ajustada foi atingida e que pode começar a engomar Depois de ter engomado pouse o ferro de engom...

Страница 148: ...a a tecla MAX 6 para produzir a máxima quantidade de vapor Prima a tecla ECO 0 para produzir menos vapor Assim que a tecla MAX 6 ou ECO 0 consoante a regulação se acender permanentemente pode começar a engomar a vapor Enquanto está a engomar a peça desejada pode manter premido o botão de vapor para produzir vapor constante entre a placa metálica do ferro e a peça a engomar Para terminar a saída de...

Страница 149: ...MAX 6 para produzir a máxima quantidade de vapor Prima a tecla ECO 0 para produzir menos vapor Assim que a tecla MAX 6 ou ECO 0 consoante a regulação se acender permanentemente pode começar a engomar a vapor Segure no ferro de engomar na posição vertical e prima o botão de vapor Toque no tecido levemente com a placa metálica do ferro e vaporize a para remover rugas Para terminar a saída de vapor s...

Страница 150: ...na horizontal sobre um recipiente de reco lha ou um lavatório Pressionando a tecla Self clean durante aprox 5 segundos o pro cesso de autolimpeza inicia se e a tecla Self clean pisca Sai vapor dos orifícios de saída de vapor na placa metálica do ferro Impurezas eventualmente existentes serão assim expelidas Assim que o processo de autolimpeza estiver concluído após aprox 80 segundos a tecla Self c...

Страница 151: ...ora do alcance das crianças Guarde o filtro anticalcário sobresselente num local fresco e seco Se o aparelho for utilizado regularmente é aconselhável possuir sempre um filtro anticalcário sobresselente de reserva Deste modo pode substituir imediatamente o filtro anticalcário assim que a tecla Anti calc 1 se acender Pode encomendar novos filtros anticalcário através da nossa Assistência Técnica ver ca...

Страница 152: ...regulação A produção de vapor não foi usada durante muito tempo ou vai ser usada pela primeira vez Mantenha o botão de vapor premido durante mais tempo O vapor necessita de algum tempo para sair da placa metálica do ferro Pinga água da placa metálica do ferro Se a engomagem for interrom pida por pouco tempo o vapor arrefecido condensa se na mangueira de ligação Isto provoca a formação de gotas Est...

Страница 153: ...ados con tacte a Assistência Técnica Armazenamento Limpe o aparelho como descrito no capítulo Limpeza e manutenção Dobre a mangueira de ligação ao meio e introduza a na cavidade do aparelho Enrole o cabo de alimentação e fixe o com a fita velcro fornecida Armazene o aparelho num local limpo e seco ...

Страница 154: ...a ou câmara municipal da sua área de residência Eliminação da embalagem A embalagem protege o aparelho contra danos durante o transporte Os mate riais de embalagem são selecionados tendo em conta os aspetos ambientais e técnicos relativamente à eliminação sendo por isso recicláveis Elimine a embalagem de modo ecológico Tenha em atenção a identificação nos diversos materiais de embalagem e separe os...

Страница 155: ...s substituídas e reparadas Danos e defeitos que possam eventualmente já existir no momento da compra devem ser imediatamente comu nicados após retirar o aparelho da embalagem Expirado o período da garantia quaisquer reparações necessárias estão sujeitas a pagamento Âmbito da garantia O aparelho foi fabricado segundo diretivas de qualidade rigorosas com o maior cuidado e testado escrupulosamente an...

Страница 156: ...ico indicado em seguida telefonicamente ou por e mail De seguida pode enviar gratuitamente o produto registado como defeituoso incluindo o comprovativo da compra talão de compra e indique o defeito e quando este ocorreu para a morada do Serviço de Assistência Técnica que lhe foi indicada Em www lidl service com poderá descarregar este manual de instruções e muitos outros bem como vídeos sobre os p...

Страница 157: ...oduto SDBS 2400 B2 Filtro anticalcário Encomende as peças sobresselentes através da nossa linha direta de Assistência Técnica ver capítulo Assistência Técnica ou confortavelmente no nosso Website em www kompernass com NOTA Tenha o número IAN que se encontra na capa deste manual de instru ções à mão para a sua encomenda ...

Страница 158: ...SE 21 DE 44867 BOCHUM GERMANY www kompernass com Stand der Informationen Last Information Update Version des informations Stand van de informatie Stav informací Estado de las informaciones Estado das informações 07 2018 Ident No SDBS2400B2 052018 2 ...

Отзывы: