background image

69 

PT

17

  ON – AUTO – OFF

18

  Indicação dos minutos 

19

 PROGRAM

20

  Indicação das horas

21

 CLOCK

22

  Número do programa

23

  AM – PM

24

  ON – OFF

  Dados técnicos

Designação do tipo: 

DZ 20 DE 

Tensão de  
funcionamento: 

 230–240  V ~ 

50 Hz

Tensão de comutação:   230–240 V ~ 

16(2)A

Potência de comutação: 3600 W
Temperatura ambiente:  -10 a 40 °C
Tempo de atraso: 

± 1 minuto/mês

Содержание 101036

Страница 1: ...EMPORIZADOR Instrucciones de utilización y de seguridad PRESA TEMPORIZZATA Indicazioni per l uso e per la sicurezza ZEITSCHALTUHR Bedienungs und Sicherheitshinweise TEMPORIZADOR Instruções de utilização e de segurança TIMER SWITCH Operation and Safety Notes ...

Страница 2: ...ida familiarícese con todas las funciones del dispositivo Prima di leggere aprire la pagina con le immagini e prendere confidenza con le diverse funzioni dell apparecchio Antes de começar a ler abra na página com as imagens e de seguida familiarize se com todas as funções do aparelho Before reading unfold the page containing the illustrations and familiarise yourself with all functions of the devi...

Страница 3: ...B 14 15 16 17 18 19 20 21 22 23 24 13 A 1 2 4 3 5 6 12 10 9 8 7 11 ...

Страница 4: ......

Страница 5: ...lementos de control Página 13 Indicaciones Página 13 Función Random Página 15 Función modo de funcionamiento Página 16 Función de programa Página 16 Función de hora Página 17 Preparación Cargar el aparato Página 17 Restablecer todos los ajustes Página 18 Ajustar la hora actualizada Página 19 Ajustar horario de verano y de invierno Página 19 Ajustar el modo de hora Página 20 ...

Страница 6: ...ivar el funcionamiento continuo Página 23 Ajustar programas Página 24 Encender y apagar la función aleatoria Página 28 Limpieza Página 30 Desecho del producto Página 31 Garantía y servicio técnico Página 31 Dirección del servicio técnico Página 33 Fabricante Página 34 ...

Страница 7: ... es apto para un uso comercial El aparato solo puede utilizarse de forma individual No coloque varios relo jes temporizadores uno tras otro Cualquier otro uso distinto al dispuesto se considerará inadecuado El fabricante no se hace res ponsable de los daños que puedan derivarse del uso indebido del aparato Lea atentamente este manual de instruccio nes antes de utilizar el aparato Guarde estas inst...

Страница 8: ...l de instrucciones Elementos de control fig A 1 Indicador LCD 2 Tecla MINUTE 3 Tecla RST RCL 4 Tecla RANDOM 5 Tecla ON AUTO OFF 6 Toma de corriente 7 Conector parte trasera 8 Tecla Timer 9 Tecla CLOCK 10 Tecla WEEK 11 Tecla MASTERCLEAR 12 Tecla HOUR ...

Страница 9: ...Símbolo R 15 Símbolo S 16 Indicador de segundos 17 ON AUTO OFF 18 Indicador de minutos 19 PROGRAM 20 Indicador de horas 21 CLOCK 22 Número de programa 23 AM PM 24 ON OFF Características técnicas Designación de tipo DZ 20 DE Tensión de funcionamiento 230 240V 50Hz ...

Страница 10: ...tencia de conmutación 3600 W Temperatura ambiental 10 a 40 C Desfase de tiempo 1 minuto mes Tiempo de conexión mínimo 1 minuto Programas 10 pares de programas ENCENDIDO APAGADO Batería NiMH 1 2V 100h Utilización en habitaciones cerradas Conformidad CE ...

Страница 11: ...e a enchufes correctamente instalados Solo conecte dispositivos con un con sumo dentro de los límites de potencia del aparato indicados No cubra el aparato Bajo la cubierta se acumula el calor de modo que existe peligro de incendio Revise regularmente que el aparato no presente daños No reemplace las piezas estropeadas póngase en con tacto con el fabricante o deseche el aparato defectuoso respetan...

Страница 12: ...estropea solo podrá ser reem plazada por el fabricante No toque el aparato con las manos mo jadas ni lo ponga en contacto con agua Para conectar el aparato sin corriente desconéctelo de la red eléctrica No conectar calentadores o dispositivos similares al aparato puesto que estos no pueden ponerse en funcionamiento sin vigilancia ...

Страница 13: ...trol Elementos de control Tecla MASTERCLEAR 11 Esta tecla elimina todos los ajustes de hora y programas Indicaciones Días de la semana 13 Las abreviaturas en el indicador LCD 1 indican MO lunes TU martes WE miércoles TH jueves FR viernes ...

Страница 14: ...a función aleato ria está activada Símbolo S 15 Muestra que se ha cambiado al horario de verano ON AUTO OFF 17 Muestra en qué modo se encuentra el aparato PROGRAM 19 Muestra que la función de programa está activada CLOCK 21 Muestra que la función de hora está activada ...

Страница 15: ...ora ON OFF 24 Muestra el estado de conmutación ON tiempo de encendido OFF tiempo de apagado El estado de conmutación solo es visible en la función de programa Función Random El símbolo R significa Random Con esta fun ción el aparato enciende y apaga el disposi tivo conectado en diferentes espacios de tiempo ...

Страница 16: ...ientes modos de funcionamiento AUTO funcionamiento de programa automático ON funcionamiento continuo ENCENDIDO OFF funcionamiento continuo APAGADO Función de programa Con esta función puede ajustar los tiempos de conexión y desconexión del dispositivo conectado ...

Страница 17: ...cador LCD Preparación Para poder poner en funcionamiento el aparato debe realizar lo siguiente 1 Cargar el aparato 2 Restablecer todos los ajustes 3 Ajustar la hora actualizada Cargar el aparato Enchufe el conector 7 a la toma de corriente Cargue la batería durante 14 horas ...

Страница 18: ...ecer todos los ajustes Restablecer todos los ajustes Presione la tecla MASTERCLEAR 11 con un bolígrafo o un objeto con punta Aparecerá el siguiente mensaje en el indicador LCD 1 Todos los ajustes se han restablecido ...

Страница 19: ...CK 21 y manténgala presionada Ajustar el día de la semana actualizado con la tecla WEEK 10 Ajustar las horas con la tecla HOUR 12 Ajustar los minutos con la tecla MINUTE 2 Ajustar horario de verano y de invierno Ajustar horario de verano Pulse las teclas CLOCK 9 y ON AUTO OFF 5 a la vez En el in dicador LCD 1 el indicador de horas 20 ...

Страница 20: ...o de invierno Pulse las teclas CLOCK 9 y ON AUTO OFF 5 a la vez En el in dicador LCD 1 desaparece el símbolo S 15 y el indicador de horas 20 dismi nuye una hora Ajustar el modo de hora En el indicador LCD 1 puede mostrarse la hora actualizada en formato de 12 o de ...

Страница 21: ...s 12 horas PM desde las 12 hasta las 24 horas El apa rato está prefijado en el formato de 24 horas Ajustar el formato de 12 horas Pulse las teclas TIMER 8 y CLOCK 9 a la vez En el indicador LCD aparece AM o PM 23 La siguiente imagen muestra las 23 horas en formato de 12 horas ...

Страница 22: ...z En el indicador LCD desapa rece AM o PM 23 Manejo Cambiar a la función de hora El indicador LCD 1 vuelve automáticamente a la función de hora si no realiza cambios en otra función durante más de 30 segundos Para cambiar a la función de hora de forma manual pulse la tecla CLOCK 9 ...

Страница 23: ...o continuo Funcionamiento de programa automático El funcionamiento de programa automático viene prefijado Independientemente de los programas fijados en el aparato siempre puede cambiar al funcionamiento continuo Activar el funcionamiento continuo Pulsar la tecla ON AUTO OFF 5 hasta que en el indicador LCD 1 aparezca ON 17 ...

Страница 24: ...dor LCD 1 aparezca OFF 17 Activar funcionamiento de programa automático Pulsar la tecla ON AUTO OFF 5 hasta que en el indicador LCD 1 aparezca AUTO r 17 Ajustar programas Puede ajustar hasta 10 programas de ENCENDIDO APAGADO El espacio de tiempo más corto entre encendido y apa gado es de un minuto ...

Страница 25: ... tiempo de los diferentes programas no coinciden En caso de que los ajustes de tiempo coincidan tendrá preferencia el tiempo de encendido 1 Compruebe si el aparato se encuentra en modo AUTO 17 En caso contrario active el modo AUTO 17 ver Ajustar modo de funcionamiento 2 Seleccionar la función de programa con la tecla TIMER 8 En el indicador LCD 1 aparece ...

Страница 26: ...na de las siguientes combinaciones MO TU WE TH FR SA SU MO TU WE TH FR SA SU MO TU WE TH FR SA MO WE FR TU TH SA MO TU WE TH FR SA MO WE FR SU 4 Ajustar la hora deseada con las teclas HOUR 12 y MINUTE 2 5 Confirmar la selección con la tecla TIMER 8 El tiempo de encendido ha sido ajustado El indicador LCD 1 cambia al tiempo de apagado ...

Страница 27: ...ar un programa completa mente debe desactivar los tiempos de encendido y apagado Pulse la tecla TIMER 8 Pulse la tecla TIMER 8 repetidas veces para seleccionar el tiempo de encen dido deseado Pulse la tecla RST RCL 3 Pulse la tecla TIMER 8 para seleccio nar el tiempo de apagado deseado Pulse la tecla RST RCL 3 Pulse la tecla CLOCK 9 para confirmar la entrada y terminar ...

Страница 28: ...ablecer un programa desactivado Encender y apagar la función aleatoria La función aleatoria únicamente funciona por las noches entre las 18 y las 6 horas Es requisito que se hayan establecido programas para este periodo de tiempo Si se activa la función aleatoria el aparato conecta los programas establecidos con una diferencia aleatoria de entre 10 y 31 minutos ...

Страница 29: ...ra en modo AUTO 17 En caso contrario active el modo AUTO 17 ver Ajustar modo de funcionamiento Pulse la tecla RANDOM 4 En el indi cador LCD 1 aparece el símbolo R 14 Desactivar función aleatoria Pulse la tecla RANDOM 4 En el indicador LCD 1 desaparece el símbolo R 14 ...

Страница 30: ...que no entra ningún líquido en el aparato Estos podrían causar un cortocircuito ATENCIÓN Peligro por productos de limpieza abrasivos Nunca utilice productos de limpieza abrasivos o corrosivos Limpie el aparato con un paño suave y ligeramente humedecido y con un producto leve Antes de volver a utilizar el aparato asegúrese de que está completamente seco ...

Страница 31: ...dos estos deben recogerse por separado y ser reciclados respetando el medio ambiente Para obtener información sobre las posibles formas de eliminación del producto al final de su vida útil acuda a la administración de su municipio o ciudad Garantía y servicio técnico Este aparato dispone de una garantía de 3 años a partir de la fecha de compra Presente el ticket de compra como ...

Страница 32: ...defec tos de fabricación o del material en el marco del uso previsto La garantía quedará anulada en caso de que el aparato sea ma nipulado por terceros Esta garantía no res tringe sus derechos legales En caso de que tenga que hacer uso de la garantía póngase en contacto con el servicio de mantenimiento Sólo de este modo podemos garantizarle el envío gratuito del aparato ...

Страница 33: ...ße 35 72074 Tübingen Alemania Correo electrónico exp bat tuebingen com Número de asistencia 00800 48720741 Si desea más información le recomendamos consulte el apartado Asistencia Preguntas frecuentes en nuestra página web www dvw service com IAN 101036 ...

Страница 34: ...34 ES Fabricante BAT Lindenstraße 35 72074 Tübingen Alemania ...

Страница 35: ...agina 41 Elementi di comando e di visualizzazione Elementi di comando Pagina 43 Indicatori Pagina 43 Funzione Random Pagina 45 Funzione Modalità funzionamento Pagina 46 Funzione Programma Pagina 46 Funzione Orologio Pagina 46 Preparazione Caricare l apparecchio Pagina 47 Resettare tutte le impostazioni Pagina 47 Impostare l orario attuale Pagina 48 ...

Страница 36: ...are alla funzione Orologio Pagina 52 Accensione e spegnimento del funzionamento continuo Pagina 52 Impostazione programmi Pagina 54 Attivazione e disattivazione della funzione Casuale Pagina 58 Pulizia Pagina 60 Smaltimento Pagina 61 Garanzia e assistenza Pagina 61 Indirizzo servizio clienti Pagina 63 Produttore Pagina 63 ...

Страница 37: ...isto per l uso privato Non è adatto per un utilizzo commerciale L apparecchio può essere utilizzato solo singolarmente Non collegare più interruttori orari in serie Qualsiasi altro impiego è da considerarsi improprio Il produttore declina ogni responsabilità per danni causati da un utilizzo non conforme Leggere attentamente e per intero questo manuale d istruzioni d uso prima di utiliz zare l appa...

Страница 38: ...e anche le relative istruzioni d uso Elementi di comando fig A 1 Visualizzazione LCD 2 Tasto MIN minuto 3 Tasto RST RCL 4 Tasto RANDOM 5 Tasto ON AUTO OFF 6 Presa 7 Spina lato posteriore 8 Tasto timer 9 Tasto CLOCK 10 Tasto WEEK 11 Tasto MASTERCLEAR 12 Tasto HOUR ...

Страница 39: ...R 15 Simbolo S 16 Indicatore dei secondi 17 ON AUTO OFF 18 Indicatore dei minuti 19 PROGRAM 20 Indicatore delle ore 21 CLOCK 22 Numero programma 23 AM PM 24 ON OFF Dati tecnici Denominazione tipo DZ 20 DE Tensione di esercizio 230 240V 50Hz Tensione di contatto 230 240V 16 2 A ...

Страница 40: ... Temperatura ambientale da 10 C a 40 C Differenza tempo 1 minuto mese Tempo di azionamento minore 1 minuto Programmi 10 coppie di programmi ACCEN SIONE SPEGNI MENTO Batteria NiMH 1 2 v 100h Utilizzo in ambienti chiusi Conforme alle norme CE ...

Страница 41: ...hio può essere inserito sola mente in prese installate in maniera sicura Collegare solo consumatori elettrici che rientrano nei limiti di potenza indicati Non coprire l apparecchio Così fa cendo si accumula il calore e sussiste il pericolo di incendio Verificare regolarmente la presenza di danni sull apparecchio Non sostituire componenti danneggiati ma rivolgersi al produttore o smaltire l apparec...

Страница 42: ...sostitu ita soltanto dal produttore Non maneggiare l apparecchio con mani bagnate e non farlo entrare in contatto con l acqua Per azionare l apparecchio in assenza di tensione scollegarlo dalla corrente elettrica Non collegare all apparecchio oggetti caldi o consumatori energetici simili in quanto questi non devono essere mai utilizzati senza sorveglianza ...

Страница 43: ...ti di comando Tasto MASTERCLEAR 11 Questo tasto cancella tutte le impostazioni di ora e programmi Indicatori Giorno della settimana 13 Le abbreviazioni sul display LCD 1 stanno per MO Lunedì TU Martedì WE Mercoledì TH Giovedì FR Venerdì SA Sabato SU Domenica ...

Страница 44: ...ca che l orario è impostato sull ora legale ON AUTO OFF 17 Indica in che modalità di funzionamento di trova l apparecchio PROGRAM 19 Indica che la funzione Programma è attiva CLOCK 21 Indica che la funzione Orario è attiva Numero programma 22 Indica il numero del programma nella funzione PROGRAM ...

Страница 45: ...ato di attivazione ON acceso OFF spento Lo stato di attivazione è visibile solamente nella funzione Programma Funzione Random Il simbolo R sta per Random Con questa funzione l apparecchio accende e spegne a diversi intervalli di tempo il consumatore energetico collegato ...

Страница 46: ...programmazione automatica ON funzionamento continuo ACCESO OFF funzionamento continuo SPENTO Funzione Programma Con questa funzione si possono impostare i tempi di accensione e spegnimento per il consumatore energetico collegato Funzione Orologio Questa funzione indica l ora attuale sul display LCD ...

Страница 47: ...hio 2 resettare tutte le impostazioni 3 impostare l orario attuale Caricare l apparecchio Inserire la spina 7 in una presa Far caricare la batteria per 14 ore Resettare tutte le impostazioni Resettaggio di tutte le impostazioni Premere il tasto MASTERCLEAR 11 con una penna o con un altro oggetto ...

Страница 48: ...zioni sono state resettate Impostare l orario attuale Nota l impostazione avviene più veloce mente se si tengono premuti il tasto HOUR MINUTE Premere e tenere premuto il tasto CLOCK 21 Impostare il giorno della settimana corrente con il tasto WEEK 10 Impostare le ore con il tasto HOUR 12 ...

Страница 49: ... MINUTE 2 Impostazione dell ora legale e dell ora solare Impostare l ora legale Premere contemporaneamente i tasti CLOCK 9 e ON AUTO OFF 5 Sul display LCD 1 l indicatore dell ora 20 segnerà un ora avanti e verrà visualiz zato il simbolo S 15 ...

Страница 50: ...ell ora 20 segnerà un ora indietro Impostazione della modalità delle ore L orario attuale può essere visualizzato sul display LCD 1 in modalità 12h o 24h Nella modalità 12h appare AM da 0h a 12h PM da 12h a 24h L apparecchio è preimpostato in modalità 24h Impostare la modalità 12h Premere contemporaneamente i tasti TIMER 8 e CLOCK 9 Sul display LCD apparirà AM o PM 23 ...

Страница 51: ...51 IT MT La figura seguente mostra le 23h in modalità 12h Impostare la modalità 24h Premere contemporaneamente i tasti TIMER 8 e CLOCK 9 Sul display LCD scomparirà AM o PM 23 ...

Страница 52: ...rologio se un altra funzione non viene utilizzata per più di 30 secondi Per passare manualmente alla funzione Orologio premere il tasto CLOCK 9 Accensione e spegnimento del funzionamento continuo L apparecchio hai le seguenti modalità di funzionamento funzionamento continuo programmazione automatica ...

Страница 53: ...ontinuo indipendentemente dal programma impostato Attivazione funzionamento continuo Premere ripetutamente il tasto ON AUTO OFF 5 fino a che sul display LCD 1 non appare l indicazione ON 17 Disattivazione funzionamento continuo Premere ripetutamente il tasto ON AUTO OFF 5 fino a che sul display ...

Страница 54: ... che sul dispaly LCD 1 non appare l indicazione AUTO 17 Impostazione programmi È possibile impostare fino a 10 programmi di ACCENSIONE SPEGNIMENTO La durata minore tra accensione e spegnimento è di un minuto Un programma è fatto da tempi di accen sione e spegnimento Per poter utilizzare un programma bisogna programmare entrambi i tempi ...

Страница 55: ...de avrà priorità il tempo di accensione 1 Verificare se l apparecchio si trova sulla modalità di funzionamento AUTO 17 In caso contrario attivare la modalità AUTO 17 vedi Impostazione modalità di funzionamento 2 Selezionare la funzione Programma con il tasto TIMER 8 Sul dispaly LCD 1 apparirà ...

Страница 56: ...a Una delle seguenti combinazioni MO TU WE TH FR SA SU MO TU WE TH FR SA SU MO TU WE TH FR SA MO WE FR TU TH SA MO TU WE TH FR SA MO WE FR SU 4 Impostare l ora desiderata con i tasti HOUR 12 e MINUTE 2 5 Confermare la selezione con il tasto TI MER 8 Il tempo di accensione è così impostato Il dispaly LCD 1 passerà al tempo di spegnimento ...

Страница 57: ... completamente un programma disattivare i tempi di accensione e spegni mento Premere il tasto TIMER 8 Premere ripetutamente il tasto TIMER 8 per selezionare il tempo di accensione desiderato Premere il tasto RST RCL 3 Premere il tasto TIMER 8 per selezionare il tempo di spegnimento Premere il tasto RST RCL 3 Premere il tasto CLOCK 9 per confermare i dati inseriti e terminare ...

Страница 58: ... per ripristinare un programma disattivato Attivazione e disattivazione della funzione Casuale La funzione Casuale entra in funzione solo di notte dalle 18h alle 6h Il presupposto è che siano impostati programmi per questo lasso di tempo Se la funzione Casuale è attiva l apparec chio attiva i programmi impostati con un ritardo casuale tra i 10 e 31 minuti ...

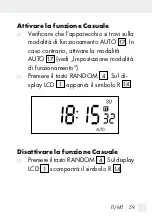
Страница 59: ...à di funzionamento AUTO 17 In caso contrario attivare la modalità AUTO 17 vedi Impostazione modalità di funzionamento Premere il tasto RANDOM 4 Sul di splay LCD 1 apparirà il simbolo R 14 Disattivare la funzione Casuale Premere il tasto RANDOM 4 Sul display LCD 1 scomparirà il simbolo R 14 ...

Страница 60: ... nell apparec chio non prenitrino liquidi Ciò potrebbe provocare cortocircuiti ATTENZIONE Pericolo causato da detergenti aggressivi Per la pulizia non utilizzare in nessun caso detergenti aggressivi o corrosivi Pulire il prodotto con un panno morbido leggero e umido e con un detergente non aggressivo Prima di riutilizzare l apparecchio assi curarsi che sia completamente asciutto ...

Страница 61: ...cazione nel diritto nazionale gli apparec chi elettrici usati devono essere raccolti separatamente e riciclati in modo non dannoso per l ambiente Ulteriori indicazioni sullo smaltimento del prodotto sono reperibili presso il municipio o l amministrazione comunale Garanzia e assistenza Questo apparecchio è garantito per 3 anni a partire dalla data di acquisto Si prega di ...

Страница 62: ...zi di materiale e di fabbrica zione in presenza di un utilizzo corretto La garanzia decade in caso di intervento sul prodotto da parte di terzi Questa garanzia non costituisce alcun limite ai diritti legali del consumatore In caso di necessità di inter venti di riparazione nel periodo di garanzia mettersi in contatto telefonicamente con il centro di assistenza Solo in questo modo si può garantire ...

Страница 63: ...aße 35 72074 Tübingen Germania E Mail exp bat tuebingen com N assistenza 00800 48720741 Per maggiori informazioni rimandiamo all area Assistenza FAQ sul nostro sito www dvw service com IAN 101036 Produttore BAT Lindenstraße 35 72074 Tübingen Germania ...

Страница 64: ...64 ...

Страница 65: ... 70 Elementos de comando e de visualização Elementos de comando Página 72 Visualizar Página 73 Função Random Página 75 Função do modo de funcionamento Página 75 Função do programa Página 76 Função da hora Página 76 Preparação Página 76 Carregar o aparelho Página 77 Repor todas as configurações Página 77 Acertar a hora atual Página 78 ...

Страница 66: ...izar Mudar para a função da hora Página 81 Ligar e desligar o funcionamento contínuo Página 82 Configurar os programas Página 83 Ligar e desligar a função aleatória Página 87 Limpeza Página 88 Eliminação Página 90 Garantia e assistência Página 91 Endereço da assistência Página 92 Fabricante Página 92 ...

Страница 67: ...ra um uso industrial O aparelho só pode ser operado individual mente Não conecte consecutivamente vários temporizadores Qualquer outra utili zação é considerada indevida O fabricante não se responsabiliza por danos que resul tam de uma utilização inadequada Leia este manual de instruções antes de utili zar o aparelho Guarde o manual de instru ções Caso entregar o aparelho a terceiros entregue tamb...

Страница 68: ...TE 3 Botão RST RCL 4 Botão RANDOM 5 Botão ON AUTO OFF 6 Tomada 7 Ficha parte de trás 8 Botão Timer 9 Botão CLOCK 10 Botão WEEK 11 Botão MASTERCLEAR 12 Botão HOUR Visor LCD Fig B 13 Indicação do dia de semana 14 Símbolo R 15 Símbolo S 16 Indicação dos segundos ...

Страница 69: ...ção das horas 21 CLOCK 22 Número do programa 23 AM PM 24 ON OFF Dados técnicos Designação do tipo DZ 20 DE Tensão de funcionamento 230 240V 50Hz Tensão de comutação 230 240V 16 2 A Potência de comutação 3600W Temperatura ambiente 10 a 40 C Tempo de atraso 1 minuto mês ...

Страница 70: ... LIGAR DESLIGAR Bateria NiMH 1 2V 100h Uso em espaço fechados conforme a diretiva CE Indicações de segurança As crianças não se aprecebem dos perigos que podem surgir em caso de uso inadequado de aparelho elétricos Nunca deixe utilizar as crianças apare lhos elétricos sem vigilância ...

Страница 71: ...igo de incêndio Controle regularmente o aparelho quanto a danos Não substitua peças danificadas mas sim contacte o fabri cante ou elimine o aparelho defeituoso de acordo com as normas ambientais Não abra o aparelho Após abertura do aparelho a garantia será anulada O aparelho está equipado com uma bateria Uma bateria defeituosa só pode ser mudada pelo fabricante Não toque o aparelho com mãos mo lha...

Страница 72: ...ente elétrica Não ligue radiadores ou consumidores semelhantes ao aparelho porque estes não podem ser operados sem vigilância Elementos de comando e de visualização Elementos de comando Botão MASTERCLEAR 11 Este botão apaga todas as configurações de tempo e de programa ...

Страница 73: ... LCD 1 significam o seguinte MO Segunda feira TU Terça feira WE Quarta feira TH Quinta feira FR Sexta feira SA Sábado SU Domingo Símbolo R 14 O símbolo R indica que a função aleatória está ativada Símbolo S 15 Indica que a hora foi mudada para a hora de Verão ...

Страница 74: ...encontra PROGRAM 19 Indica que a função do programa está ligada CLOCK 21 Indica que a função da hora está ligada Número do programa 22 Indica na função PROGRAM o número do programa AM PM 23 Indica o modo das horas ON OFF 24 Indica o estado de comutação ON Ligado OFF Desligado ...

Страница 75: ...ca Random Com esta função o aparelho liga e desliga em dife rentes intervalos o consumidor conectado Função do modo de funcionamento Distinguem se os seguintes modos de funcionamento AUTO Funcionamento automático do programa ON Funcionamento contínuo LIGADO OFF Funcionamento contínuo DESLIGADO ...

Страница 76: ...ar os tempos para ligar e desligar o consumidor conectado Função da hora Esta função indica a hora atual no visor LCD Preparação Para poder colocar o aparelho em funcionamento deve 1 Carregar o aparelho 2 Repor todas as configurações 3 Acertar a hora atual ...

Страница 77: ...omada Carregue a bateria 14 horas Repor todas as configurações Repor todas as configurações Prima o botão MASTERCLEAR 11 com uma esferográfica ou um outro objeto bicudo A seguinte indicação aparece no visor LCD 1 Todas as configurações estão repostas ...

Страница 78: ...o CLOCK 21 e mantenha premido Acerte com o botão WEEK 10 o dia de semana atual Acerte com o botão HOUR 12 as horas Acerte com o botão MINUTE 2 os minutos Acertar a hora do Verão e do Inverno Acertar a hora do Verão Prima simultaneamente os botões CLOCK 9 e ON AUTO OFF 5 No visor LCD 1 o indicador de horas 20 ...

Страница 79: ...a hora para frente e aparece o símbolo S 15 Acertar a hora do Inverno Prima simultaneamente os botões CLOCK 9 e ON AUTO OFF 5 No visor LCD 1 apaga se o símbolo S 15 e o indicador de horas 15 conta uma hora para trás ...

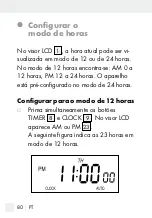
Страница 80: ...e 24 horas No modo de 12 horas encontra se AM 0 a 12 horas PM 12 a 24 horas O aparelho está pré configurado no modo de 24 horas Configurar para o modo de 12 horas Prima simultaneamente os botões TIMER 8 e CLOCK 9 No visor LCD aparece AM ou PM 23 A seguinte figura indica as 23 horas em modo de 12 horas ...

Страница 81: ...CLOCK 9 No visor LCD apaga se AM ou PM 23 Como utilizar Mudar para a função da hora O visor LCD 1 volta a mudar automatica mente para a função da hora se uma função não foi utilizada durante mais do que 30 segundos Para mudar manualmente para a função da hora prima o botão CLOCK 9 ...

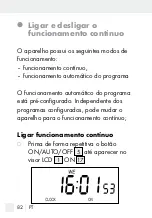
Страница 82: ...ento contínuo funcionamento automático do programa O funcionamento automático do programa está pré configurado Independente dos programas configurados pode mudar o aparelho para o funcionamento contínuo Ligar funcionamento contínuo Prima de forma repetitiva o botão ON AUTO OFF 5 até aparecer no visor LCD 1 ON 17 ...

Страница 83: ...a Prima de forma repetitiva o botão ON AUTO OFF 5 até aparecer no visor LCD 1 AUTO 17 Configurar os programas Pode configurar até 10 programas LIGAR DESLIGAR O intervalo mais pequeno entre a ativação e a desativação é de um minuto Um programa é composto de um tempo de ativação e um tempo de desativação Para poder utilizar um programa deve progra mar os dois tempos ...

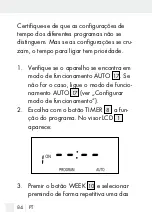
Страница 84: ...para ligar tem prioridade 1 Verifique se o aparelho se encontra em modo de funcionamento AUTO 17 Se não for o caso ligue o modo de funcio namento AUTO 17 ver Configurar modo de funcionamento 2 Escolha com o botão TIMER 8 a fun ção do programa No visor LCD 1 aparece 3 Premir o botão WEEK 10 e selecionar premindo de forma repetitiva uma das ...

Страница 85: ... FR SA SU MO TU WE TH FR SA MO WE FR TU TH SA MO TU WE TH FR SA MO WE FR SU 4 Acerte com os botões HOUR 12 e MINUTE 2 a hora desejada 5 Confirme a escolha com o botão TIMER 8 A hora para ligar está ajus tada O visor LCD 1 comuta para o tempo para desligar 6 Acerte a hora para desligar como descrito em passo 3 a 5 ...

Страница 86: ...Prima o botão TIMER 8 Prima de forma repetitiva o botão TIMER 8 para escolher a hora para ligar desejada Prima o botão RST RCL 3 Prima de forma repetitiva o botão TIMER 8 para escolher a hora para desligar desejada Prima o botão RST RCL 3 Prima o botão CLOCK 9 para confir mar e terminar a configuração Restaurar os programas Só pode restaurar programas em estado desativado ...

Страница 87: ...ó funciona de noite entre 18 e 6 horas Condição prévia programas devem estar configurados para este período Se a função aleatória estiver ligada o apa relho comuta os programas confiugrados com um atraso aleatório de 10 a 31 minutos Ligar a função aleatória Verifique se o aparelho se encontra em modo de funcionamento AUTO 17 Se não for o caso ligue o modo de ...

Страница 88: ...ar modo de funcionamento Prima o botão RANDOM 4 No visor LCD 1 aparece o símbolo R 14 Desligar a função aleatória Prima o botão RANDOM 4 No visor LCD 1 apaga se o símbolo R 14 Limpeza ATENÇÃO EXISTE PE RIGO DEVIDO A CHO QUE ELÉTRICO Desligue o ...

Страница 89: ...nenhum para dentro do aparelho A penetração de líquido pode causar um curto circuito ATENÇÃO Perigo devido a detergen tes abrasivos Ao limpar nunca utilize produto de limpeza agressivos ou abrasivos Limpe o aparelho com um pano macio ligeiramente húmido e detergente suave Certifique se antes da próxima utiliza ção de que o aparelho está completa mente seco ...

Страница 90: ...íduos dos equipamentos elétricos e eletrónicos e à transposição para o direito nacional as fer ramentas elétricas usadas devem ser separa das e devem ser sujeitas a uma reciclagem que respeite o meio ambiente Pode obter informações acerca da eliminação do apa relho usado junto das autoridades locais responsáveis pela reciclagem ...

Страница 91: ...meticulosa antes da distribuição A garantia é válida apenas em caso de defei tos de material ou de fabrico numa utiliza ção correta A garantia expira no caso de uma intervenção externa no aparelho Os seus direitos legais não ficam limitados por esta garantia Em caso de garantia contac tar telefonicamente o departamento de ser viço Só assim é possível garantir o envio gratuito do seu aparelho ...

Страница 92: ... Alemanha E Mail exp bat tuebingen com N da assistência técnica 00800 48720741 Para mais informações recomendamos a área de serviço perguntas frequentes n nossa página de Internet www dvw service com IAN 101036 Fabricante BAT Lindenstraße 35 72074 Tübingen Alemanha ...

Страница 93: ...elements Control elements Page 100 Displays Page 100 Random function Page 102 Operating mode function Page 103 Program function Page 103 Clock function Page 103 Preparation Charging the device Page 104 Reset all settings Page 104 Setting the current time Page 105 Setting standard and summer time Page 106 Setting the hour mode Page 107 ...

Страница 94: ...nction Page 108 De activating continuous operation Page 109 Configuring programs Page 110 De Activating the random function Page 114 Cleaning Page 115 Disposal Page 116 Warranty and Service Page 117 Service address Page 118 Manufacturer Page 118 ...

Страница 95: ...use It is not suita ble for commercial use Only operate the device individually Do not connect several timer switches in series Any other use is con sidered improper The manufacturer is not liable for damages due to improper use Read the entire instructions for use before using the device Keep these instructions for use Include the instructions for use when passing the device on ...

Страница 96: ...tton 3 RST RCL button 4 RANDOM button 5 ON AUTO OFF button 6 Socket 7 Plug reverse 8 Timer button 9 CLOCK button 10 WEEK button 11 MASTERCLEAR button 12 HOUR button LCD display Fig B 13 Weekday display 14 R symbol 15 S symbol 16 Seconds display 17 ON AUTO OFF ...

Страница 97: ...OCK 22 Program number 23 AM PM 24 ON OFF Technical Data Model designation DZ 20 DE Operating voltage 230 240V 50Hz Switched voltage 230 240V 16 2 A Switching capacity 3600W Ambient temperature 10 to 40 C Time error 1 minute month Shorting switching time 1 minute ...

Страница 98: ...t Safety notices Children are not able to understand the dangers arising from improper use of electric devices Never leave children unsupervised when using electric devices Only plug the device into safely installed sockets Only connect loads within the specified capacities of the device ...

Страница 99: ...tally responsible way Do not open the device Opening the device will void the warranty The device contains a rechargeable bat tery A defective rechargeable battery must be replaced by the manufacturer Do not touch the device with wet hands or bring into contact with water Disconnect the device from the power mains to de energise Do not connect heaters or similar loads to the device as these must n...

Страница 100: ...ts Control elements MASTERCLEAR button 11 This button will delete all time and program settings Displays Weekdays 13 The abbreviations on the LCD display 1 mean MO Monday TU Tuesday WE Wednesday TH Thursday FR Friday SA Saturday SU Sunday ...

Страница 101: ...itching is activated S symbol 15 Indicates the clock has been set to summer time ON AUTO OFF 17 Indicates the operating mode of the device PROGRAM 19 Indicates the program function has been activated CLOCK 21 Indicates the clock function has been activated ...

Страница 102: ...Indicates the hour mode ON OFF 24 Indicates the switching state ON turn on time OFF turn off time The switching state is only visible under program function Random function The R symbol means random In this mode the device will switch the connected loads on and off at different intervals ...

Страница 103: ...modes are AUTO automatic program operation ON continuous operation ON OFF continuous operation OFF Program function This function allows the on and off times to be programmed for the connected load Clock function This function shows the current time in the LCD ...

Страница 104: ... Reset all settings 3 Set the current time Charging the device Insert the plug 7 into a mains socket Charge the rechargeable battery for 14 hours Reset all settings Reset all settings Press the MASTERCLEAR 11 button with a pen or other pointy object The LCD display 1 will read ...

Страница 105: ...the current time Note Hold the HOUR MINUTE button for faster programming Press and hold the CLOCK 21 button Set the current day of the week with the WEEK 10 button Set the hour with the HOUR 12 button Set the minute with the MINUTE 2 button ...

Страница 106: ...ss the CLOCK 9 and ON AUTO OFF 5 buttons The LCD 1 will advance the hour display 20 by one hour and the S symbol 15 disap pears Setting standard time Simultaneously press the CLOCK 9 and ON AUTO OFF 5 buttons The S symbol 15 disappears from the LCD 1 and the hour 20 decreases by one ...

Страница 107: ...n 12 or 24 hour mode In 12 hour mode AM means before 12 noon PM after 12 noon The default is 24 hour mode Setting to 12 hour mode Simultaneously press the TIMER 8 and CLOCK 9 buttons The LCD will show AM or PM 23 The following illustration shows 23 00 hours in 12 hour mode ...

Страница 108: ...and CLOCK 9 buttons The LCD will stop showing AM or PM 23 Operation Switching to the clock function The LCD 1 automatically switches back to clock function if a function is not used for more than 30 seconds Press the CLOCK 9 button to manually go to the clock function ...

Страница 109: ...ting modes Continuous operation Automatic program operation The default is automatic program operation You can switch the device to continuous operation separate from the programs Activating continuous operation Repeatedly press the ON AUTO OFF 5 button until the LCD 1 reads ON 17 ...

Страница 110: ...tomatic program operation Repeatedly press the ON AUTO OFF 5 button until the LCD 1 reads AUTO 17 Configuring programs You can set up to 10 ON OFF programs The shorted time between switching on and off is one minute A program consists of the switch on and switch off time Both times must be pro grammed to be able to use a program ...

Страница 111: ...kes priority 1 Check if the device is in AUTO 17 mode If not set to AUTO 17 see Setting the operating mode 2 Select the program function with the TIMER 8 button The LCD 1 reads 3 Press the WEEK 10 button and press repeatedly to select one of the following options An individual weekday One of the following combinations ...

Страница 112: ... SA MO TU WE TH FR SA MO WE FR SU 4 Set the respective time using the HOUR 12 and MINUTE 2 buttons 5 Press the TIMER 8 button to confirm the selection The switch on time has been programmed The LCD 1 will switch to switch off time 6 Set the switch off time as described in steps 3 to 5 ...

Страница 113: ...y press the TIMER 8 button to select the respective switch on time Press the RST RCL 3 button Press the TIMER 8 button to select the switch off time Press the RST RCL 3 button Press the CLOCK 9 button to confirm the entry and exit Restoring programs Programs can only be restored whilst deactivated Follow the instructions in chapter Deactivating programs to restore a deactivated program ...

Страница 114: ...ams to be set for this timeframe With random mode activated the device will switch the configured programs with a random delay of 10 to 31 minutes Activating the random function Check if the device is in AUTO 17 mode If not set to AUTO 17 see Setting the operating mode Press the RANDOM 4 button The R symbol 14 will appear in the LCD 1 ...

Страница 115: ...m the LCD 1 Cleaning ATTENTION RISK OF ELECTRIC SHOCK Discon nect the device from the mains before cleaning ATTENTION RISK OF ELECTRIC SHOCK Do not allow liquids to enter the device Liquids entering can result in a short circuit ATTENTION Danger due to harsh cleaners Never use harsh or scouring cleaners ...

Страница 116: ...e of electric equipment in the house hold waste In accordance with European Directive 2012 19 EC relating to old electrical and electronic appliances used electrical equip ment must be collected separately and recy cled in an ecologically compatible way Contact your local authorities for information on how to dispose of the appliance at the end of product life ...

Страница 117: ... been produced to the highest standards and thoroughly checked before dispatch The guarantee only applies to faults in mate rial or manufacture when used properly Any modifications will void the guarantee This warranty does not limit your legal rights Please phone the service centre for guaran tee claims This is the only way to return your product free of charge ...

Страница 118: ...Tübingen Germany E Mail exp bat tuebingen com Service phone 00800 48720741 If you need further information we recom mend that you consult Service FAQ s on our homepage www dvw service com IAN 101036 Manufacturer BAT Lindenstraße 35 72074 Tübingen Germany ...

Страница 119: ...emente Bedienelemente Seite 126 Anzeigen Seite 127 Random Funktion Seite 129 Betriebsmodus Funktion Seite 129 Programm Funktion Seite 130 Uhrzeit Funktion Seite 130 Vorbereitung Seite 130 Gerät aufladen Seite 131 Alle Einstellungen zurücksetzen Seite 131 Aktuelle Zeit einstellen Seite 132 Sommer und Winterzeit einstellen Seite 132 Stunden Modus einstellen Seite 134 ...

Страница 120: ...seln Seite 135 Dauerbetrieb ein und ausschalten Seite 136 Programme einstellen Seite 138 Zufallsfunktion ein und ausschalten Seite 141 Reinigung Seite 143 Entsorgung Seite 144 Garantie und Service Seite 145 Serviceadresse Seite 146 Hersteller Seite 146 ...

Страница 121: ...den Privatgebrauch konstruiert Es ist für eine ge werbliche Nutzung nicht geeignet Das Ge rät darf nur einzeln betrieben werden Nicht mehrere Zeitschaltuhren hintereinander ste cken Jede weitere Verwendung gilt als nicht bestimmungsgemäß Für Schäden aufgrund nicht bestimmungsgemäßer Verwendung übernimmt der Hersteller keine Haftung Lesen Sie diese Bedienungsanleitung voll ständig durch bevor Sie d...

Страница 122: ...s Gerät weitergeben geben Sie die Bedienungsanleitung mit Bedienelemente Abb A 1 LCD Anzeige 2 Taste MINUTE 3 Taste RST RCL 4 Taste RANDOM 5 Taste ON AUTO OFF 6 Steckdose 7 Stecker Rückseite 8 Taste Timer 9 Taste CLOCK 10 Taste WEEK 11 Taste MASTERCLEAR 12 Taste HOUR ...

Страница 123: ...e 14 R Symbol 15 S Symbol 16 Sekundenanzeige 17 ON AUTO OFF 18 Minutenanzeige 19 PROGRAM 20 Stundenanzeige 21 CLOCK 22 Programmnummer 23 AM PM 24 ON OFF Technische Daten Typbezeichnung DZ 20 DE Betriebsspannung 230 240V 50Hz Schaltspannung 230V 16 2 A ...

Страница 124: ... Schaltzeit 1 Minute Programme 10 EIN AUS Programmpaare Akku NiMH 1 2V 100h Gebrauch in geschlossenen Räumen EG konform Sicherheitshinweise Kinder erkennen nicht die Gefahren die bei unsachgemäßem Umgang mit Elekt rogeräten entstehen können Lassen Sie Kinder niemals unbeaufsichtigt Elektro geräte benutzen ...

Страница 125: ...dgefahr besteht Das Gerät regelmäßig auf Schäden kon trollieren Beschädigte Teile nicht erset zen sondern an den Hersteller wenden oder das defekte Gerät umweltgerecht entsorgen Das Gerät nicht öffnen Nach Öffnen des Geräts entfällt jede Gewährleistung Das Gerät enthält einen Akku Ein defek ter Akku kann nur vom Hersteller gewechselt werden Das Gerät nicht mit nassen Händen anfassen und nicht mit ...

Страница 126: ...om Stromnetz trennen Heizkörper oder ähnliche Verbraucher nicht an das Gerät anschließen da diese niemals unbeaufsichtigt betrieben werden dürfen Bedien und Anzeigeelemente Bedienelemente Taste MASTERCLEAR 11 Diese Taste löscht alle Zeit und Programm einstellungen ...

Страница 127: ...in der LCD Anzeige 1 stehen für MO Montag TU Dienstag WE Mittwoch TH Donnerstag FR Freitag SA Samstag SU Sonntag R Symbol 14 Das R Symbol zeigt an dass die Zufalls Funktion aktiviert ist S Symbol 15 Zeigt an dass die Uhrzeit auf Sommerzeit umgestellt ist ...

Страница 128: ... sich das Gerät befindet PROGRAM 19 Zeigt an dass die Programm Funktion eingeschaltet ist CLOCK 21 Zeigt an dass die Uhrzeit Funktion eingeschaltet ist Programmnummer 22 Zeigt in der Funktion PROGRAM die Nummer des Programms an AM PM 23 Zeigt den Stundenmodus an ...

Страница 129: ...m Funktion sichtbar Random Funktion Das R Symbol steht für Random Mit dieser Funktion schaltet das Gerät in unterschiedli chen Zeitabständen den angeschlossenen Verbraucher ein und aus Betriebsmodus Funktion Folgende Betriebsmodi werden unterschieden AUTO Automatischer Programmbetrieb ON Dauerbetrieb EIN OFF Dauerbetrieb AUS ...

Страница 130: ...iten für den angeschlossenen Verbraucher einstellen Uhrzeit Funktion Diese Funktion zeigt die aktuelle Uhrzeit auf der LCD Anzeige an Vorbereitung Um das Gerät in Betrieb nehmen zu können müssen Sie 1 Das Gerät aufladen 2 Alle Einstellungen zurücksetzen 3 Die aktuelle Zeit einstellen ...

Страница 131: ...kku 14 Stunden aufladen Alle Einstellungen zurücksetzen Alle Einstellungen zurücksetzen Die Taste MASTERCLEAR 11 mit einem Kugelschreiber oder einem anderen spit zen Gegenstand drücken Die folgende Anzeige erscheint in der LCD Anzeige 1 Alle Einstellungen sind zurückgesetzt ...

Страница 132: ... halten Die Taste CLOCK 21 drücken und gedrückt halten Mit der Taste WEEK 10 den aktuellen Wochentag einstellen Mit der Taste HOUR 12 die Stunden einstellen Mit der Taste MINUTE 2 die Minuten einstellen Sommer und Winterzeit einstellen Sommerzeit einstellen Die Tasten CLOCK 9 und ON AUTO OFF 5 gleichzeitig drücken In der ...

Страница 133: ...tundenan zeige 20 eine Stunde vor und das S Symbol 15 erscheint Winterzeit einstellen Die Tasten CLOCK 9 und ON AUTO OFF 5 gleichzeitig drücken In der LCD Anzeige 1 erlischt das S Symbol 15 und die Stundenanzeige 20 zählt eine Stunde zurück ...

Страница 134: ... angezeigt werden Im 12 Stunden Modus steht AM 0 bis 12 Uhr PM 12 bis 24 Uhr Das Gerät ist im 24 Stunden Modus voreingestellt 12 Stunden Modus einstellen Die Tasten TIMER 8 und CLOCK 9 gleichzeitig drücken In der LCD Anzeige erscheint AM oder PM 23 Die folgende Abbildung zeigt die Uhrzeit 23 Uhr im 12 Stunden Modus ...

Страница 135: ...en In der LCD Anzeige erlischt AM oder PM 23 Bedienung In die Uhrzeit Funktion wechseln Die LCD Anzeige 1 wechselt automatisch in die Uhrzeit Funktion zurück wenn Sie eine Funktion länger als 30 Sekunden nicht verwenden Um manuell in die Uhrzeit Funktion zu wechseln die Taste CLOCK 9 drücken ...

Страница 136: ...ieb Automatischer Programmbetrieb Der automatische Programmbetrieb ist voreingestellt Sie können das Gerät unab hängig von den eingestellten Programmen in den Dauerbetrieb umschalten Dauerbetrieb einschalten Die Taste ON AUTO OFF 5 wieder holt drücken bis in der LCD Anzeige 1 ON 17 erscheint ...

Страница 137: ... ausschalten Die Taste ON AUTO OFF 5 wieder holt drücken bis in der LCD Anzeige 1 OFF 17 erscheint Automatischen Programmbetrieb einschalten Die Taste ON AUTO OFF 5 wieder holt drücken bis in der LCD Anzeige 1 AUTO 17 erscheint ...

Страница 138: ... Sie beide Zeiten programmieren Stellen Sie sicher dass die Zeiteinstellungen der unterschiedlichen Programme sich nicht überschneiden Überschneiden sich die Zeiteinstellungen dennoch hat die Einschalt zeit Vorrang 1 Prüfen Sie ob sich das Gerät im Betriebs modus AUTO 17 befindet Falls nicht den Betriebsmodus AUTO 17 einschal ten siehe Betriebsmodus einstellen 2 Mit der Taste TIMER 8 die Programm ...

Страница 139: ...n und durch wiederholtes Drücken eine der folgen den Möglichkeiten auswählen Einen einzelnen Wochentag Eine der folgenden Kombination MO TU WE TH FR SA SU MO TU WE TH FR SA SU MO TU WE TH FR SA MO WE FR TU TH SA MO TU WE TH FR SA MO WE FR SU ...

Страница 140: ...t in die Ausschaltzeit um 6 Die Ausschaltzeit einstellen wie in Schritt 3 bis 5 beschrieben Programme deaktivieren Sie können einzelne oder alle Programme deaktivieren Um ein Programm vollständig zu deaktivie ren müssen Sie Ein und Ausschaltzeit deaktivieren Die Taste TIMER 8 drücken Die Taste TIMER 8 wiederholt drücken um die gewünschte Einschaltzeit auszu wählen Die Taste RST RCL 3 drücken ...

Страница 141: ...mme wiederherstellen Sie können nur Programme im deaktivierten Zustand wiederherstellen Gehen Sie vor wie in Kapitel Programme deaktivieren beschrieben um ein deak tiviertes Programm wiederherzustellen Zufallsfunktion ein und ausschalten Die Zufallsfunktion läuft nur nachts in der Zeit von 18 Uhr bis 6 Uhr Vorraussetzung ist dass für diesen Zeitraum Programme eingestellt sind ...

Страница 142: ... mit einer zufälligen Verzögerung von 10 bis 31 Minuten Zufalls Funktion einschalten Prüfen ob sich das Gerät im Betriebsmo dus AUTO 17 befindet Falls nicht den Betriebsmodus AUTO 17 einschalten siehe Betriebsmodus einstellen Die Taste RANDOM 4 drücken In der LCD Anzeige 1 erscheint das R Symbol 14 ...

Страница 143: ...l 14 Reinigung ACHTUNG GEFAHR DURCH ELEKTRISCHEN SCHLAG Vor dem Reinigen das Gerät vom Stromnetz trennen ACHTUNG GEFAHR DURCH ELEKTRISCHEN SCHLAG Achten Sie dar auf dass keine Flüssigkeit in das Gerät eindringt Eindringende Flüssigkeit kann zu einem Kurzschluss führen ACHTUNG Gefahr durch aggressive Reinigungsmittel ...

Страница 144: ...nigungsmittel Stellen Sie vor der nächsten Verwendung sicher dass das Gerät vollständig ge trocknet ist Entsorgung Werfen Sie Elektrogeräte nicht in den Hausmüll Gemäß Europäischer Richtlinie 2012 19 EC über Elektro und Elektronikaltgeräte müssen verbrauchte Elektrogeräte getrennt gesammelt und einer umweltgerechten Wiederverwertung zugeführt werden Möglichkeiten zur ...

Страница 145: ...s Gerät wurde sorgfältig produziert und vor Auslieferung gewissenhaft geprüft Die Garantieleistung gilt nur für Material oder Fabrikationsfehler bei sachgemäßer Verwendung Die Garantie erlischt bei Fremdeingriff Ihre gesetzlichen Rechte werden durch diese Garantie nicht eingeschränkt Im Garantiefall mit der Servi cestelle telefonisch in Verbindung setzen Nur so kann eine kostenlose Einsendung Ihre...

Страница 146: ...4 Tübingen Deutschland E Mail exp bat tuebingen com Service Nr 00800 48720741 Für weitere Informationen empfehlen wir den Bereich Service FAQ s auf unserer Home page www dvw service com IAN 101036 Hersteller BAT Lindenstraße 35 72074 Tübingen Deutschland ...

Страница 147: ...147 ...

Страница 148: ...148 ...

Страница 149: ...enstraße 35 72074 Tübingen Germany Estado de las informaciones Versione delle informazioni Estado das informações Last Information Update Stand der Informationen 05 2014 Ident No 0474739 052014 ES IT IAN 101036 ...

Отзывы: